Python uiautomation获取微信内容!聊天记录、聊天列表、全都可获取
Python uiautomation 是一个用于自动化 GUI 测试和操作的库,它可以模拟用户操作来执行各种任务。
通过这个库,可以使用Python脚本模拟人工点击,人工操作界面。本文使用 Python uiautomation 进行微信电脑版的操作。
以下是本次实验的版本号。

你需要安装 uiautomation
pip install uiautomation示例代码
import time
import uiautomation as auto
import re
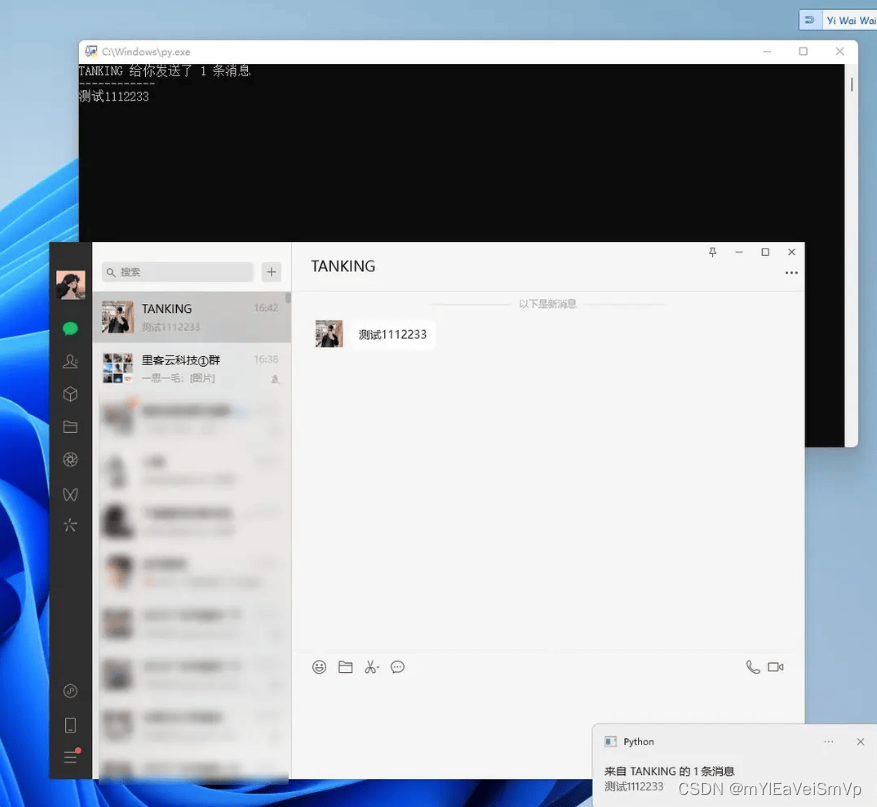
from plyer import notificationnotification_history = {} # 历史消息def check_wechat_messages():# 获取微信窗口wechat_win = auto.WindowControl(Name="微信", ClassName="WeChatMainWndForPC")shoukuanWin = wechat_win.ListControl(Name="会话")bbb = shoukuanWin.GetChildren()for chatMsg in bbb:if "条新消息" in chatMsg.Name:# 计算消息条数match = re.match(r'([a-zA-Z0-9]+)(\d+)条新消息', chatMsg.Name)if match:nickname = match.group(1)message_count = int(match.group(2))printInfo = f"{nickname} 给你发送了 {message_count} 条消息"print(printInfo)print("------------")# 获取消息列表控件xiaoxis = wechat_win.ListControl(Name="消息")# 获取消息列表控件的子控件xiaoxi_children = xiaoxis.GetChildren()# 获取最后一个子控件last_xiaoxi = xiaoxi_children[-1]# 打印最后一条消息的内容print(last_xiaoxi.Name)# 在指定时间内不重发last_notification_time = notification_history.get((nickname, message_count), 0)current_time = time.time()if current_time - last_notification_time > 15:# 依次发送notification_title = f"来自 {nickname} 的 {message_count} 条消息"notification_message = f"{last_xiaoxi.Name}"notification.notify(title=notification_title,message=notification_message,app_name="WeChat")# 更新日志notification_history[(nickname, message_count)] = current_timeif __name__ == "__main__":try:while True:check_wechat_messages()time.sleep(2) #2秒检测一次UI组件except KeyboardInterrupt:print("程序退出~")except Exception as e:print(f"程序执行出现了问题: {str(e)}")代码解析:
以上代码使用 uiautomation 实时获取微信聊天列表的消息状态,一旦有消息发过来,就会获取到发送人的微信昵称以及发送的消息内容、消息个数。
每2秒获取一次UI控件的内容,实测挂在后台对CPU和内存占用并无明显影响,结合Python uiautomation的各种用法,可以做成自动回复的功能。使用这款软件,可以获取到微信电脑版大部分控件的内容。例如:微信聊天列表、群名称、好友微信昵称、群人数、微信号等。
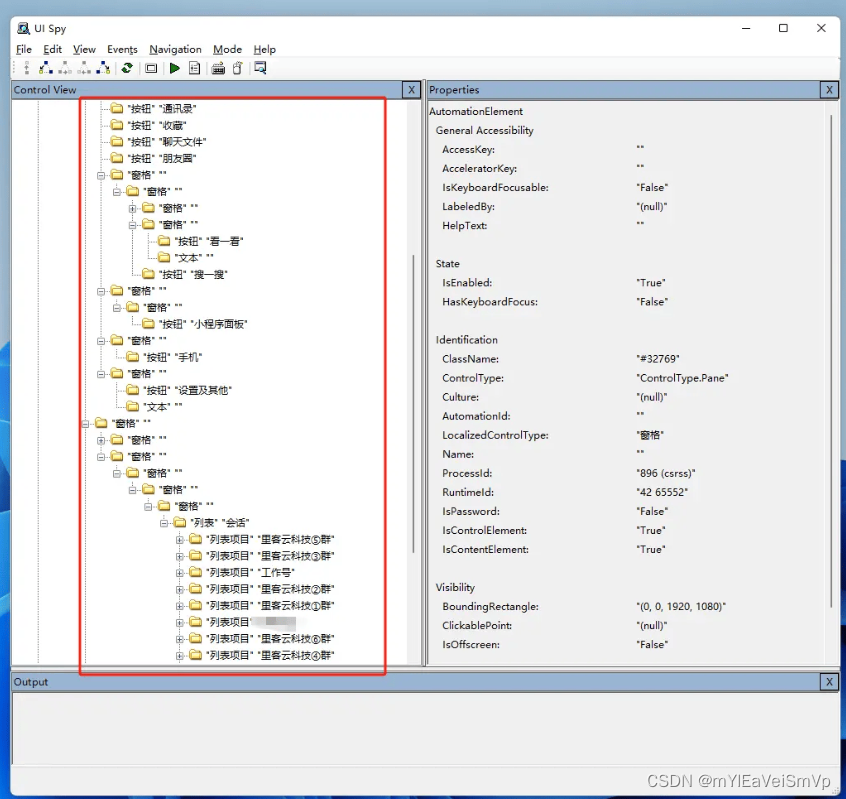
还可以获取到群内的每一条聊天内容,获取到你跟好友的聊天记录。
 只要 UISpy.exe 可获取到的控件内容,那么你用 Python就可以获取到。
拓展
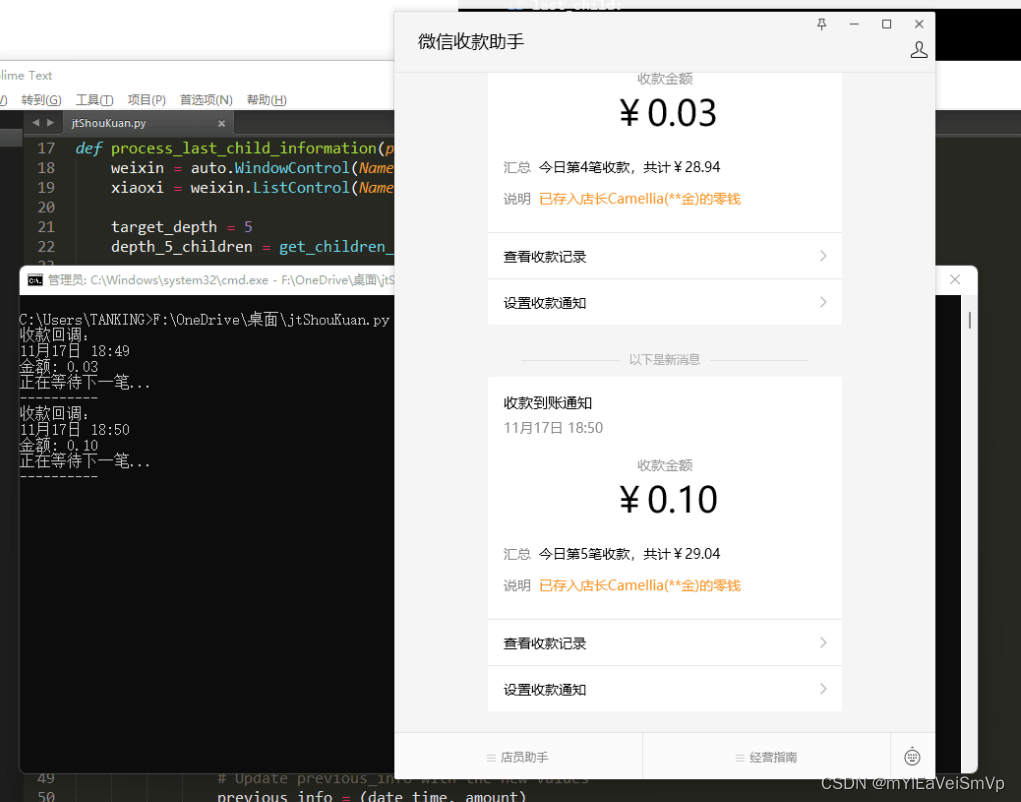
还可以用来做收款监控。将【微信收款助手】这个公众号单独窗口出来,然后监控这个窗口。
妥妥的实现了一个PC收款监控。可以用来做收款码的支付回调。
import uiautomation as auto
import re
import timedef get_children_at_depth(control, target_depth, current_depth=0):children = control.GetChildren()result = []for child in children:if current_depth == target_depth:result.append(child)else:result.extend(get_children_at_depth(child, target_depth, current_depth + 1))return resultdef process_last_child_information(previous_info):weixin = auto.WindowControl(Name="微信收款助手", ClassName="ChatWnd")xiaoxi = weixin.ListControl(Name="消息")target_depth = 5depth_5_children = get_children_at_depth(xiaoxi, target_depth)# 正则表达式模式pattern = r'收款到账通知(\d+月\d+日 \d+:\d+)收款金额¥([0-9.]+)汇总'last_child = Nonefor child in depth_5_children:match = re.search(pattern, child.Name)if match:last_child = child  # 保存最后一条子控件的引用# 在循环结束后,提取最后一条子控件的信息if last_child:match = re.search(pattern, last_child.Name)if match:date_time = match.group(1)amount = match.group(2)# 监听下一笔if (date_time, amount) != previous_info:print("收款回调:")print(date_time)print("金额:", amount)print("正在等待下一笔...")print("----------")previous_info = (date_time, amount)return previous_info# 循环
previous_info = Nonewhile True:previous_info = process_last_child_information(previous_info)# 每2秒执行一次循环time.sleep(2)
请勿使用这种技术用于非法行为,仅供大家开发一写小工具自己用。
如果使用这种技术来进行违法行为所带来的责任自行负责,与工具、教程作者、发布的平台无关。