Spring Boot使用EhCache完成一个缓存集群
在上一篇在SpringBoot中使用EhCache缓存,我们完成了在Spring Boot中完成了对EhCaChe的使用,这篇,我们将对EhCache的进一步了解,也就是搭建一个EhCache的缓存集群。
集群
在搭建一个EhCache的时候,我们需要先了解,什么是集群?集群具有的特点?
什么是集群?以及集群的特点?
集群是值将多个独立的计算机节点连接在一起,通过网络协议协同工作,用以实现工共同的目标,在集群中,各个节点通过通信和协作来提供更高的性能,可用性和可扩展性。
集群可以用于各种不同领域,和应用场景,包括计算、存储、数据库、网络服务等,通过将各个节点组成集群,可以实现以下特点(或者成为好处):
- 高性能: 集群可以将任务分配给不同的节点并行处理,从而进一步提高整体的计算能力和处理速度,通过增加节点的数量,可以进一步提高集群的性能。
- 高可用性:集群中的节点可以相互备份和冗余,当某个节点发生故障时,其他节点可以接管其工作,保证系统的持续可用性。这种冗余机制可以提高系统的容错能力。
- 可扩展性:通过向集群中添加新的节点,可以轻松的拓展系统的处理能力和存储容量,这种可拓展性可以使得集群能够应对不同增长的需求和负载。
- 负载均衡:集群可以通过负载均衡算法将请求分发到不同节点上,从而平衡各个节点的负载,避免单个节点过载,提高系统的稳定性和性能。
- 故障恢复:集群可以通过故障检测和自动恢复机制来处理节点故障,当某个节点发生故障的时候,集群可以自动将任务重新分配给其他正常工作的节点,从而实现故障的快速恢复。
集群demo的搭建
引入相关依赖:
<dependency><groupId>org.springframework.boot</groupId><artifactId>spring-boot-starter-web</artifactId></dependency><dependency><groupId>org.springframework.boot</groupId><artifactId>spring-boot-starter-data-jpa</artifactId></dependency><dependency><groupId>org.springframework.boot</groupId><artifactId>spring-boot-starter-cache</artifactId></dependency><dependency><groupId>net.sf.ehcache</groupId><artifactId>ehcache</artifactId></dependency><dependency><groupId>org.springframework.boot</groupId><artifactId>spring-boot-starter-actuator</artifactId></dependency><dependency><groupId>mysql</groupId><artifactId>mysql-connector-java</artifactId></dependency><dependency><groupId>org.projectlombok</groupId><artifactId>lombok</artifactId><scope>provided</scope></dependency><dependency><groupId>org.springframework.boot</groupId><artifactId>spring-boot-starter-test</artifactId><scope>test</scope></dependency>
application.properties配置文件
spring.datasource.url=jdbc:mysql://localhost:3306/test?useUnicode=true&characterEncoding=utf-8&useSSL=true&serverTimezone=UTC
spring.datasource.username=root
spring.datasource.password=123456
spring.datasource.driver-class-name=com.mysql.cj.jdbc.Driverspring.jpa.show-sql=true
spring.jpa.hibernate.ddl-auto=create#logging.level.net.sf.ehcache=debug# 不同实例的配置
#spring.cache.ehcache.config=classpath:ehcache-1.xml
#spring.cache.ehcache.config=classpath:ehcache-2.xml# 用不同命令启动不同实例
#-Dserver.port=8001 -Dspring.cache.ehcache.config=classpath:ehcache-1.xml
#-Dserver.port=8002 -Dspring.cache.ehcache.config=classpath:ehcache-2.xml
创建一个User实体类:
@Entity
public class User implements Serializable {@Id@GeneratedValueprivate Long id;private String name;private Integer age;public User(String name, Integer age) {this.name = name;this.age = age;}public Long getId() {return id;}public void setId(Long id) {this.id = id;}public String getName() {return name;}public void setName(String name) {this.name = name;}public Integer getAge() {return age;}public void setAge(Integer age) {this.age = age;}public User() {}
}
创建一个User实体的数据访问实现
//插入缓存注解
@CacheConfig(cacheNames = "users")
public interface UserRepository extends JpaRepository<User, Long> {@CacheableUser findByName(String name);
}
在resources目录下分别创建ehcache-1.xml
<ehcache xmlns:xsi="http://www.w3.org/2001/XMLSchema-instance"xsi:noNamespaceSchemaLocation="ehcache.xsd"><!--这里的users对应我们常用的--><cache name="users"maxEntriesLocalHeap="200"timeToLiveSeconds="600"><cacheEventListenerFactoryclass="net.sf.ehcache.distribution.RMICacheReplicatorFactory"properties="replicateAsynchronously=true,replicatePuts=true,replicateUpdates=true,replicateUpdatesViaCopy=false,replicateRemovals=true "/></cache><cacheManagerPeerProviderFactoryclass="net.sf.ehcache.distribution.RMICacheManagerPeerProviderFactory"properties="hostName=10.10.0.100,port=40001,socketTimeoutMillis=2000,peerDiscovery=manual,rmiUrls=//10.10.0.101:40001/users" /></ehcache>创建另一个ehcache-2.xml
<ehcache xmlns:xsi="http://www.w3.org/2001/XMLSchema-instance"xsi:noNamespaceSchemaLocation="ehcache.xsd"><cache name="users"maxEntriesLocalHeap="200"timeToLiveSeconds="600"><cacheEventListenerFactoryclass="net.sf.ehcache.distribution.RMICacheReplicatorFactory"properties="replicateAsynchronously=true,replicatePuts=true,replicateUpdates=true,replicateUpdatesViaCopy=false,replicateRemovals=true "/></cache><cacheManagerPeerProviderFactoryclass="net.sf.ehcache.distribution.RMICacheManagerPeerProviderFactory"properties="hostName=10.10.0.101,port=40001,socketTimeoutMillis=2000,peerDiscovery=manual,rmiUrls=//10.10.0.100:40001/users" /></ehcache>cache标签中定义名为users的缓存,这里我们增加了一个子标签定义cacheEventListenerFactory,这个标签主要用来定义缓存事件监听的处理策略,它有以下这些参数用来设置缓存的同步策略:
replicatePuts:当一个新元素增加到缓存中的时候是否要复制到其他的peers。默认是true。
replicateUpdates:当一个已经在缓存中存在的元素被覆盖时是否要进行复制。默认是true。
replicateRemovals:当元素移除的时候是否进行复制。默认是true。
replicateAsynchronously:复制方式是异步的指定为true时,还是同步的,指定为false时。默认是true。
replicatePutsViaCopy:当一个新增元素被拷贝到其他的cache中时是否进行复制指定为true时为复制,默认是true。
replicateUpdatesViaCopy:当一个元素被拷贝到其他的cache中时是否进行复制指定为true时为复制,默认是true。
新增了一个cacheManagerPeerProviderFactory标签的配置,用来指定组建的集群信息和要同步的缓存信息,其中:
hostName:是当前实例的主机名
port:当前实例用来同步缓存的端口号
socketTimeoutMillis:同步缓存的Socket超时时间
peerDiscovery:集群节点的发现模式,有手工与自动两种,这里采用了手工指定的方式
rmiUrls:当peerDiscovery设置为manual的时候,用来指定需要同步的缓存节点,如果存在多个用|连接
注意以上ip地址的分配
ok具体的配置我们已经配置完毕了,那么我们启动项目和添加测试类进行测试了:
@EnableCaching
@SpringBootApplication
public class Application {public static void main(String[] args) throws Exception {
//		LocateRegistry.createRegistry(Integer.valueOf(System.getProperty("rmi.port")));SpringApplication.run(Application.class, args);}@RestControllerstatic class HelloController {@Autowiredprivate UserRepository userRepository;@GetMapping("/create")public void create() {userRepository.save(new User("AAA", 10));}@GetMapping("/update")public User update() {User u1 = userRepository.findByName("AAA");u1.setAge(20);u1 = userRepository.save(u1);return u1;}@GetMapping("/find")public User find() {User u1 = userRepository.findByName("AAA");System.out.println("查询AAA用户:" + u1.getAge());return u1;}}
}
我们通过打包的方式运行我们的实例:
# 实例1
-Dspring.cache.ehcache.config=classpath:ehcache-1.xml
# 实例2
-Dspring.cache.ehcache.config=classpath:ehcache-2.xml
在以上代码中,也就是我们常用的Controller层,主要围绕我们所说的命令参数,启动相关实例。
-
调用实例1的
/create接口,创建一条数据 -
调用实例1的
/find接口,此时会清除缓存中的User,同时同步缓存相关信息给另一个实例,在实例1中会存在我们常用的SQL语句。 -
调用实例2的
/find接口,由于缓存集群同步了User的信息,所以在实例2中的这次查询也不会出现SQL语句
以及创建一个测试类:
@Slf4j
@RunWith(SpringRunner.class)
@SpringBootTest
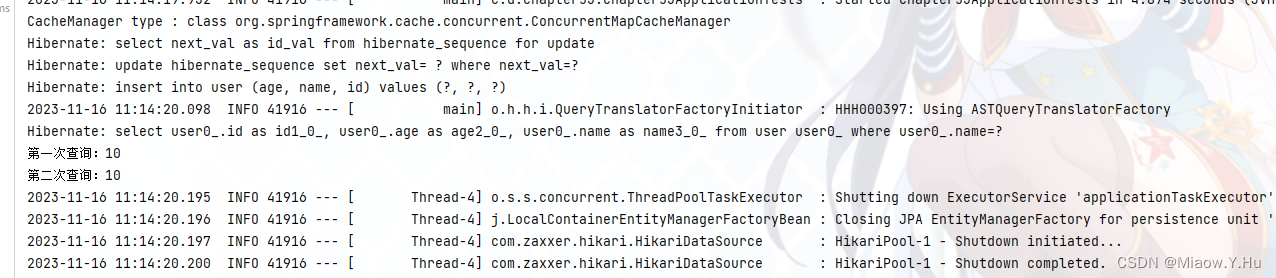
public class ApplicationTests {@Autowiredprivate UserRepository userRepository;@Autowiredprivate CacheManager cacheManager;@Testpublic void test() throws Exception {System.out.println("CacheManager type : " + cacheManager.getClass());// 创建1条记录userRepository.save(new User("AAA", 10));User u1 = userRepository.findByName("AAA");System.out.println("第一次查询:" + u1.getAge());User u2 = userRepository.findByName("AAA");System.out.println("第二次查询:" + u2.getAge());}
}
注意,以上实例建议在多机的情况下进行,有云服务器就是使用云服务器,并配备好上述的Ip地址,方便集群之间进行通讯,通过打包的方式运行,可以帮助我们减少很多麻烦