react类式组件的生命周期和useEffect实现函数组件生命周期
概念
生命周期是一个组件丛创建,渲染,更新,卸载的过程,无论是vue还是react都具有这个设计概念,也是开发者必须熟练运用的,特别是业务开发,不同的生命周期做不同的事是很重要的.
....
多说两句心得,本人是先接触vue的,无论是vue2还是vue3的生命周期,在理解和学习上都会比react更容易理解,我在学习react的时候,也经常会想着这个api如果在vue里面会和哪个api功能相同.
其实有些本末倒置了,先有react才有的vue,vue是作者做了更多的操作,让你用到更舒适的api,还是那个经典形容,react是手动打,vue是自动挡.
废话不多说,开始说react的生命周期
...
如果想直接死记硬背八股文,直接拉到底看总结就可以了
类式组件
在hooks出来之前,写react基本都是用类式组件
两个原因,一是对this这个东西有特别的喜爱(vue后遗症),二是类式组件可以使用生命周期和state,适合开发业务组件.
测试各个钩子函数的demo
import React, { Component} from 'react'
export default class index extends Component {constructor(){super()console.log(this,'constructor---构造器')}state = {num:1}add = ()=>{let newNum = this.state.num +1this.setState({num:newNum})}//生命周期钩子(旧的)
//  componentWillMount =()=>{
//     console.log('componentWillMount---组件将要加载')
//  }//  componentWillUpdate = ()=>{
//     console.log('componentWillUpdate','组件将要更新')
//  }//生命周期钩子(新的)
static getDerivedStateFromProps = ()=>{console.log(this,'getDerivedStateFromProps---初始化一些基础状态')return null
}getSnapshotBeforeUpdate = ()=>{console.log(this,'getSnapshotBeforeUpdate---更新之前的快照')return '旧的值'
}//新旧都具备的shouldComponentUpdate = ()=>{console.log(this,'shouldComponentUpdate','组件需要更新')return true}componentDidUpdate = ()=>{console.log(this,'componentDidUpdate','组件更新完毕')}componentDidMount = ()=>{console.log(this,'componentDidMount---组件加载完成')}updateCallBack = ()=>{this.forceUpdate()}render() {console.log(this,'render---渲染函数')return (<div id='index'><h3>生命周期模块</h3> <button onClick={this.add}>修改一下数值</button><p>{this.state.num}</p><button onClick={this.updateCallBack}>手动更新</button><br /></div>)}componentWillUnmount = ()=>{console.log(this,'componentWillUnmount---组件将要卸载')}
}
场景:
1.页面初次加载
constructor > getDerivedStateFromProps > render > componentDidMount

2.点击修改一下数值按钮
getDerivedStateFromProps > shouldComponentUpdate > render > getSnapshotBeforeUpdate >
componentDidUpdate

3.手动更新(forceUpdate函数)
getDerivedStateFromProps > render > getSnapshotBeforeUpdate > componentDidUpdate

4.卸载当前组件
componentWillUnmount

生命周期经典图

解读一下:
好吧,其实没有什么太多好解读的,本人的react内力没有那么深厚,这张图就是刚才我们实验的结果
初始化,自动更新,手动更新,卸载
你只要把这个demo自己写一下,就瞬间知道这个图是干啥的了,除了很长的单词比较难写,其余都好说.
你以为这样就完了吗,不不不,没有没有没有.这里还有两个需要专门说的
两个疑问
1.生命周期连续调用了两次的问题

造成这个原因是因为你的根组件使用了严格模式 React.StrictMode
ReactDOM.createRoot(document.getElementById('root')).render(<Provider store={store}>{/* <React.StrictMode> 把它注释掉就可以了*/}   <App />{/* </React.StrictMode> */}</Provider>
)
2.父子组件生命周期顺序(测试demo)
初始化
父costructor > 父 getDerviedStateFromProps > 父render >子costructor >子getDerviedStateFromProps > 子render > 子componentDidMount >父componentDidMount

父组件修改值触发更新
父 getDerivedStateFromProps > 父 shouldComponentUpdate > 父 render > 子 getDrivedStateFromprops > 子shouldComponentUpdate > 子 render > 子 getSnaphotBeforeUpdate > 父getSnapshotBeforeUpdate > 子 componentDidUpdate> 父 componentDidUpdate

父组件手动更新
父 getDerivedStateFromProps > 父render > 子 getDerivedStateFromProps > 子 shouldComponentUpdate > 子render > 子getSnapshotBeforeUpdate > 父getSnapshotBeforeUpdate > 子componentDidUpdate > 父componentDidUpdate

组件卸载
父componentWillUnmount > 子componentWillUnmount

函数组件
函数组件实现生命周期是需要借助一个api的,这个api叫做useEffect.
demo
import React,{useState,useEffect} from 'react'
import {Button} from 'antd'
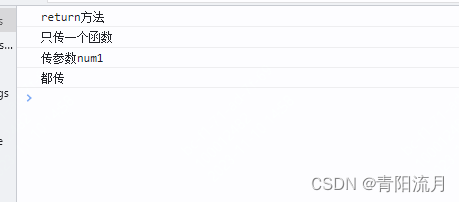
export default function index(props) {const [num1,changeNum1] = useState(0)const [num2,changeNum2] = useState(10)//单个-----------------------------------------------------//首次加载,修改num1,修改num2,卸载当前组件没有useEffect(()=>{console.log('只传一个函数')})//首次加载,num1没有,num2没有,卸载当前组件没有useEffect(()=>{console.log('参数二传一个空数组')},[])//首次加载,修改num1,num2没有,卸载当前组件没有useEffect(()=>{console.log('传参数num1')},[num1])//首次加载,num1没有,修改num2,卸载当前组件没有useEffect(()=>{console.log('传参数num2')},[num2])//首次加载,修改num1,修改num2,卸载当前组件没有useEffect(()=>{console.log('都传')},[num1,num2])//首次没有,修改num1,修改num2,卸载组件调用useEffect(()=>{return ()=>{console.log('return方法')}})// 总结:// 1.参数1:函数: 初始化和每次修改参数都会触发这个函数// 2.参树2:空数组: 只有首次加载会触发// 3.参数2:某条数据: 首次加载和修改该数据都会触发// 4.参数2:多条数据: 首次加载和修改数组内任意一条数据都会触发// 5.参数1:函数返回一个函数: 首次不急在,但是修改任意数值和卸载组件时都会调用return (<div><p>数值1:{num1}<Button onClick={()=>changeNum1(num1+1)}>修改数值1</Button></p><p>数值2:{num2}<Button onClick={()=>changeNum2(num2-1)}>修改数值2</Button></p></div>)
}初始化

修改值1
组件卸载

实现初始化,更新,单独的数据更新,卸载
import React,{useState,useEffect} from 'react'
import {Button} from 'antd'
export default function index(props) {const [num1,changeNum1] = useState(0)const [num2,changeNum2] = useState(10)// 组合------------------------------------------------------// 场景1: 初始化加载useEffect(()=>{console.log('初始化加载')console.log(num1,'???',props)},[])//场景2: 任意数据更新,但是初始化不加载useEffect(()=>{return ()=>{console.log('数据发生修改了')}})//场景3: 只有卸载时加载useEffect(()=>{return ()=>{console.log('卸载才会调用')}},[])//场景4: 某一数据发生改变,单独触发useEffect(()=>{return ()=>{console.log('只有修改num1才会调用')}},[num1])return (<div><p>数值1:{num1}<Button onClick={()=>changeNum1(num1+1)}>修改数值1</Button></p><p>数值2:{num2}<Button onClick={()=>changeNum2(num2-1)}>修改数值2</Button></p></div>)
}
总结
类式组件
各阶段钩子调用顺序
| 初始化 | constructor > getDerivedStateFromProps > render > componentDidMount |
| 自动更新 | getDerivedStateFromProps > shouldComponentUpdate > render > getSnapshotBeforeUpdate > componentDidUpdate |
| 手动更新 | getDerivedStateFromProps > render > getSnapshotBeforeUpdate > componentDidUpdate |
| 卸载 | componentWillUnmount |
父子组件生命周期
| 初始化 | 父costructor > 父 getDerviedStateFromProps > 父render >子costructor >子getDerviedStateFromProps > 子render > 子componentDidMount >父componentDidMount |
| 父组件自动更新 | 父 getDerivedStateFromProps > 父 shouldComponentUpdate > 父 render > 子 getDrivedStateFromprops > 子shouldComponentUpdate > 子 render > 子 getSnaphotBeforeUpdate > 父getSnapshotBeforeUpdate > 子 componentDidUpdate> 父 componentDidUpdate |
| 父组件手动更新 | 父 getDerivedStateFromProps > 父render > 子 getDerivedStateFromProps > 子 shouldComponentUpdate > 子render > 子getSnapshotBeforeUpdate > 父getSnapshotBeforeUpdate > 子componentDidUpdate > 父componentDidUpdate |
| 卸载 | 父componentWillUnmount > 子componentWillUnmount |
钩子函数连续调用两次的问题解决
干掉根组件的 React.StrictMode
函数组件
| 只在初始化加载调用 | useEffect(()=>{ console.log('初始化加载') },[]) |
| 初始化不调用但是更新组件会调用 | useEffect(()=>{ return ()=>{ console.log('数据发生修改了') } }) |
| 单独的数据发生变化进行调用 | useEffect(()=>{ return ()=>{ console.log('只有修改num1才会调用') } },[num1]) |
| 只在组件卸载时调用 | useEffect(()=>{ return ()=>{ console.log('卸载才会调用') } },[]) |
尾声
我的这篇博客没有专门讲这些api在调用时都发生了啥,主要是让读者了解react生命周期的api调用时机,属于业务开发中实用知识点,感觉还行的看客老爷们给个赞吧!