uni-app学习笔记(二)
目录
一、路由与页面跳转
1、tabar与普通页面跳转例子
3、switchTab
二、vue组件
1、传统vue组件的使用
2、easycom
三、uView组件库
1、安装配置
2、引入配置
3、使用
四、Vuex
1、认识
2、state基本使用
3、mapState使用
五、网络请求
1、封装请求
2、细化每个接口的配置
3、实例调用
六、媒体上传图片
1、uni.chooseImage(OBJECT)
2、代码实例
一、路由与页面跳转
1、tabar与普通页面跳转例子
pages.json配置页面
{"pages": [{"path": "pages/about/about","style": {"navigationBarTitleText": "关于","enablePullDownRefresh": false}},{"path": "pages/index/index","style": {"navigationBarTitleText": "首页"}}, {"path": "pages/prompt/prompt","style": {"navigationBarTitleText": "提示框","enablePullDownRefresh": false}}, {"path": "pages/swiper/swiper","style": {"navigationBarTitleText": "滑块","enablePullDownRefresh": false}}, {"path": "pages/form/form","style": {"navigationBarTitleText": "表单","enablePullDownRefresh": false}}, {"path": "pages/router/router","style": {"navigationBarTitleText": "路由","enablePullDownRefresh": false}}],"globalStyle": {"navigationBarTextStyle": "white","navigationBarTitleText": "全局","navigationBarBackgroundColor": "#000000","backgroundColor": "#ffffff"},"tabBar": {"color": "#7A7E83","selectedColor": "#1296db","borderStyle": "black","backgroundColor": "#000000","list": [{"pagePath": "pages/index/index","iconPath": "/static/首页2.png","selectedIconPath": "/static/首页.png","text": "首页"}, {"pagePath": "pages/about/about","iconPath": "/static/关于2.png","selectedIconPath": "/static/关于.png","text": "关于"}, {"pagePath": "pages/form/form","iconPath": "/static/表单 (1).png","selectedIconPath": "/static/表单.png","text": "表单"}, {"pagePath": "pages/router/router","iconPath": "/static/路由器组2.png","selectedIconPath": "/static/路由.png","text": "路由"}]},"uniIdRouter": {}
}
router.vue文件,模拟页面跳转
<template><view><button @click="toIndex">tabar跳转</button><button @click="toSwiper">普通页面跳转</button></view>
</template><script>export default {data() {return {}},methods: {toIndex(){uni.switchTab({url:"/pages/index/index"})},toSwiper(){uni.navigateTo({url:"/pages/swiper/swiper"})}}}
</script>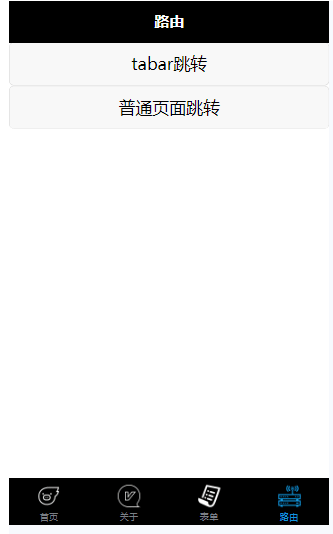
2、navigateTo
(1)跳转非tabBar页面的url路径,路径可以带参数
格式:path?key=value&key2=value2
path:要跳转页面的路径
toSwiper(){uni.navigateTo({url:"/pages/swiper/swiper?name=sxx"})
}
(2)获取参数
在跳转到的页面的onLoad函数获取
onLoad(option) {console.log(option);
},
3、switchTab
(1)跳转tabBar页面的url路径(需在 pages.json 的 tabBar 字段定义的页面),路径不能带参数
(2)需要的参数可以写到全局变量去获取
二、vue组件
1、传统vue组件的使用
(1)创建components文件夹=》创建.vue组件文件

(2)在需要的页面引入、注册
index.vue
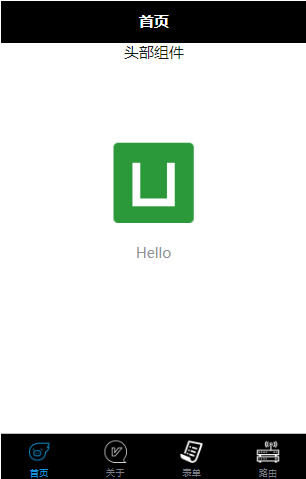
<template><view class="content"><header-cpn></header-cpn><image class="logo" src="/static/logo.png"></image><view class="text-area"><text class="title">{{title}}</text></view></view>
</template><script>// 注意路径components前没有/// 命名至少两个词组成,以小驼峰的形式import headerCpn from 'components/header.vue'export default {components:{headerCpn},data() {return {title: 'Hello'}},onLoad() {console.log(getApp().globalData);},methods: {}}
</script><style>.content {display: flex;flex-direction: column;align-items: center;justify-content: center;}.logo {height: 200rpx;width: 200rpx;margin-top: 200rpx;margin-left: auto;margin-right: auto;margin-bottom: 50rpx;}.text-area {display: flex;justify-content: center;}.title {font-size: 36rpx;color: #8f8f94;}
</style>
2、easycom
(1)说明
传统vue组件,需要安装、引用、注册,三个步骤后才能使用组件
easycom将其精简为一步
(2)使用
只要组件安装在项目的 components 目录下,并符合components/组件名称/组件名称.vue
通过插件库引入到components文件下然后直接引入即可
DCloud 插件市场DCloud 插件市场![]() https://ext.dcloud.net.cn/可以看文件的命名和文档来决定引入标签的名字
https://ext.dcloud.net.cn/可以看文件的命名和文档来决定引入标签的名字
三、uView组件库
1、安装配置
(1)打开工程终端
npm install uview-ui@1.8.8如果根目录又没有package.json文件,先执行以下命令
npm init -y
(2)uView依赖SCSS,必须要安装此插件,否则无法正常运行
查看是否安装scss插件:点击工具=》插件安装
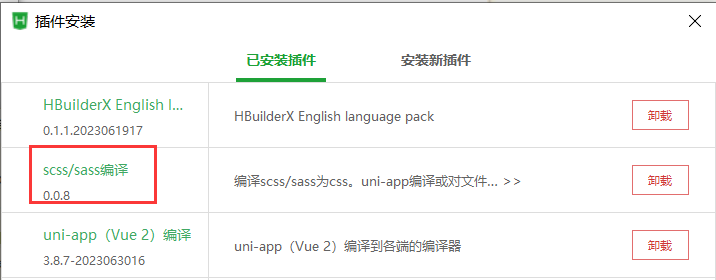
①前往插件市场安装

②终端命令安装
// 安装node-sass
npm i node-sass -D// 安装sass-loader
npm i sass-loader -D
2、引入配置
(1)主JS库:在项目根目录中的main.js中,引入并使用uView的JS库
// main.js
import uView from "uview-ui";
Vue.use(uView);
注意要放在
import Vue之后
(2)全局SCSS:引入uView主题文件
/* uni.scss */
@import 'uview-ui/theme.scss';
(3)引入基础样式
在
App.vue中首行的位置引入,注意给style标签加入lang="scss"属性
<style lang="scss">/* 注意要写在第一行,同时给style标签加入lang="scss"属性 */@import "uview-ui/index.scss";
</style>
(4) 配置easycom组件模式
在项目根目录的
pages.json中,配置easycom注意:
①只有一个
easycom字段②配置完要重启HX或重新编译项目
// pages.json
{"easycom": {"^u-(.*)": "uview-ui/components/u-$1/u-$1.vue"},// 此为本身已有的内容"pages": [// ......]
}
3、使用
(1)按钮
<template><view>头部组件<u-button type="primary">主要按钮</u-button><u-button type="success">成功按钮</u-button><u-button type="info">信息按钮</u-button><u-button type="warning">警告按钮</u-button><u-button type="error">危险按钮</u-button></view>
</template>
四、Vuex
1、认识
uni-app 内置了Vuex
(1)使用场景
- 当一个组件需要多次派发事件时。例如购物车数量加减。
- 跨组件共享数据、跨页面共享数据。例如订单状态更新。
- 需要持久化的数据。例如登录后用户的信息。
- 当您需要开发中大型应用,适合复杂的多模块多页面的数据交互,考虑如何更好地在组件外部管理状态时
(2)规则
-
应用层级的状态应该集中到单个
store对象中。 -
提交
mutation是更改状态的唯一方法,并且这个过程是同步的。 -
异步逻辑都应该封装到
action里面
2、state基本使用
(1)在项目根目录下,新建 store 目录=》新建 index.js 文件
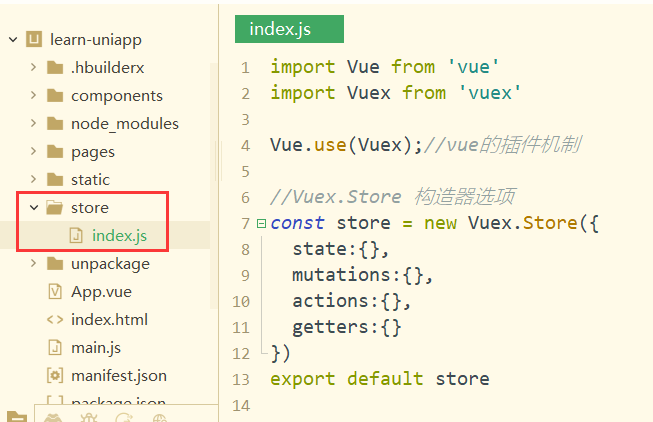
import Vue from 'vue'
import Vuex from 'vuex'Vue.use(Vuex);//vue的插件机制//Vuex.Store 构造器选项
const store = new Vuex.Store({state:{msg:'存放的信息'},mutations:{},actions:{},getters:{}
})
export default store
(2)在 main.js 中导入文件
import store from './store'
const app = new Vue({store,...App
})
(3)获取数据
<template><view><button @click="toIndex">tabar跳转</button><button @click="toSwiper">普通页面跳转</button><text>{{$store.state.msg}}</text></view>
</template>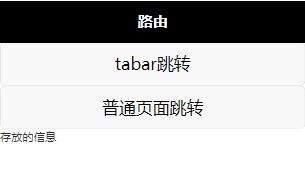
3、mapState使用
(1)当一个组件需要获取多个状态的时候,将这些状态都声明为计算属性会有些重复和冗余。 为了解决这个问题,可以使用 mapState 辅助函数 帮助我们生成计算属性
<template><view><text>{{$store.state.msg}}</text><text>{{userName}}</text></view>
</template><script>import { mapState } from 'vuex'//引入mapStateexport default {computed: mapState({// 从state中拿到数据 箭头函数可使代码更简练userName: state => state.userName,})}
</script>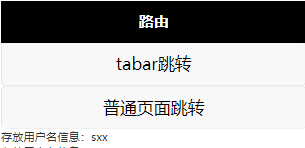
(2)当映射的计算属性名称与 state 的子节点名称相同时,可以给 mapState 传一个字符串数组
<template><view><text>{{$store.state.msg}}</text><text>{{userName}}</text><view>{{msg}}{{userName}}</view></view>
</template><script>import { mapState } from 'vuex'//引入mapStateexport default {computed: mapState(['msg','userName'])}
</script>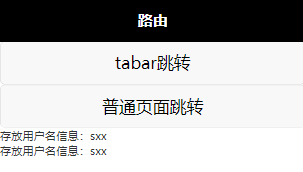
五、网络请求
这里小编用天行API为实例
天行数据TianAPI - 开发者API数据平台
1、封装请求
创建utils文件夹=》创建request.js文件
const instance = (url,data,header,callback) => {const BASE_URL = "https://apis.tianapi.com"uni.request({url: BASE_URL + url,data,header,success: callback});
}
export default instance;
2、细化每个接口的配置
import instance from "../utils/request.js"// 获取用户信息(GET)
export function getTianGou(data,callback){return instance('/tiangou/index',data,{},callback)
}
3、实例调用
<script>import {getTianGou} from "../../api/user.js"import instance from "../../utils/request.js"export default {onLoad() {// 跳过第2步,直接调用instance("/tiangou/index", {key: ''//data传参}, {}, (res) => {console.log(res);}),// 细化接口配置后的调用getTianGou({key: ''//data传参}, (res) => {console.log(res);})},}
</script>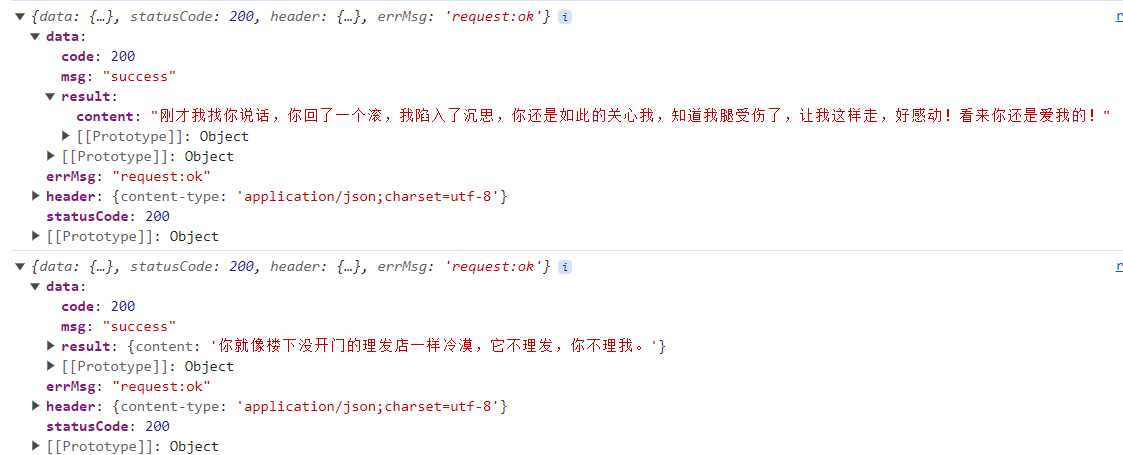
六、媒体上传图片
1、uni.chooseImage(OBJECT)
参数介绍:
①count:最多可以选择的图片张数,默认9
②sizeType:original 原图,compressed 压缩图,默认二者都有
uni.chooseImage({count: 6, //默认9sizeType: ['original', 'compressed'], //可以指定是原图还是压缩图,默认二者都有sourceType: ['album'], //从相册选择success: function (res) {console.log(JSON.stringify(res.tempFilePaths));}
});
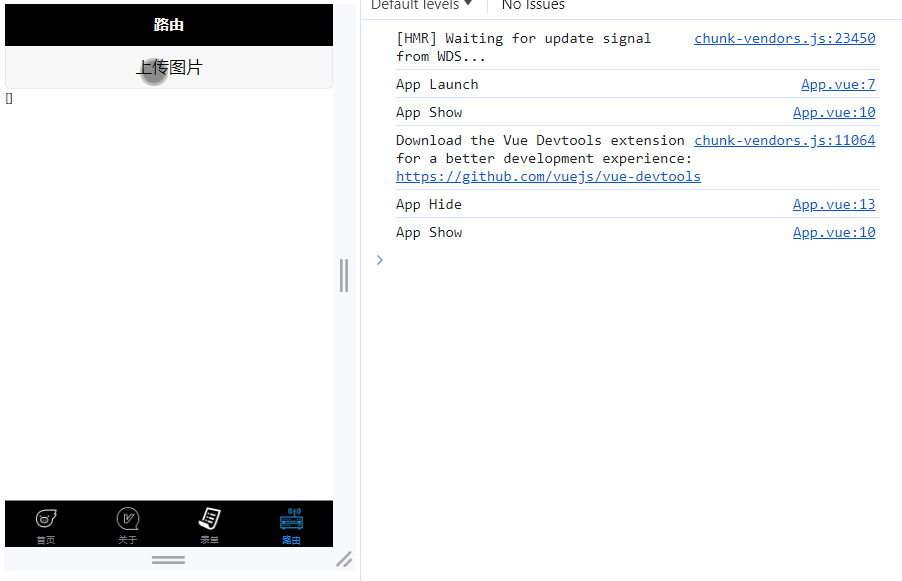
2、代码实例
<template><view><!-- 媒体图片 --><button type="default" @click="upImage">上传图片</button>{{imgArr}}<image v-for="item in imgArr" :key="item" :src="item" mode=""></image></view>
</template><script>export default {data() {return {imgArr:[]}},methods: {// 上传图片事件upImage(){uni.chooseImage({count:6,success:res=> {console.log(res.tempFilePaths);console.log(this.imgArr);this.imgArr = res.tempFilePaths}})}}}
</script>