centos7下安装主从仲裁三台结构的MongoDB 7.0.4
安装手册英文版在这里
https://www.mongodb.com/docs/v7.0/tutorial/install-mongodb-on-red-hat/
我的安装过程
1)基础安装
1、创建 /etc/yum.repos.d/mongodb-org-7.0.repo文件
下面的代码复制到这个文件中,保存
[mongodb-org-7.0]
name=MongoDB Repository
baseurl=https://repo.mongodb.org/yum/redhat/$releasever/mongodb-org/7.0/x86_64/
gpgcheck=1
enabled=1
gpgkey=https://www.mongodb.org/static/pgp/server-7.0.asc
2、yum安装
yum install -y mongodb-org
会看到安装一大堆的内容
注意两个事情
第一,MongoDB默认用的mongod的账号去启动资源,如果有permission deny的报错,找到目录,执行chown -R mongod:mongod 目录
第二,配置文件默认放在/etc/mongod.conf,这里可以设置日志和数据文件地址,如果你改了,记得按照第一条把新的目录改属主为mongod
3、关闭SELinux,设置SELinux状态
setenforce 0
不执行上述命令,改了属主也没有用
要想重启后生效,需要改文件vim /etc/selinux/config,SELINUX=enforcing改成SELINUX=permissive
4、启动
systemctl start mongod
5、用客户端连接试试
mongosh
看到一大堆输出,就进去了
Current Mongosh Log ID: 6516b6
Connecting to:          mongodb://127.0.0.1:27017/?directConnection=true&serverSelectionTimeoutMS=2000&appName=mongosh+2.0.1
Using MongoDB:          7.0.1
Using Mongosh:          2.0.1For mongosh info see: https://docs.mongodb.com/mongodb-shell/
To help improve our products, anonymous usage data is collected and sent to MongoDB periodically (https://www.mongodb.com/legal/privacy-policy).
You can opt-out by running the disableTelemetry() command.The server generated these startup warnings when booting2023-09-29T19:27:11.183+08:00: Using the XFS filesystem is strongly recommended with the WiredTiger storage engine. See http://dochub.mongodb.org/core/prodnotes-filesystem2023-09-29T19:27:11.495+08:00: Access control is not enabled for the database. Read and write access to data and configuration is unrestricted2023-09-29T19:27:11.496+08:00: You are running on a NUMA machine. We suggest launching mongod like this to avoid performance problems: numactl --interleave=all mongod [other options]2023-09-29T19:27:11.497+08:00: /sys/kernel/mm/transparent_hugepage/enabled is 'always'. We suggest setting it to 'never'2023-09-29T19:27:11.497+08:00: /sys/kernel/mm/transparent_hugepage/defrag is 'always'. We suggest setting it to 'never'2023-09-29T19:27:11.497+08:00: vm.max_map_count is too low
------test>
6、重启试试
reboot,然后看看服务起来没有,systemctl status mongod
正常
2)集群安装
上面是单机,也没有密码,下面部署集群,记得先把主、从、仲裁都按照上面步骤装好
7、改配置文件
先把三个机器的MongoDB服务停了,找到/etc/mongod.conf,修改
replication:replSetName: hep22
然后启动服务
8、给防火墙开端口
firewall-cmd --permanent --add-port=27017/tcp
firewall-cmd --reload
不开端口连不上
9、初始化主
在主上进入MongoDB,执行mongosh,然后执行
rs.initiate({_id: "hepee",members:[ {_id:0,host:"10.15.32.130:27017",priority:5}]})
priority:5越高等级越高,你希望谁是主,就把谁设高
设置完可以看一下情况
rs.conf()
10、增加从
还是在主服务器上操作哈
rs.add({
_id: 1,host:"10.15.32.131:27017",priority:4
})
11、增加仲裁
rs.add({
_id: 2,host:"10.15.32.132:27017",arbiterOnly:true
})
增加的时候报错,Reconfig attempted to install a config that would change the implicit default write concern,执行下面语句
db.adminCommand({"setDefaultRWConcern" : 1,"defaultWriteConcern" : {"w" : 2}
})
再增加仲裁机,就好了
12、复查
rs.conf()
rs.status()
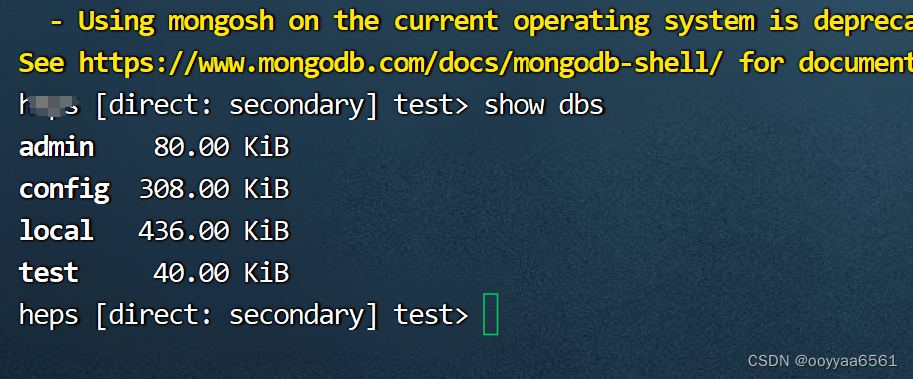
show dbs
增加一条记录试试
use test
db.test.insert({name:"mongo"})
show dbs
注意:一定要切换数据库
这时能看到多了个test数据库,说明成功了
到从上看看,看到secondary了,这是从,看到了test数据库,已经同步过来了
3)安全认证
为了安全,要配置一下安全认证,不然对所有人都是敞开的
mongodb4.0以上不支持TLS1.0,改支持1.1
请注意版本,mongodb不同版本参数,命令会有细微不同,所以得试,看哪个命令好使
keyfile白话说就是一个记事本,存放这一串字符,就可以当做秘钥。 keyfile是用于mongodb集群内部成员认证用的。
先建个最高级别账号,否则后面怕进不来
db.createUser({user:"root",pwd:"XXX0",roles: [ { role: "root", db: "admin" } ]})
- 创建keyfile
openssl rand -base64 756 > /data/mongoDB/internal.keychmod 400 /data/mongoDB/internal.keychown mongod.mongod /data/mongoDB/internal.key将此keyfile拷贝到其他两台主机相同目录下。
- 配置Keyfile
修改/etc/mongod.conf文件,增加副本集与安全配置:主要是security:里面这两句
net:port: 27017bindIp: 0.0.0.0 # Enter 0.0.0.0,:: to bind to all IPv4 and IPv6 addresses or, alternatively, use the net.bindIpAll setting.security:keyFile: /data/mongoDB/internal.keyauthorization: enabled#operationProfiling:
把三台机器都设置好,然后重启服务,重启记得顺序,先起从节点,仲裁,最后起主节点
- 连接
此时用mongosh连接,不会报错,能进,但是进去干不了啥,会出错,得用用户名、密码进去才正常
mongosh -u root -p
用前面创建的账号进入
插入个数据吧
- 远程连接
此时从远程连接,没密码进入执行啥命令,就提示要授权,只有用账号密码进去了,执行才能成功
use
db.cicatDb.insertOne({name:"mongo"})
show dbs