Spring(四)
1、Spring6整合JUnit
1、JUnit4
User类:
package com.songzhishu.spring.bean;import org.springframework.beans.factory.annotation.Value;
import org.springframework.stereotype.Component;/*** @BelongsProject: Spring6* @BelongsPackage: com.songzhishu.spring.bean* @Author: 斗痘侠* @CreateTime: 2023-10-18  20:41* @Description: TODO* @Version: 1.0*/
@Component
public class User {@Value("张三")private String name;@Overridepublic String toString() {return "User{" +"name='" + name + '\'' +'}';}public String getName() {return name;}public void setName(String name) {this.name = name;}public User() {}public User(String name) {this.name = name;}
}
配置文件: 开启组件扫描
<?xml version="1.0" encoding="UTF-8"?>
<beans xmlns="http://www.springframework.org/schema/beans"xmlns:xsi="http://www.w3.org/2001/XMLSchema-instance"xmlns:context="http://www.springframework.org/schema/context"xsi:schemaLocation="http://www.springframework.org/schema/beans http://www.springframework.org/schema/beans/spring-beans.xsdhttp://www.springframework.org/schema/context http://www.springframework.org/schema/context/spring-context.xsd"><context:component-scan base-package="com.songzhishu.spring.bean"/></beans>
测试:
@RunWith(SpringJUnit4ClassRunner.class)
@ContextConfiguration("classpath:spring.xml")
public class TestJunit4 {@Autowiredprivate User user;@Testpublic void  test1(){System.out.println(user.getName());}
}
2、JUnit5:
测试:
@ContextConfiguration("classpath:spring.xml")
@ExtendWith(SpringExtension.class)
public class TestJunit5 {@Autowiredprivate User user;@Testpublic void  test1(){System.out.println(user.getName());}
}
2、Spring6集成MyBatis
第一步:准备数据库表
第二步:IDEA中创建一个模块,并引入依赖
- spring-context
- spring-jdbc
- mysql驱动
- mybatis
- mybatis-spring:mybatis提供的与spring框架集成的依赖
- 德鲁伊连接池
- junit
第三步:基于三层架构实现,所以提前创建好所有的包
第四步:编写pojo
第五步:编写mapper接口
第六步:编写mapper配置文件
- 在配置文件中配置命名空间,以及每一个方法对应的sql。

第七步:编写service接口和service接口实现类
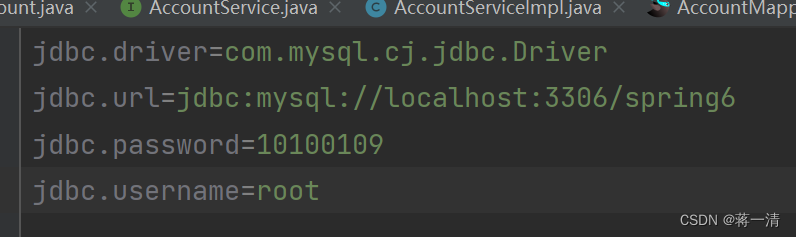
第八步:编写jdbc.properties配置文件
- 数据库连接池相关信息
第九步:编写mybatis-config.xml配置文件
- 该文件可以没有,大部分的配置可以转移到spring配置文件中。
- 如果遇到mybatis相关的系统级配置,还是需要这个文件。
<?xml version="1.0" encoding="UTF-8" ?>
<!DOCTYPE configurationPUBLIC "-//mybatis.org//DTD Config 3.0//EN""http://mybatis.org/dtd/mybatis-3-config.dtd">
<configuration><!--放在properties标签后面--><settings><!--开启驼峰命名--><setting name="mapUnderscoreToCamelCase" value="true"/><!--开启全局的懒加载 默认是false --><setting name="lazyLoadingEnabled" value="true"/><!-- 开启二级缓存 这个不设置也是开启的 这个是总开关 具体的使用要在XXMapper.xml 文件里面开启--><setting name="cacheEnabled" value="true"/><!--日志--><setting name="logImpl" value="STDOUT_LOGGING"/></settings></configuration>
第十步:编写spring.xml配置文件
-
- 组件扫描
- 引入外部的属性文件
- 数据源
- SqlSessionFactoryBean配置
-
-
- 注入mybatis核心配置文件路径
- 指定别名包
- 注入数据源
-
-
- Mapper扫描配置器
-
-
- 指定扫描的包
-
-
- 事务管理器DataSourceTransactionManager
-
-
- 注入数据源
-
-
- 启用事务注解
-
-
- 注入事务管理器
-
<?xml version="1.0" encoding="UTF-8"?>
<beans xmlns="http://www.springframework.org/schema/beans"xmlns:xsi="http://www.w3.org/2001/XMLSchema-instance"xmlns:context="http://www.springframework.org/schema/context"xmlns:tx="http://www.springframework.org/schema/tx"xsi:schemaLocation="http://www.springframework.org/schema/beans http://www.springframework.org/schema/beans/spring-beans.xsdhttp://www.springframework.org/schema/context https://www.springframework.org/schema/context/spring-context.xsdhttp://www.springframework.org/schema/tx https://www.springframework.org/schema/tx/spring-tx.xsd"><!--组件扫描--><context:component-scan base-package="com.songzhishu.spring6"/><!--引入外部的属性配置文件--><context:property-placeholder location="jdbc.properties"/><!--数据源--><bean id="druidDataSource" class="com.alibaba.druid.pool.DruidDataSource"><property name="driverClassName" value="${jdbc.driver}"></property><property name="url" value="${jdbc.url}"></property><property name="username" value="${jdbc.username}"></property><property name="password" value="${jdbc.password}"></property></bean><!--SqlSessionFactoryBean配置--><bean class="org.mybatis.spring.SqlSessionFactoryBean"><!--注入数据源--><property name="dataSource" ref="druidDataSource"></property><!--指定核心配置文件--><property name="configLocation" value="mybatis-config.xml"></property><!--指定别名--><property name="typeAliasesPackage" value="com.songzhishu.spring6.pojo"></property></bean><!--mapper扫描配置器 扫描mapper接口 生成代理类--><bean class="org.mybatis.spring.mapper.MapperScannerConfigurer" ><property name="basePackage" value="com.songzhishu.spring6.mapper"></property></bean><!--事务管理器--><bean id="dataSourceTransactionManager" class="org.springframework.jdbc.datasource.DataSourceTransactionManager"><property name="dataSource" ref="druidDataSource"></property></bean><!--启用事务注解--><tx:annotation-driven transaction-manager="dataSourceTransactionManager"></tx:annotation-driven></beans>
第十一步:编写测试程序,并添加事务,进行测试