MySQL学习笔记3
MySQL的源码编译安装:
1、参考MySQL的源码安装官方文档:

2、源码安装定制选项:

3、源码安装三部曲:配置、编译、安装。
4、软件安装包:
mysql-boost-5.7.43.tar.gz
5、安装需求:
| 安装需求 | 具体配置 |
| 安装目录basedir | /mysql_3307 |
| 数据目录datadir | /mysql_3307/data |
| 端口号 | 3307 |
| socket文件位置 | $basedir/mysql.sock |
| 字符集 | utf8mb4 |
主要安装目录、端口和socket套接字不一样,就可以在一台服务器上安装两个mysql。
6、了解配置选项:
源码安装,可定制性比较强。

其中collation:
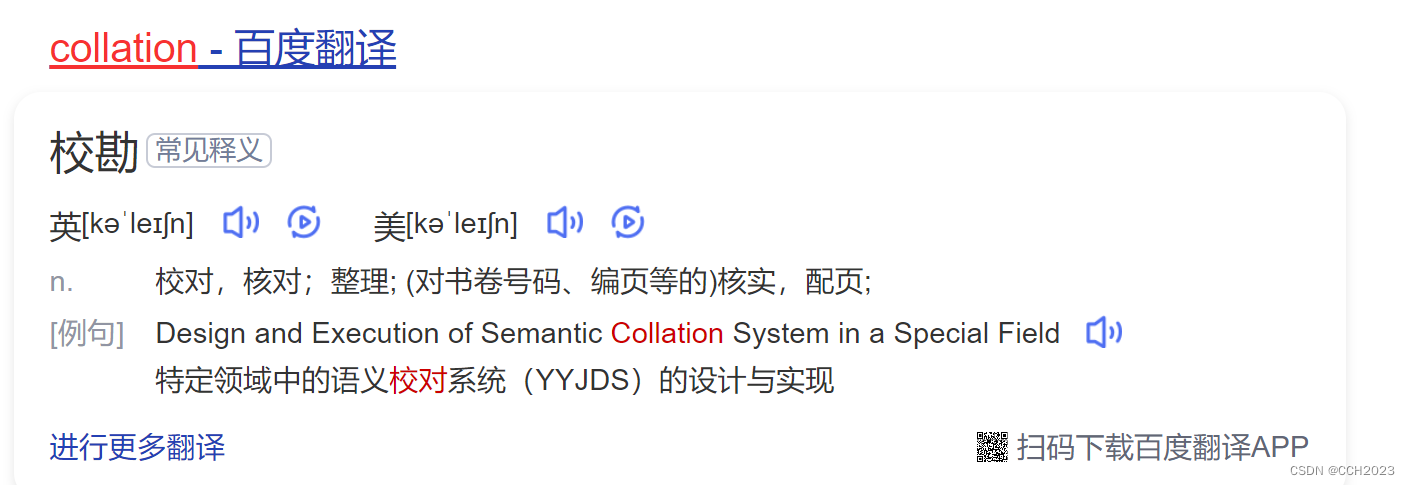
核对、校验的意思。
ENABLED_LOCAL_INFILE:外部数据,导入的时候,需要开启该功能。


安装步骤:
1)安装依赖包:
[root@mysql-server ~]# yum -y install ncurses-devel cmake libaio-devel openssl-devel
2)上传mysql源码包,并解压:
这个时候做一个拍照。
[root@mysql-server ~]# tar -zxvf mysql-boost-5.7.43.tar.gz3)进入到解压目录里配置:
[root@mysql-server ~]# cd mysql-5.7.434)编写脚本进行配置 vim myconfig.sh:
cmake . \
-DCMAKE_INSTALL_PREFIX=/mysql_3307 \
-DMYSQL_DATADIR=/mysql_3307/data \
-DMYSQL_TCP_PORT=3307 \
-DMYSQL_UNIX_ADDR=/mysql_3307/mysql.sock \
-DWITH_INNOBASE_STORAGE_ENGINE=1 \
-DWITH_PARTITION_STORAGE_ENGINE=1 \
-DWITH_FEDERATED_STORAGE_ENGINE=1 \
-DWITH_BLACKHOLE_STORAGE_ENGINE=1 \
-DWITH_MYISAM_STORAGE_ENGINE=1 \
-DENABLED_LOCAL_INFILE=1 \
-DEXTRA_CHARSETS=all \
-DDEFAULT_CHARSET=utf8mb4 \
-DDEFAULT_COLLATION=utf8mb4_general_ci \
-DWITH_SSL=system \
-DWITH_BOOST=/mysql_3307/boost \
-DDOWNLOAD_BOOST=1
说明:在这个配置里,如果还需要安装别的数据库,只要修改几个地方:
-DCMAKE_INSTALL_PREFIX
-DMYSQL_DATADIR
-DMYSQL_TCP_PORT
-DMYSQL_UNIX_ADDR
5)添加脚本执行权限,然后执行脚本。
[root@mysql-server mysql-5.7.43]# chmod +x mysqlconfig.sh
[root@mysql-server mysql-5.7.43]# ./mysqlconfig.sh

这个过程是一个配置的过程。
6)编译和安装:
make && make install也可以写成:
make -j2 && make install选项:
-j2:代表同时开启多个线程共同实现编译操作。

MySQL数据库的初始化工作:
1)进入到/mysql_3307
[root@mysql-server mysql-5.7.43]# cd /mysql_3307
[root@mysql-server mysql_3307]# pwd
/mysql_3307
2)创建mysql-files目录:
[root@mysql-server mysql_3307]# mkdir mysql-files
[root@mysql-server mysql_3307]# chown mysql:mysql mysql-files
[root@mysql-server mysql_3307]# chmod 750 mysql-files
3)初始化数据库:
[root@mysql-server mysql_3307]# bin/mysqld --initialize --user=mysql --basedir=/mysql_3307 --datadir=/mysql_3307/data
2023-09-22T16:03:38.325762Z 0 [Warning] TIMESTAMP with implicit DEFAULT value is deprecated. Please use --explicit_defaults_for_timestamp server option (see documentation for more details).
2023-09-22T16:03:38.507868Z 0 [Warning] InnoDB: New log files created, LSN=45790
2023-09-22T16:03:38.532672Z 0 [Warning] InnoDB: Creating foreign key constraint system tables.
2023-09-22T16:03:38.586904Z 0 [Warning] No existing UUID has been found, so we assume that this is the first time that this server has been started. Generating a new UUID: 97a3f645-5961-11ee-8c2b-000c295cf01e.
2023-09-22T16:03:38.587416Z 0 [Warning] Gtid table is not ready to be used. Table 'mysql.gtid_executed' cannot be opened.
2023-09-22T16:03:38.703329Z 0 [Warning] A deprecated TLS version TLSv1 is enabled. Please use TLSv1.2 or higher.
2023-09-22T16:03:38.703383Z 0 [Warning] A deprecated TLS version TLSv1.1 is enabled. Please use TLSv1.2 or higher.
2023-09-22T16:03:38.703732Z 0 [Warning] CA certificate ca.pem is self signed.
2023-09-22T16:03:38.736069Z 1 [Note] A temporary password is generated for root@localhost: _uhi%b?us9Qr

里面创建了data目录,data目录里面有mysql目录。
4)启动数据库:
[root@mysql-server mysql_3307]# cp support-files/mysql.server /etc/init.d/mysql_3307
[root@mysql-server mysql_3307]# service mysql_3307 start
常见启动异常的解决方案:

查看日志:
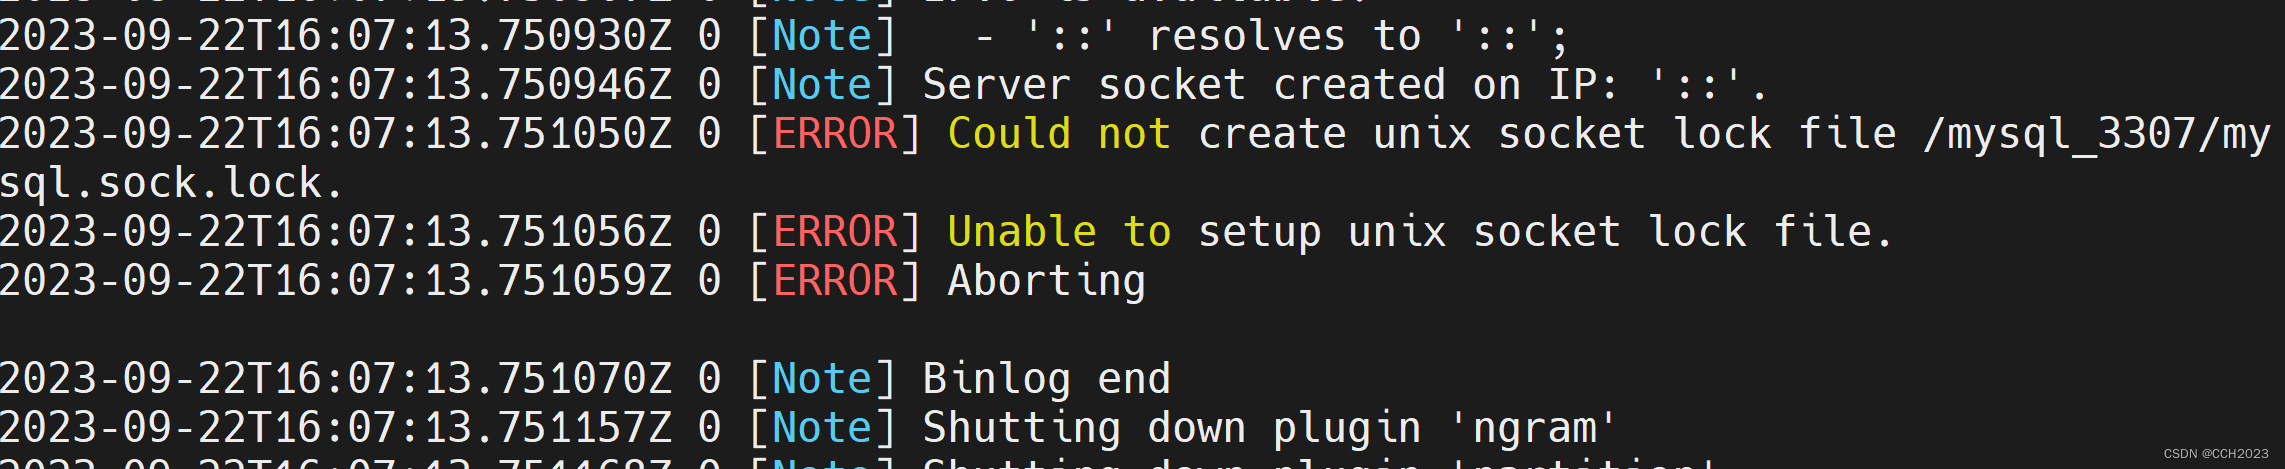
解决办法:很多问题跟权限有关,要理解权限、拥有者、所属组。
[root@mysql-server /]# chown -R mysql:mysql mysql_3307
也可以使用chmod命令更改权限,如果该了权限,可能不符合权限最小化的原则。
安装完后续配置:
[root@mysql-server mysql_3307]# cat my.cnf
[mysqld]
basedir=/mysql_3307
datadir=/mysql_3307/data
socket=/mysql_3307/mysql.sock[root@mysql-server mysql_3307]# service mysql_3307 restart
Shutting down MySQL.. SUCCESS!
Starting MySQL. SUCCESS!
别忘了要将mysql_3307重启。
设置数据库管理root的密码:
bin/mysqladmin -uroot password '1q2w3e4r' -p安全设置:
[root@mysql-server mysql_3307]# bin/mysql_secure_installationSecuring the MySQL server deployment.Enter password for user root:VALIDATE PASSWORD PLUGIN can be used to test passwords
and improve security. It checks the strength of password
and allows the users to set only those passwords which are
secure enough. Would you like to setup VALIDATE PASSWORD plugin?Press y|Y for Yes, any other key for No: n
Using existing password for root.
Change the password for root ? ((Press y|Y for Yes, any other key for No) : n... skipping.
By default, a MySQL installation has an anonymous user,
allowing anyone to log into MySQL without having to have
a user account created for them. This is intended only for
testing, and to make the installation go a bit smoother.
You should remove them before moving into a production
environment.Remove anonymous users? (Press y|Y for Yes, any other key for No) : y
Success.Normally, root should only be allowed to connect from
'localhost'. This ensures that someone cannot guess at
the root password from the network.Disallow root login remotely? (Press y|Y for Yes, any other key for No) : y
Success.By default, MySQL comes with a database named 'test' that
anyone can access. This is also intended only for testing,
and should be removed before moving into a production
environment.Remove test database and access to it? (Press y|Y for Yes, any other key for No) : y- Dropping test database...
Success.- Removing privileges on test database...
Success.Reloading the privilege tables will ensure that all changes
made so far will take effect immediately.Reload privilege tables now? (Press y|Y for Yes, any other key for No) : y
Success.All done!
添加mysql_3307的开机启动项:
[root@mysql-server ~]# chkconfig --add mysql_3307
[root@mysql-server ~]# chkconfig mysql_3307 on
[root@mysql-server ~]#
[root@mysql-server ~]# chkconfig --listNote: This output shows SysV services only and does not include nativesystemd services. SysV configuration data might be overridden by nativesystemd configuration.If you want to list systemd services use 'systemctl list-unit-files'.To see services enabled on particular target use'systemctl list-dependencies [target]'.mysql_3306      0:off   1:off   2:on    3:on    4:on    5:on    6:off
mysql_3307      0:off   1:off   2:on    3:on    4:on    5:on    6:off
netconsole      0:off   1:off   2:off   3:off   4:off   5:off   6:off
network         0:off   1:off   2:on    3:on    4:on    5:on    6:off
mysql常见问题解决方案:
1、如何访问不同的数据库?
方法一:直接使用==对应的客户==端软件访问:
访问5.7.31版本数据库:
[root@node1 ~]# /mysql_3306/bin/mysql -uroot -p
Enter password:
Welcome to the MySQL monitor.  Commands end with ; or \g.
Your MySQL connection id is 3
Server version: 5.7.31 MySQL Community Server (GPL)访问5.7.31版本数据库:
[root@node1 ~]# /mysql_3307/bin/mysql -uroot -p
Enter password:
Welcome to the MySQL monitor.  Commands end with ; or \g.
Your MySQL connection id is 7
Server version: 5.7.31 Source distribution方法二:==定义别名==的方式访问
[root@node1 ~]# alias mysql_3306="/mysql_3306/bin/mysql"
[root@node1 ~]# alias mysql_3307="/mysql_3307/bin/mysql"
[root@node1 ~]# mysql_3306 -uroot -p
Enter password:
Welcome to the MySQL monitor.  Commands end with ; or \g.
Your MySQL connection id is 4
Server version: 5.7.31 MySQL Community Server (GPL)[root@node1 ~]# mysql_3307 -uroot -p
Enter password:
Welcome to the MySQL monitor.  Commands end with ; or \g.
Your MySQL connection id is 8
Server version: 5.7.31 Source distribution方法三:==拷贝相应命令==到PATH可以识别的路径下==并重命名==
[root@node1 ~]# unalias mysql_3306
[root@node1 ~]# unalias mysql_3307
+++++++++++++++++++++我是华丽分隔符+++++++++++++++++++++++++++
[root@node1 ~]# cp /mysql_3306/bin/mysql /usr/bin/mysql_3306
[root@node1 ~]# cp /mysql_3307/bin/mysql /usr/bin/mysql_3307
[root@node1 ~]# which mysql_3306
/usr/bin/mysql_3306
[root@node1 ~]# which mysql_3307
/usr/bin/mysql_3307
我个人感觉还是倾向于第三种方法。
思考:我们之所以能够连接到数据库服务器的本质,就是套接字。
MySQL密码忘记了如何解决:
这个需要按照老师的步骤进行下联系。
[root@mysql-server ~]# ps aux |grep mysql
root        934  0.0  0.0 115544  1708 ?        S    13:08   0:00 /bin/sh /mysql_3307/bin/mysqld_safe --datadir=/mysql_3307/data --pid-file=/mysql_3307/data/mysql-server.lnmp.com.pid
mysql      1213  0.1  9.0 1144064 183968 ?      Sl   13:08   0:00 /mysql_3307/bin/mysqld --basedir=/mysql_3307 --datadir=/mysql_3307/data --plugin-dir=/mysql_3307/lib/plugin --user=mysql --log-error=mysql-server.lnmp.com.err --pid-file=/mysql_3307/data/mysql-server.lnmp.com.pid --socket=/mysql_3307/mysql.sock
root       1621  0.0  0.0  11824  1592 pts/0    S    13:13   0:00 /bin/sh /mysql_3306/bin/mysqld_safe --datadir=/mysql_3306/data --pid-file=/mysql_3306/data/mysql-server.lnmp.com.pid
mysql      1750  0.2  8.9 1121060 180816 pts/0  Sl   13:13   0:00 /mysql_3306/bin/mysqld --basedir=/mysql_3306 --datadir=/mysql_3306/data --plugin-dir=/mysql_3306/lib/plugin --user=mysql --log-error=mysql-server.lnmp.com.err --pid-file=/mysql_3306/data/mysql-server.lnmp.com.pid --socket=/tmp/mysql.sock
root       1887  0.0  0.0 112812   972 pts/0    S+   13:14   0:00 grep --color=auto mysql
[root@mysql-server ~]# service mysql_3306 restart
Shutting down MySQL.. SUCCESS!
Starting MySQL. SUCCESS!
[root@mysql-server ~]# service mysql_3307 restart
Shutting down MySQL.. SUCCESS!
Starting MySQL. SUCCESS!
mysqladmin工具的使用:
关闭数据库
[root@node1 ~]# mysqladmin shutdown -p
默认修改数据库管理员root密码
[root@node1 ~]# mysqladmin password 'newpass' -p
[root@node1 ~]# mysqladmin password '123' -uroot -h localhost -p查看扩展信息,比如变量
[root@node1 ~]# mysqladmin proc extended-status -p
创建数据库
[root@node1 ~]# mysqladmin create db01 -p
删除数据库
[root@node1 ~]# mysqladmin drop db01 -p