(二十一)、实现评论功能(1)【uniapp+uinicloud多用户社区博客实战项目(完整开发文档-从零到完整项目)】
1,评论回复模块的样式布局
1.1 在detail页面添加uview中的 Empty 内容为空组件
<!-- 评论区 --><view class="comment"><u-empty mode="comment" icon="http://cdn.uviewui.com/uview/empty/comment.png"></u-empty></view>
1.2 创建评论子组件comment-item和comment-frame
comment-item子组件:
<template><view><view class="comment-item"><view class="avatar"><u-avatar src="../../static/images/panda.jpg" size="26"></u-avatar></view><view class="wrap"><view class="username">王五</view><view class="comment-content">评论的详细内容</view><view class="info"><view class="reply-btn">3回复 </view><view><uni-dateformat :date="Date.now() - 35444582" :threshold="[60000,3600000*24*30]"></uni-dateformat></view><view>北京市</view></view></view></view></view>
</template><script>export default {name: "comment-item",data() {return {};}}
</script><style lang="scss" scoped>.comment-item {display: flex;.wrap {flex: 1;padding-left: 20rpx;padding-bottom: 20rpx;.username {font-size: 26rpx;color: #666;padding: 10rpx 0;}.comment-content {font-size: 34rpx;color: #111;line-height: 1.8em;}.info {font-size: 26rpx;color: #666;display: flex;padding: 10rpx 0;align-items: center;view {margin-right: 25rpx;}.reply-btn {padding: 6rpx 18rpx;background: #e4e4e4;border-radius: 30rpx;}}}}
</style>
comment-frame子组件:
<template><view><view class="commentFrame"><uni-easyinput ref="uipt" @confirm="goComment" suffixIcon="paperplane" v-model="replyContent":placeholder="placeholder" @iconClick="goComment"></uni-easyinput></view></view>
</template><script>export default {name: "comment-frame",data() {return {};}}
</script><style lang="scss" scoped>.commentFrame {width: 100%;background: #fff;padding: 20rpx 30rpx;box-sizing: border-box;position: fixed;bottom: 0;left: 0;z-index: 100;}
</style>
1.3 detail页面中引入子组件,并添加样式
<!-- 评论内容子组件 --><view class="content"><view class="item" v-for="item in 3"><comment-item></comment-item></view></view></view><!-- 评论回复子组件 --><comment-frame></comment-frame>
添加相应的样式:
.comment {padding: 30rpx;padding-bottom: 120rpx;.item {padding: 10rpx 0;}}
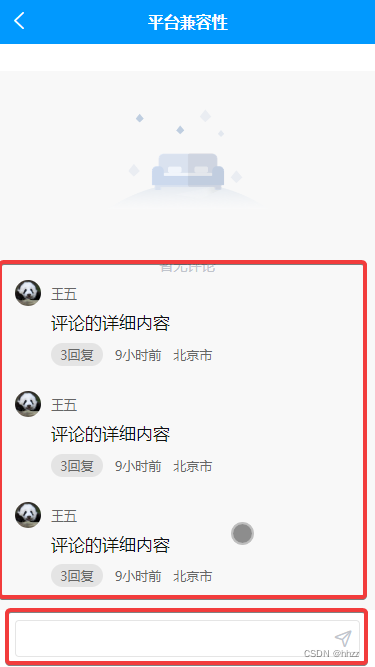
1.4 效果:
2,创建评论表的schema数据结构
2.1 创建评论表的schema
按照评论模板创建quanzi_comment.schema:
{"bsonType": "object","required": ["article_id", "user_id", "comment_content", "comment_type"],"permission": {"read": true,"create": "auth.uid != null","update": "doc.user_id == auth.uid || 'webmaster' in auth.role","delete": "doc.user_id == auth.uid || 'webmaster' in auth.role"},"properties": {"_id": {"description": "存储文档 ID(文章 ID),系统自动生成"},"article_id": {"bsonType": "string","description": "文章ID,opendb-news-posts 表中的`_id`字段","foreignKey": "quanzi_articles._id"},"user_id": {"bsonType": "string","description": "评论者ID,参考`uni-id-users` 表","forceDefaultValue": {"$env": "uid"},"foreignKey": "uni-id-users._id"},"comment_content": {"bsonType": "string","description": "评论内容","title": "评论内容","trim": "right"},"comment_type": {"bsonType": "int","description": "回复类型: 0 针对文章的回复  1 针对评论的回复"},"reply_user_id": {"bsonType": "string","description": "被回复的评论用户ID,comment_type为1时有效","foreignKey": "uni-id-users._id"},"reply_comment_id": {"bsonType": "string","description": "被回复的评论ID,comment_type为1时有效","parentKey": "_id"},"comment_date": {"bsonType": "timestamp","description": "评论发表时间","forceDefaultValue": {"$env": "now"}},"comment_ip": {"bsonType": "string","description": "评论发表时 IP 地址","forceDefaultValue": {"$env": "clientIP"}},"province": {"bsonType": "string","title": "发布省份","description": "发布省份","label": "发布省份","trim": "both"}},"version": "0.0.1"
}
2.2 输入框子组件补齐data属性和methods方法
<script>export default {name: "comment-frame",data() {return {replyContent: '',placeholder: '评论点什么呢~'};},methods: {goComment() {console.log(this.placeholder)}}}
</script>
2.3 封装传值公共组件并入库
detail页面:
<!-- 评论输入框子组件 --><comment-frame :commentObj="commentObj"></comment-frame>
onload中添加:
this.commentObj.article_id = e.id
在组件comment-frame中:
<template><view><view class="commentFrame"><uni-easyinput ref="uipt" @confirm="goComment" suffixIcon="paperplane" v-model="replyContent":placeholder="placeholder" @iconClick="goComment"></uni-easyinput></view></view>
</template><script>import {getProvince} from "@/utils/tools.js"const db = uniCloud.database();export default {name: "comment-frame",props: {commentObj: {type: Object,default: () => {return {}}},placeholder: {type: String,default: "评论点什么吧~"}},data() {return {replyContent: '',};},methods: {async goComment() {let province = await getProvince();if (!this.replyContent) {uni.showToast({title: "评论不能为空",icon: "none"})return;}db.collection("quanzi_comment").add({"comment_content": this.replyContent,"province": province,...this.commentObj}).then(res => {uni.showToast({title: "评论成功"})console.log(res);})}}}
</script><style lang="scss" scoped>.commentFrame {width: 100%;background: #fff;padding: 20rpx 30rpx;box-sizing: border-box;position: fixed;bottom: 0;left: 0;z-index: 100;}
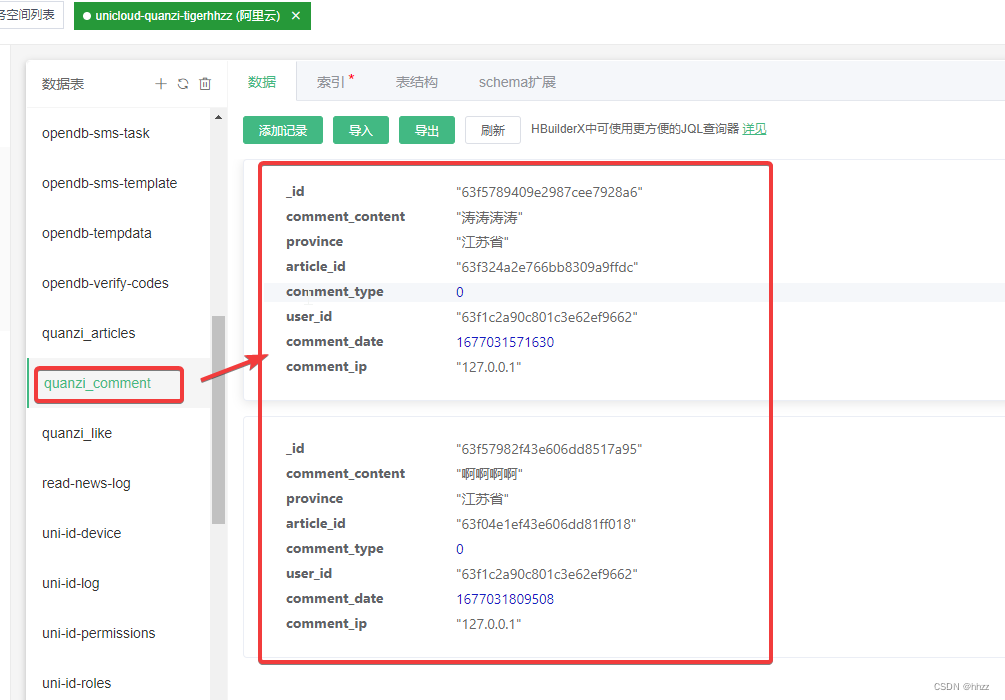
</style>2.4 查看数据库
数据库中添加了针对不同的两篇文章的同一用户的评论内容。