springboot web 增加不存在的url返回200状态码 vue 打包设置
spring boot项目增加 html web页面访问
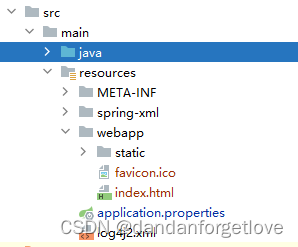
1. 首先 application.properties 文件中增加配置,指定静态资源目录(包括html的存放)
spring.resources.static-locations=classpath:/webapp/,classpath:/webapp/static/2. 项目目录

3. 如果有实现 WebMvcConfigurer 类的,增加实现
package yourpack;import org.springframework.beans.factory.annotation.Autowired;
import org.springframework.context.annotation.Configuration;
import org.springframework.http.HttpStatus;
import org.springframework.web.servlet.config.annotation.InterceptorRegistry;
import org.springframework.web.servlet.config.annotation.ResourceHandlerRegistry;
import org.springframework.web.servlet.config.annotation.ViewControllerRegistry;
import org.springframework.web.servlet.config.annotation.WebMvcConfigurer;import javax.annotation.Resource;/*** @author wangtong*/
@Configuration
public class CustomWebMvcConfigurer implements WebMvcConfigurer {@Autowiredprivate YourInterceptor yourint;// 拦截器@Overridepublic void addInterceptors(InterceptorRegistry registry) {registry.addInterceptor(yourint).addPathPatterns("/url").addPathPatterns("/url2");// 不设置拦截器的可以不实现该方法}@Overridepublic void addViewControllers(ViewControllerRegistry registry) {
//        registry.addViewController("/").setStatusCode(HttpStatus.OK);registry.addViewController("/index.jsp").setViewName("index"); // 配置首页registry.addViewController("/").setViewName("index");registry.addViewController("/404").setViewName("404"); // 配置404页面}@Overridepublic void addResourceHandlers(ResourceHandlerRegistry registry) {
// 设置静态资源目录registry.addResourceHandler("/static/**").addResourceLocations("classpath:/webapp/static/").addResourceLocations("classpath:/resources/webapp/static/");}
}
如果访问不到页面的,可以检查下application配置文件是否有以下配置
#spring.web.resources.add-mappings=false
#spring.resources.add-mappings=false
如果有的话,需要进行注释。这两个配置都是不进行静态资源的映射。所以会导致html等无法访问。
增加spring boot web不存在的url返回200状态码
1. application配置文件增加以下配置
spring.mvc.throw-exception-if-no-handler-found=true
2. 增加一个error配置类的实现
package ;import org.springframework.boot.web.server.ErrorPage;
import org.springframework.boot.web.server.ErrorPageRegistrar;
import org.springframework.boot.web.server.ErrorPageRegistry;
import org.springframework.context.annotation.Configuration;
import org.springframework.http.HttpStatus;@Configuration
public class ErrorConfig implements ErrorPageRegistrar {@Overridepublic void registerErrorPages(ErrorPageRegistry registry) {ErrorPage[] errorPages = new ErrorPage[1];errorPages[0] = new ErrorPage(HttpStatus.NOT_FOUND, "/404.do");registry.addErrorPages(errorPages);}
}
3. 增加一个mapping
import org.springframework.http.HttpStatus;
import org.springframework.http.ResponseEntity;@RequestMapping(value = {"/404.do"})public ResponseEntity<Map<String, String>> error() {Map<String, String> retMap = new HashMap<>();retMap.put("message", "请求路径不存在");return new ResponseEntity<Map<String, String>> (retMap, HttpStatus.OK);}
访问一下

vue 打包配置:
1. main.js 配置 axios相关,这里没有进行增加前缀路由,注释调的api是增加的,但是打包后,访问的页面里面也加上了,不知道为什么,所有就去掉吧
// var baseURL = '/api';
var baseURL = 'http://localhost:8080';
axios.interceptors.request.use(config=>{config.baseURL= baseURL;config.headers.post["Origin"] = baseURL;config.headers.post["Referer"] = baseURL;return config;
});
axios.defaults.withCredentials = true;
axios.defaults.headers.post["Origin"] = baseURL;
axios.defaults.headers.post["Referer"] = baseURL;Vue.prototype.$request=axios;
2. package.json 文件, scripts 中没有build的可以增加一个,如果执行 npm run build 报错的,可以改成build+后缀的其它。 我这里的话 npm run buildt
{"name": "vue-admin-template","version": "4.4.0","description": "A vue admin template with Element UI & axios & iconfont & permission control & lint","author": "","scripts": {"dev": "vue-cli-service serve","build:prod": "vue-cli-service build","buildt": "npm install && vue-cli-service build","preview": "node build/index.js --preview","svgo": "svgo -f src/icons/svg --config=src/icons/svgo.yml","lint": "eslint --ext .js,.vue src","test:unit": "jest --clearCache && vue-cli-service test:unit","test:ci": "npm run lint && npm run test:unit"},3. vue.config.js文件
module.exports = {publicPath: '/',outputDir: '../your-web/src/main/resources/webapp',assetsDir: 'static',lintOnSave: process.env.NODE_ENV === 'development',productionSourceMap: false,devServer: {port: 2234,open: true,overlay: {warnings: false,errors: true},// proxy: { // '/api': { // target: 'http://localhost:8080',// ws: true,// changeOrigin: true ,// pathRewrite:{// '^/api':''// }// } // }},这里的话,axios没有设置前缀,所以这里的路由也就不需要了。注释掉。
outputDir 要输出的目录路径,这里的话,我这里打包的不在当前这个目录下面。
生成到和当前node父目录同层的指定目录下。
