CocosCreator3.8研究笔记(七)CocosCreator 节点和组件的介绍
相信很多新手朋友,肯定会问,CocosCreator 中什么是节点?什么是组件?
一、什么是组件(Component)?
Cocos Creator 3.8 的工作流程是以组件式开发为核心,即以组合而非继承的方式进行游戏中各种元素的构建,被称为组件式架构(Entity-Component System)。
所有继承自Component的类都称为组件类,其对象称为组件,组件是由引擎创建,组件类必须是 cc 类。
例如:
import { Component } from 'cc';@ccclass("MyComponent")
class MyComponent extends Component {
}
二、什么是节点(Node)?
节点是承载组件的实体,我们通过将具有各种功能的组件挂载到节点上,来让节点具有各式各样的表现和功能。
节点是场景的基础组成单位。节点之间是树状的组织关系,每个节点可以有多个子节点。
节点特性:
- 节点包含一组基础属性(位移、旋转、缩放),节点之间通过一组相对变换关系组织在一起。
- 节点间的更新顺序是逐级更新的,子节点的更新依赖于父节点,子节点跟随父节点变换。
- 节点上可以添加组件,将多个组件与节点关联在一起。
三、组件的创建和销毁
组件的生命周期完全由节点操控,与普通类对象不同,组件不能由构造函数创建:
const component = new NewComponent(); // 错误:组件无法由构造函数创建
组件必须由节点来创建,通过如下方法将组件添加到节点上:
const newComponent = node.addComponent(NewComponent);
组件不需要的时候,通过如下方法移除指定的组件并将其销毁:
node.removeComponent(newComponent)
四、组件执行顺序
在同一个节点上的组件执行顺序,可以通过设置组件的 executionOrder来实现。
executionOrder 越小,该组件相对其它组件就会越先执行。
executionOrder 默认为 0,因此设置为负数的话,就会在其它默认的组件之前执行。
例如:有两个组件 CompA.ts 和 CompB.ts ,在main.ts 中使用,假如我们希望CompB.ts 优先执行。
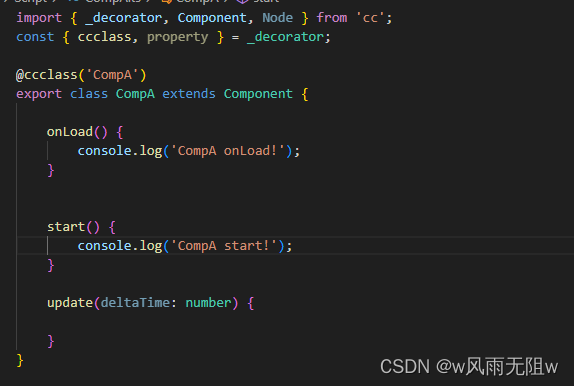
CompA.ts 脚本内容:
import { _decorator, Component, Node } from 'cc';
const { ccclass, property } = _decorator;@ccclass("CompA")
export class CompA extends Component {onLoad () {console.log('CompA onLoad!');}start () {console.log('CompA start!');}update (deltaTime: number) {console.log('CompA update!');}
}
! 
CompB.ts 脚本内容:
import { _decorator, Component, Node } from 'cc';
const { ccclass, property,executionOrder } = _decorator;@ccclass("CompB")
@executionOrder(-1)
export class CompB extends Component {onLoad () {console.log('CompB onLoad!');}start () {console.log('CompB start!');}update (deltaTime: number) {console.log('CompB update!');}
}

main.ts 脚本内容:
import { _decorator, Component, log } from 'cc';
const { ccclass, property } = _decorator;import { CompB } from './CompB';
import { CompA } from './CompA';@ccclass('main')
export class main extends Component {@property({type:CompA})private CompA = null;@property({type:CompB})private CompB = null;onLoad() {}start() {}update(deltaTime: number) {}
}
执行顺序如下:

五、 组件的生命周期
Cocos Creator 为组件提供了生命周期的回调函数,只需要定义特定的回调函数,Creator 会在特定的时期自动执行相关脚本,开发者不需要手工调用它们。
按生命周期触发先后,回调函数有以下:
- onLoad
- onEnable
- start
- update
- lateUpdate
- onDisable
- onDestroy
1、onLoad
onLoad 回调,在脚本初始化阶段回调,当节点首次激活时触发。
例如:所在的场景被载入,或者所在节点被激活的情况下。
在 onLoad 阶段,可以保证获取到场景中的其他节点,以及节点关联的资源数据。 通常会在 onLoad 阶段去做一些初始化相关的操作。
例如:
import { _decorator, CCInteger, Component, EventMouse, input, Node,Label, Sprite, find} from 'cc';const { ccclass, property,type,integer} = _decorator;@ccclass('PlayerControl')
export class PlayerControl extends Component {@property({type:Node,visible:true})node:Node = null;@property({type:Node,visible:true})nodeChild:Node = null;onLoad() {this.nodeChild = find('test/sp',this.node);}
}
2、onEnable
当组件的 enabled 属性从 false 变为 true 时,或者所在节点的 active 属性从 false 变为 true 时,会激活 onEnable 回调。
倘若节点第一次被创建且 enabled 为 true,则会在 onLoad 之后,start 之前被调用。
3、start
start回调函数会在组件第一次激活前,也就是第一次执行update` 之前触发。
start 通常用于初始化一些中间状态的数据,这些数据可能在 update 时会发生改变,并且被频繁的 enable 和 disable。
import { _decorator, CCInteger, Component, EventMouse, input, Node,Label, Sprite, find} from 'cc';const { ccclass, property,type,integer} = _decorator;@ccclass('PlayerControl')
export class PlayerControl extends Component {@property({type:Node,visible:true})node:Node = null;@property({type:Node,visible:true})nodeChild:Node = null;private _timer: number = 0.0;onLoad() {this.nodeChild = find('test/sp',this.node);}start() {this._timer = 1.0;  }update(deltaTime: number) {this._timer += deltaTime;if(this._timer >= 10.0){console.log('enabled false ');this.enabled = false;}}}
4、update
游戏开发的一个关键点是在每一帧渲染前更新物体的状态和方位。这些更新操作通常都放在 update 回调中。
import { _decorator, Component, Node } from 'cc';
const { ccclass, property } = _decorator;@ccclass("PlayerControl")
export class PlayerControl extends Component {@property({type:Node,visible:true})node:Node = null;update (deltaTime: number) {this.node.setPosition(0.0,10.0*deltaTime,0.0);}
}
5、lateUpdate
如果我们要在动效(如动画、粒子、物理等)更新后进行一些操作,或者在所有组件的 update 都执行完之后才进行其它操作,那就需要用到 lateUpdate 回调。
import { _decorator, Component, Node } from 'cc';
const { ccclass, property } = _decorator;@ccclass("PlayerControl")
export class PlayerControl extends Component {@property({type:Node,visible:true})node:Node = null;lateUpdate (deltaTime: number) {this.node.setPosition(0.0,deltaTime,0.0);}
}
6、onDisable
当组件的 enabled 属性从 true 变为 false 时,或者所在节点的 active 属性从 true 变为 false 时,会激活 onDisable 回调。
7、onDestroy
当组件或者所在节点调用了 destroy(),则会调用 onDestroy 回调,并在当帧结束时统一回收组件。