uni-app开发小程序中遇到的map地图的点聚合以及polygon划分区域问题
写一篇文章来记录以下我在开发小程序地图过程中遇到的两个小坑吧,一个是点聚合,用的是joinCluster这个指令,另一个是polygon在地图上划分多边形的问题:
1.首先说一下点聚合问题,由于之前没有做过小程序地图问题,所以浏览了很多资料,最终发现看的多了反而杂乱,而且这次要完成的不是地图单点定位或者地图导航,而是地图撒点,在地图上要显示很多定位点,那么点数过多且覆盖就成了一个要解决的问题,我上网搜了大量的资料,要么自己手写,要么引入很多其它组件方式看起来比较复杂,直接说最简单的结论,在撒的markers点内部直接加一个joinCluster: true即可,藏在官方文档marker介绍下的最下面:
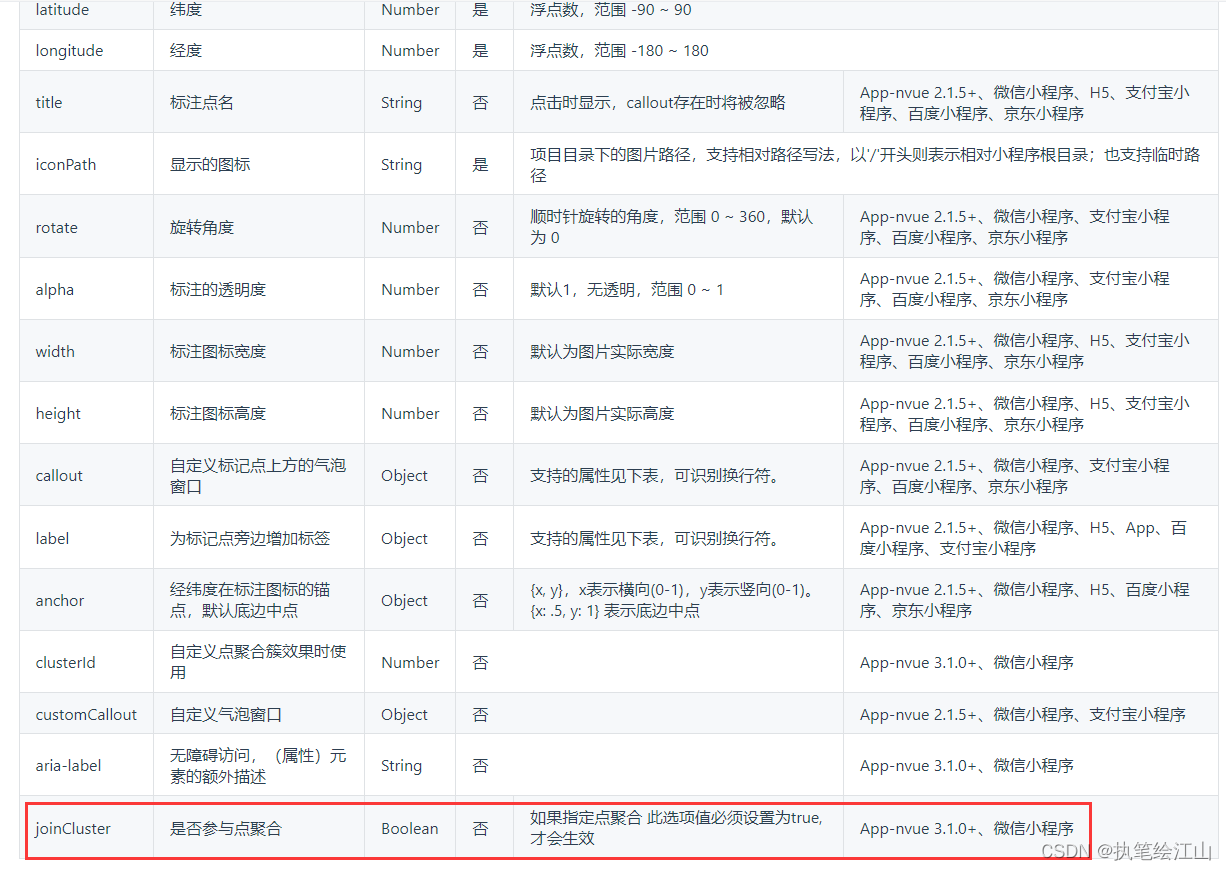
然后最坑的来了,加了这个之后会发现微信开发者工具里面缩放地图并没有反应,无论缩放地图与否,都不会聚合,实际上这是开发者工具的问题,它是一个模拟器不能完全实现手机小程序上的所有功能,这时候如果打开真机调试或者二维码预览即可发现点聚合功能是可以实现的,下面给大家一段代码:
<template><view class="base_body"><map :markers="markers" id="map1" style="width: 100%; height: 100vh;" :latitude="latitude":longitude="longitude"><cover-view slot="callout"><block v-for="(item,index) in markers" :key="index"><cover-view class="customCallout" :marker-id="item.id"><cover-view class="content">{{item.title}}</cover-view></cover-view></block></cover-view></map></view>
</template><script>export default {data() {return {map: '',latitude: 39.890, // 地图默认显示的维度longitude: 116.39752, // 地图默认显示的纬度markers: [{ // 标记点id: 1,latitude: 39.890,longitude: 116.39752,title: "点击提示1",joinCluster: true,}, {id: 2,latitude: 39.891,longitude: 116.39752,title: "点击提示2",joinCluster: true,}, {id: 3,latitude: 39.892,longitude: 116.39752,title: "点击提示3",joinCluster: true,}, {id: 4,latitude: 39.893,longitude: 116.39752,title: "点击提示4",joinCluster: true,}, ],}},onLoad() {},onReady() {},methods: {}}
</script><style>.base_body {width: 100%;height: 100%;position: absolute;}/* 水平,垂直居中 */.base_all_center {justify-content: center;align-items: center;}/* 垂直居中 */.base_center_vertical {display: flex;align-items: center;}/* 水平居中 */.base_center_horizontal {display: flex;justify-content: center;}/* 垂直布局 */.base_column {display: flex;flex-direction: column;}/* 横向布局 */.base_row {display: flex;flex-direction: row;}/* 基础dialog */.base_dialog {width: 100%;height: 100%;position: absolute;top: 0px;background: rgba(0, 0, 0, 0.5);}.customCallout {box-sizing: border-box;background-color: #fff;border: 1px solid #ccc;border-radius: 30px;width: 150px;height: 40px;display: inline-flex;padding: 5px 20px;justify-content: center;align-items: center;}.content {flex: 0 1 auto;margin: 0 10px;font-size: 14px;}
</style>
这一段代码不需要有任何修改,直接新建一个demo页面然后复制进去直接运行到微信小程序,之后启动真机调试即可发现点聚合功能是实现了的,更多细节大家可以自行了解。
2.第二个问题是划分多边形的问题,我查阅了微信官方文档上面说使用polygon即可:
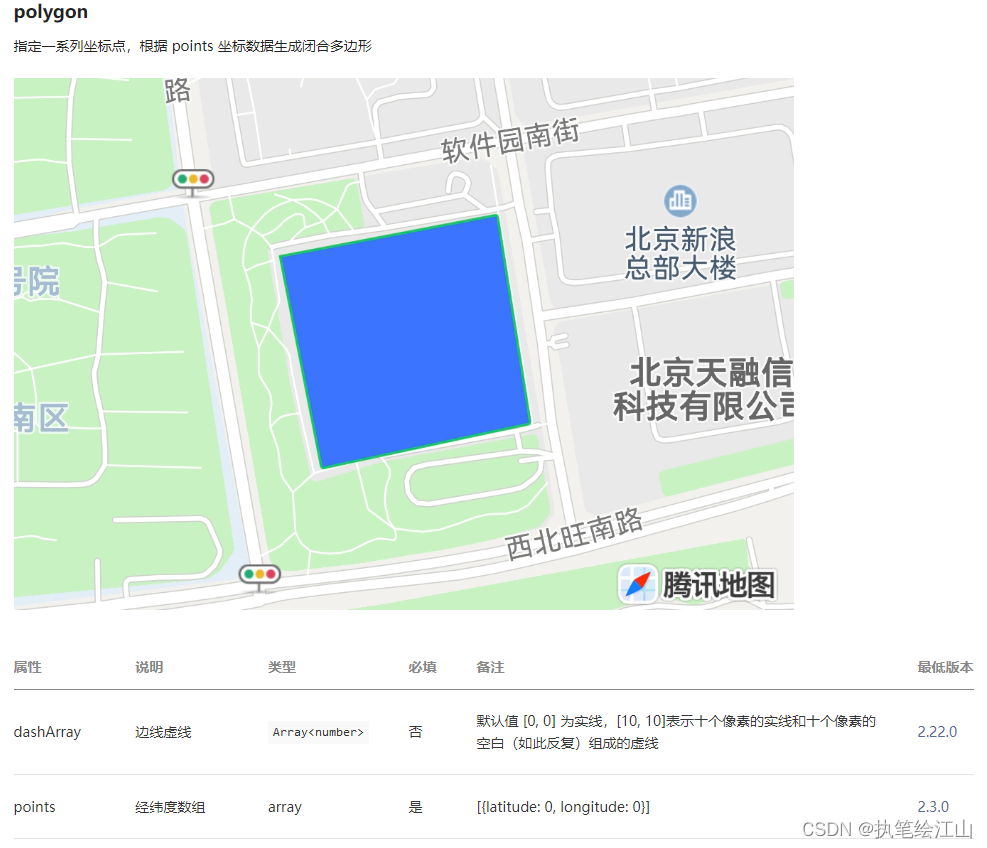
于是我使用了,但是无论我怎么填写数据都没用,一度怀疑自我,这时候发现还是要以uni-app官方文档为准,我死磕微信开发文档导致自己怀疑自我,两者有所区别,这是uni-app官方文档的介绍:
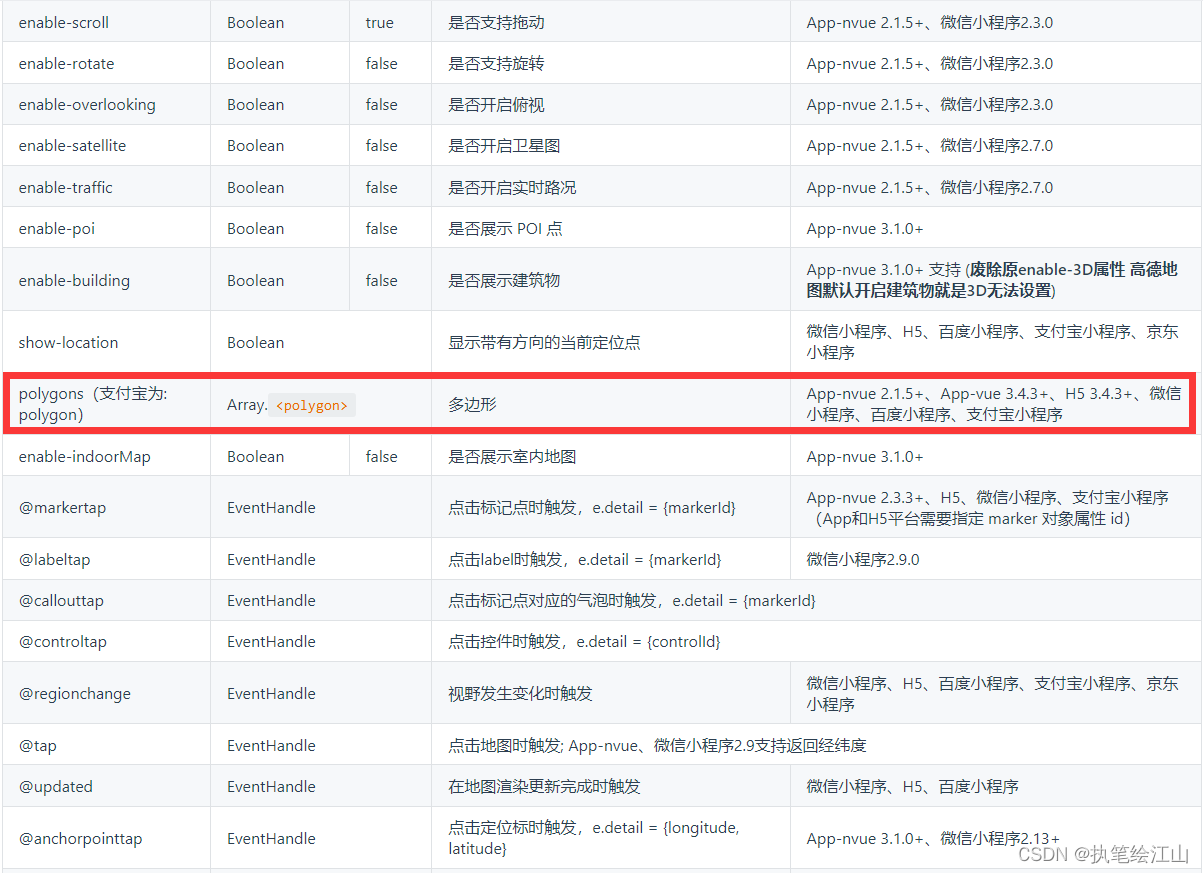
没错,uni-app官方文档显示应该加一个s,用的是polygons,所以仅仅加一个s即可,非常搞心态,而且即使是uni-app官网下方对于这个的介绍也没加s:
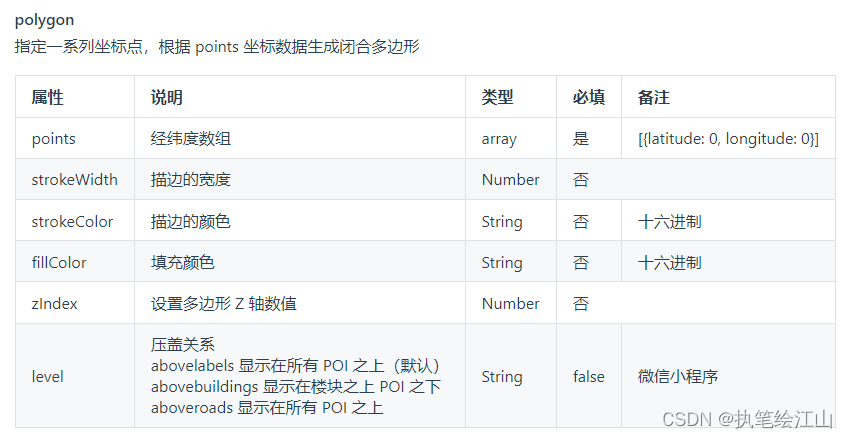
下面也给大家一段代码是划了一个多边形,和上面一样,直接复制代码进去运行即可,不需要修改其它东西 :
<template><view class="base_body"><map :polygons="polygon" id="map1" style="width: 100%; height: 100vh;" :latitude="latitude":longitude="longitude"><cover-view slot="callout"><block v-for="(item,index) in markers" :key="index"><cover-view class="customCallout" :marker-id="item.id"><cover-view class="content">{{item.title}}</cover-view></cover-view></block></cover-view></map></view>
</template><script>export default {data() {return {map: '',latitude: 39.890, // 地图默认显示的维度longitude: 116.39752, // 地图默认显示的纬度polygon: [{points: [{latitude: 39.890,longitude: 116.39752},{latitude: 39.891,longitude: 116.39852},{latitude: 39.892,longitude: 116.39852},{latitude: 39.893,longitude: 116.39752},],strokeWidth: "2",strokeColor: "#2223FD",fillColor: "#9FA4F6"}, ],}},}
</script><style>.base_body {width: 100%;height: 100vh;position: absolute;}/* 水平,垂直居中 */.base_all_center {justify-content: center;align-items: center;}/* 垂直居中 */.base_center_vertical {display: flex;align-items: center;}/* 水平居中 */.base_center_horizontal {display: flex;justify-content: center;}/* 垂直布局 */.base_column {display: flex;flex-direction: column;}/* 横向布局 */.base_row {display: flex;flex-direction: row;}/* 基础dialog */.base_dialog {width: 100%;height: 100%;position: absolute;top: 0px;background: rgba(0, 0, 0, 0.5);}.customCallout {box-sizing: border-box;background-color: #fff;border: 1px solid #ccc;border-radius: 30px;width: 150px;height: 40px;display: inline-flex;padding: 5px 20px;justify-content: center;align-items: center;}.content {flex: 0 1 auto;margin: 0 10px;font-size: 14px;}
</style>
最终结果就是显示一块多边形:
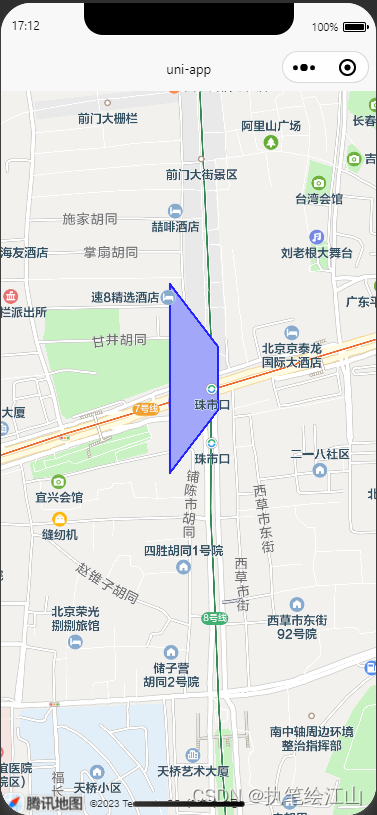
先说这么多,后续遇到什么问题我会继续上传的,诸君共勉。