Google colab部署VITS——零门槛快速克隆任意角色声音
目录
序言
查看GPU配置
复制代码库并安装运行环境
选择预训练模型
上传视频链接(单个不应长于20分钟)
自动处理所有上传的数据
训练质量相关:实验发现目前使用CJ模型+勾选ADD_AUXILIARY,对于中/日均能训练出最好的效果,第一次训练建议默认使用该组
开始训练
微调完成后,在这里尝试效果
下载模型
模型演示
Text-to-Speech
Voice Conversion
序言
语音合成技术是人工智能领域的重要分支,近年来取得了长足的进步。涌现出众多优秀的语音合成模型,其中VITS和DDSP是两种代表性的模型。
VITS模型采用了变分自编码器和声码器的组合架构,在长期训练下可以生成逼真、自然的语音。然而,由于其对显存的要求较高,不适合在普通的个人电脑上进行本地部署训练。
为了降低VITS模型的入手门槛,我选择使用Google Colab来实现本地部署训练。Google Colab是一个免费的云端计算平台,可以提供强大的计算能力。在此基础上,其简便性进行了进一步强化,目前可以仅通过视频链接来一键进行数据集处理,可以大大节省用户的时间和精力。
当然,VITS模型也存在一定的缺点,在短时间和数据集较少、质量较低的情况下,其效果会不如DDSP。因此,在选择合适的语音合成模型时,需要根据实际情况进行考量。
查看GPU配置
# 查看GPU配置
# Check GPU configuration
!nvidia-smi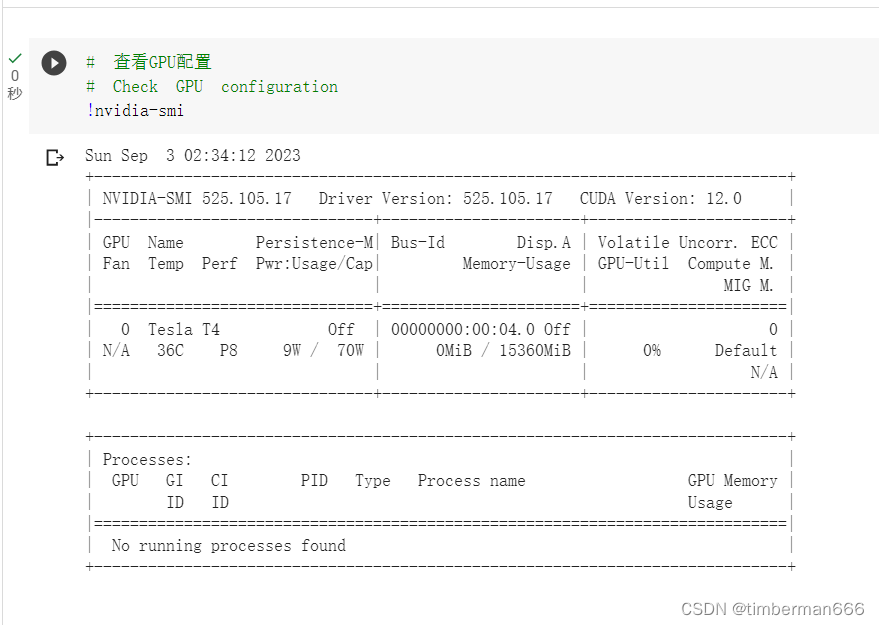
复制代码库并安装运行环境
#@title STEP 1 复制代码库并安装运行环境
#@markdown #STEP 1 (6 min)
#@markdown ##复制代码库并安装运行环境
#@markdown ##Clone repository & Build environment!git clone https://github.com/Plachtaa/VITS-fast-fine-tuning.git
!python -m pip install --upgrade --force-reinstall regex
!python -m pip install --force-reinstall soundfile
!python -m pip install --force-reinstall gradio
!python -m pip install imageio==2.4.1
!python -m pip install --upgrade youtube-dl
!python -m pip install moviepy
%cd VITS-fast-fine-tuning!python -m pip install --no-build-isolation -r requirements.txt
!python -m pip install --upgrade numpy
!python -m pip install --upgrade --force-reinstall numba
!python -m pip install --upgrade Cython!python -m pip install --upgrade pyzmq
!python -m pip install pydantic==1.10.4
!python -m pip install ruamel.yaml# build monotonic align
%cd monotonic_align/
!mkdir monotonic_align
!python setup.py build_ext --inplace
%cd ..
!mkdir pretrained_models
# download data for fine-tuning
!wget https://huggingface.co/datasets/Plachta/sampled_audio4ft/resolve/main/sampled_audio4ft_v2.zip
!unzip sampled_audio4ft_v2.zip
# create necessary directories
!mkdir video_data
!mkdir raw_audio
!mkdir denoised_audio
!mkdir custom_character_voice
!mkdir segmented_character_voice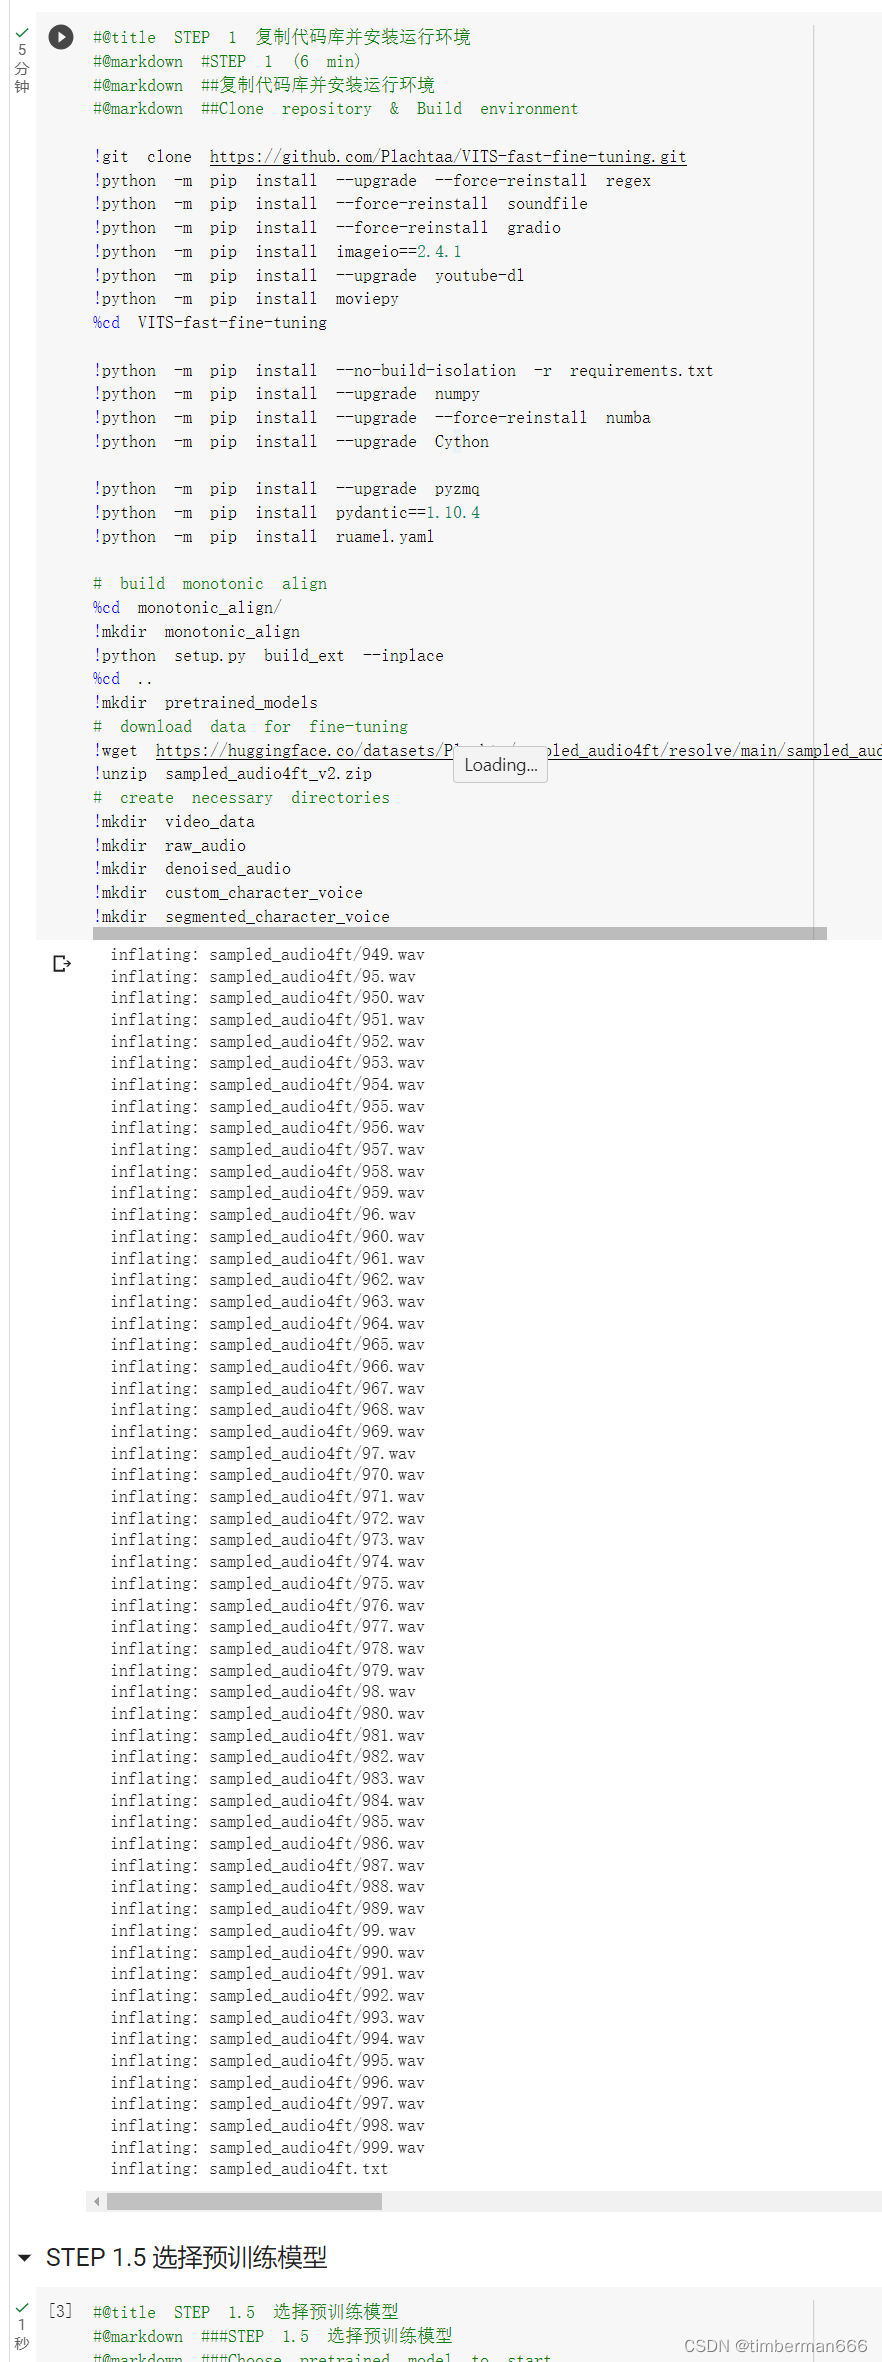
选择预训练模型
#@title STEP 1.5 选择预训练模型
#@markdown ###STEP 1.5 选择预训练模型
#@markdown ###Choose pretrained model to start
#@markdown CJE为中日英三语模型,CJ为中日双语模型,C为纯中文模型#@markdown CJE for Chinese, Japanese & English model,CJ for Chinese & Japanese model
PRETRAINED_MODEL = "CJ" #@param ["CJE","CJ","C"]
if PRETRAINED_MODEL == "CJ":!wget https://huggingface.co/spaces/sayashi/vits-uma-genshin-honkai/resolve/main/model/D_0-p.pth -O ./pretrained_models/D_0.pth!wget https://huggingface.co/spaces/sayashi/vits-uma-genshin-honkai/resolve/main/model/G_0-p.pth -O ./pretrained_models/G_0.pth!wget https://huggingface.co/spaces/sayashi/vits-uma-genshin-honkai/resolve/main/model/config.json -O ./configs/finetune_speaker.json
elif PRETRAINED_MODEL == "CJE":!wget https://huggingface.co/spaces/Plachta/VITS-Umamusume-voice-synthesizer/resolve/main/pretrained_models/D_trilingual.pth -O ./pretrained_models/D_0.pth!wget https://huggingface.co/spaces/Plachta/VITS-Umamusume-voice-synthesizer/resolve/main/pretrained_models/G_trilingual.pth -O ./pretrained_models/G_0.pth!wget https://huggingface.co/spaces/Plachta/VITS-Umamusume-voice-synthesizer/resolve/main/configs/uma_trilingual.json -O ./configs/finetune_speaker.json
elif PRETRAINED_MODEL == "C":!wget https://huggingface.co/datasets/Plachta/sampled_audio4ft/resolve/main/VITS-Chinese/D_0.pth -O ./pretrained_models/D_0.pth!wget https://huggingface.co/datasets/Plachta/sampled_audio4ft/resolve/main/VITS-Chinese/G_0.pth -O ./pretrained_models/G_0.pth!wget https://huggingface.co/datasets/Plachta/sampled_audio4ft/resolve/main/VITS-Chinese/config.json -O ./configs/finetune_speaker.json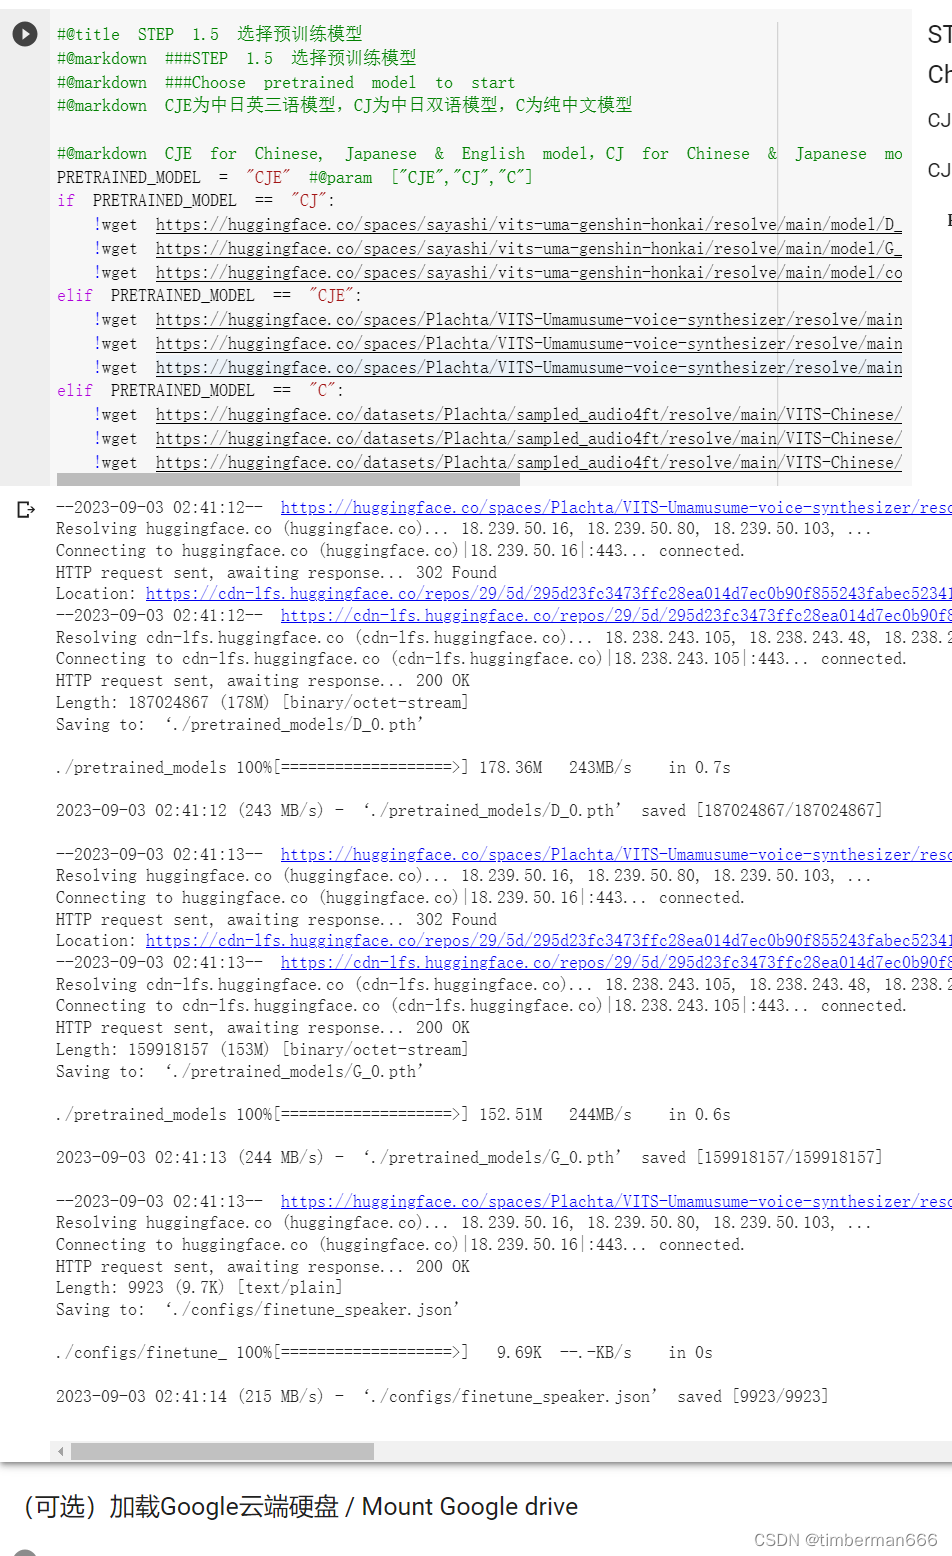
上传视频链接(单个不应长于20分钟)
#@markdown 运行该代码块会出现一个文件上传的入口,上传单个`.txt`文件。若格式正确的话,视频会自动下载并将下载后的文件名打印在下方。#@markdown Running this code block will prompt you to upload a file.
#@markdown Please upload a single `.txt` file. If you have put the links in the correct format,
#@markdown the videos will be automatically downloaded and displayed below.
%run scripts/download_video.py
!ls ./video_data/

自动处理所有上传的数据
#@markdown 运行该单元格会对所有上传的数据进行自动去背景音&标注。
#@markdown 由于需要调用Whisper和Demucs,运行时间可能较长。#@markdown Running this codeblock will perform automatic vocal seperation & annotation.
#@markdown Since this step uses Whisper & Demucs, it may take a while to complete.
# 将所有视频(无论是上传的还是下载的,且必须是.mp4格式)抽取音频
%run scripts/video2audio.py
# 将所有音频(无论是上传的还是从视频抽取的,必须是.wav格式)去噪
!python scripts/denoise_audio.py
# 分割并标注长音频
!python scripts/long_audio_transcribe.py --languages "{PRETRAINED_MODEL}" --whisper_size large
# 标注短音频
!python scripts/short_audio_transcribe.py --languages "{PRETRAINED_MODEL}" --whisper_size large
# 底模采样率可能与辅助数据不同,需要重采样
!python scripts/resample.py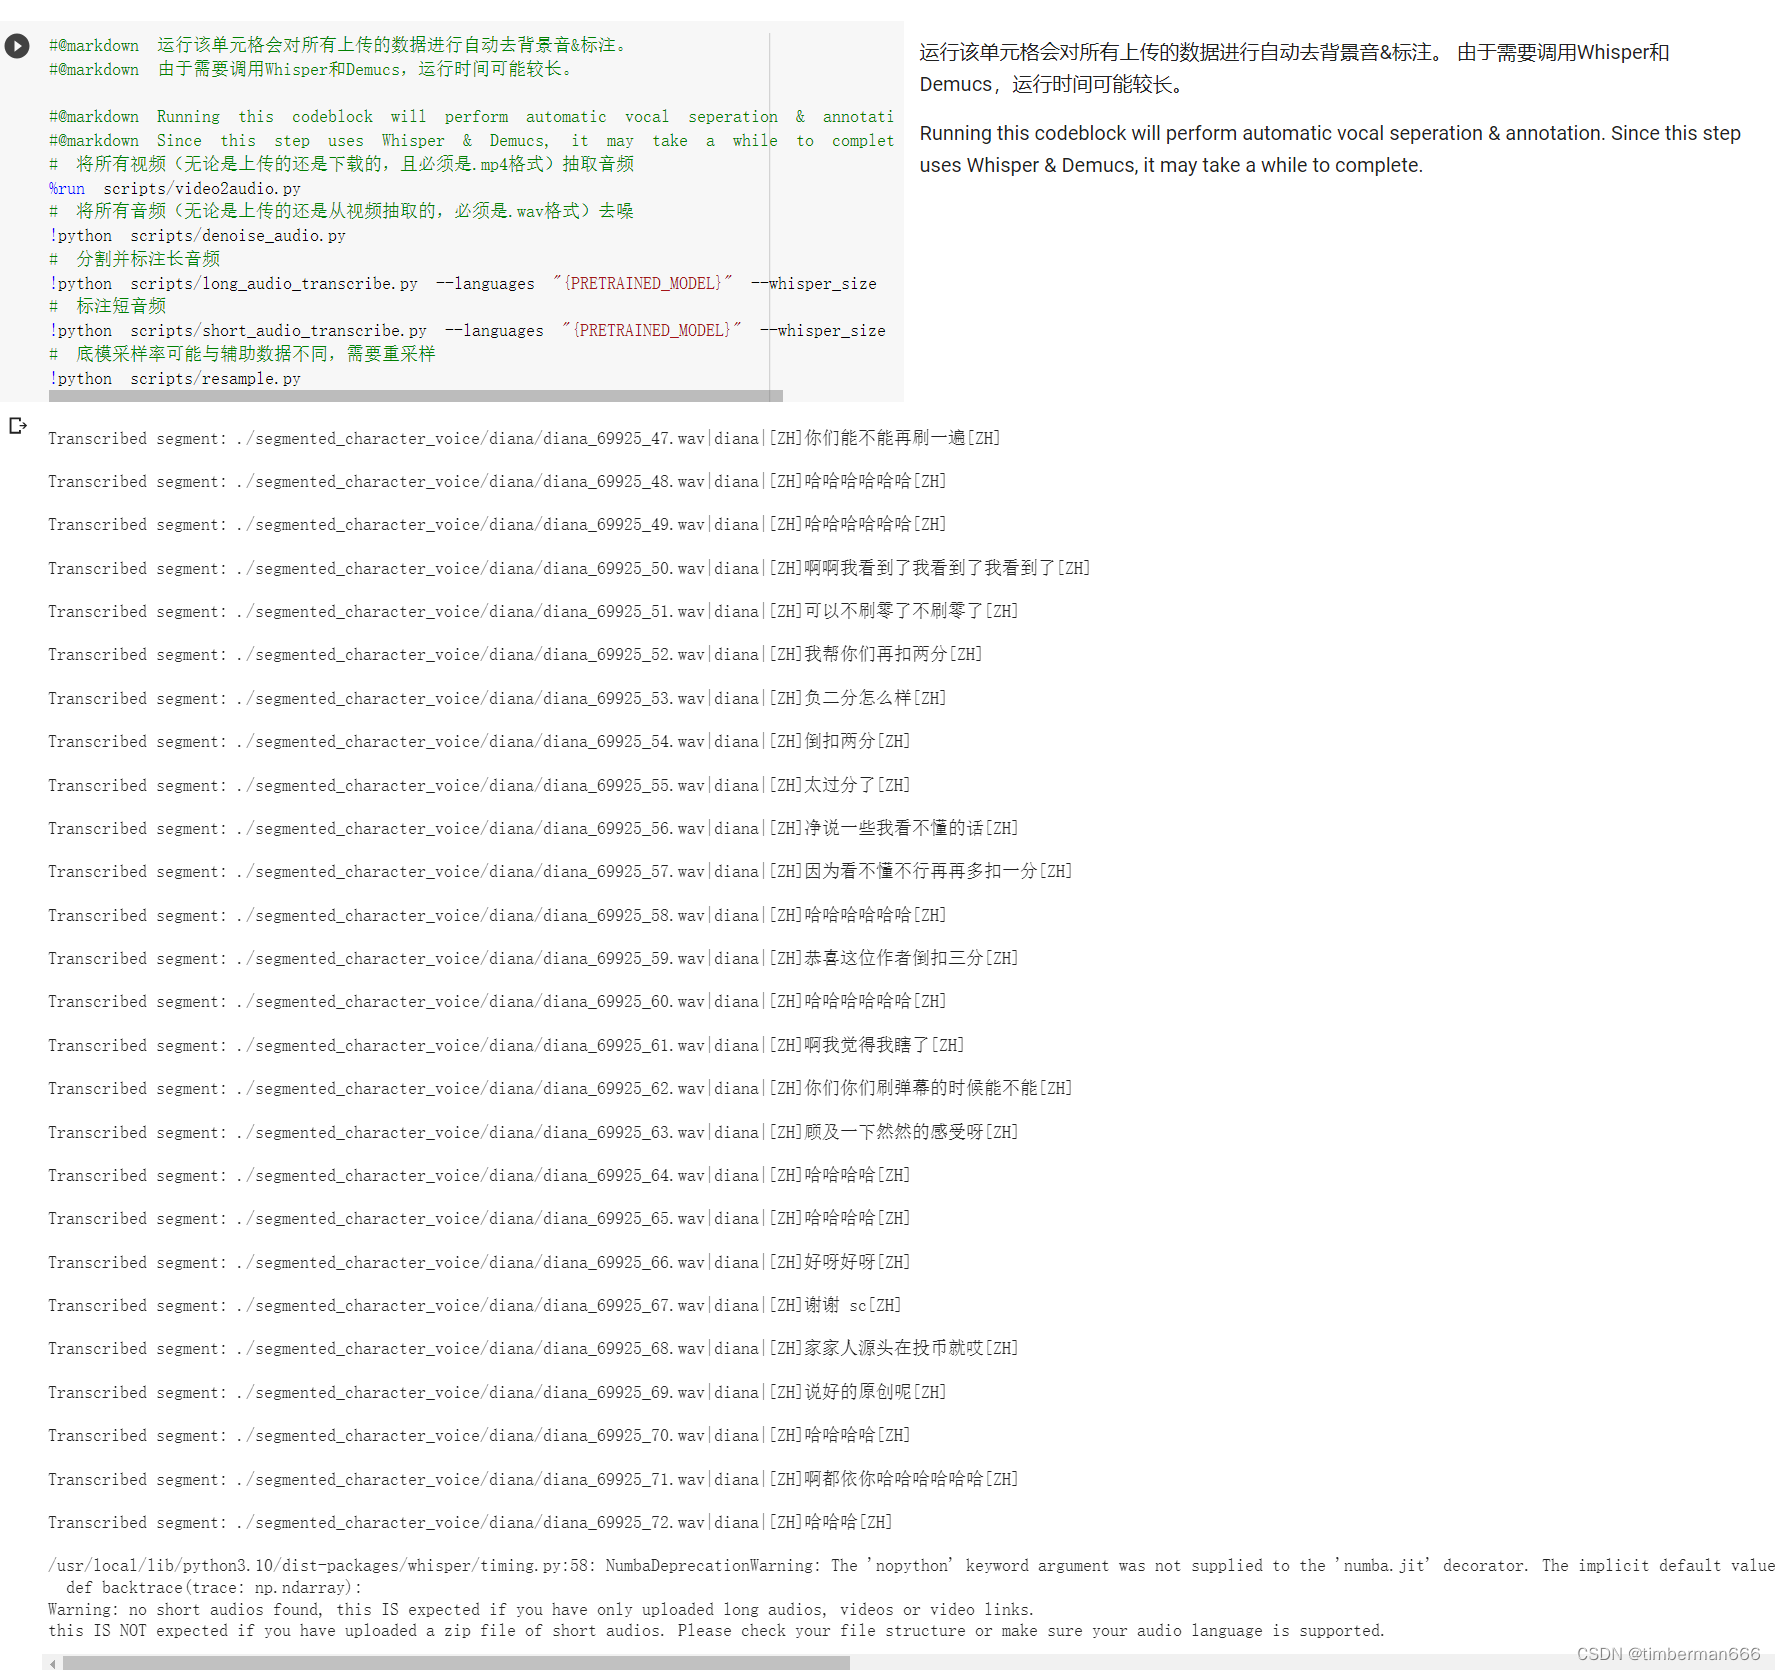
训练质量相关:实验发现目前使用CJ模型+勾选ADD_AUXILIARY,对于中/日均能训练出最好的效果,第一次训练建议默认使用该组
#@markdown ##STEP 3.5
#@markdown 运行该单元格会生成划分好训练/测试集的最终标注,以及配置文件#@markdown Running this block will generate final annotations for training & validation, as well as config file.#@markdown 选择是否加入辅助训练数据:/ Choose whether to add auxiliary data:
ADD_AUXILIARY = False #@param {type:"boolean"}
#@markdown 辅助训练数据是从预训练的大数据集抽样得到的,作用在于防止模型在标注不准确的数据上形成错误映射。#@markdown Auxiliary data is to prevent overfitting when the audio samples are small or with low quality.#@markdown 以下情况请勾选:#@markdown 总样本少于100条/样本质量一般或较差/样本来自爬取的视频#@markdown 以下情况可以不勾选:#@markdown 总样本量很大/样本质量很高/希望加速训练/只有二次元角色# assert(not (ADD_AUXILIARY and PRETRAINED_MODEL != "CJE")), "add auxiliary data is available only available for CJE model!"
if ADD_AUXILIARY:%run preprocess_v2.py --add_auxiliary_data True --languages "{PRETRAINED_MODEL}"
else:%run preprocess_v2.py --languages "{PRETRAINED_MODEL}"
开始训练
#@markdown #STEP 4 (>=20 min)
#@markdown 开始微调模型。
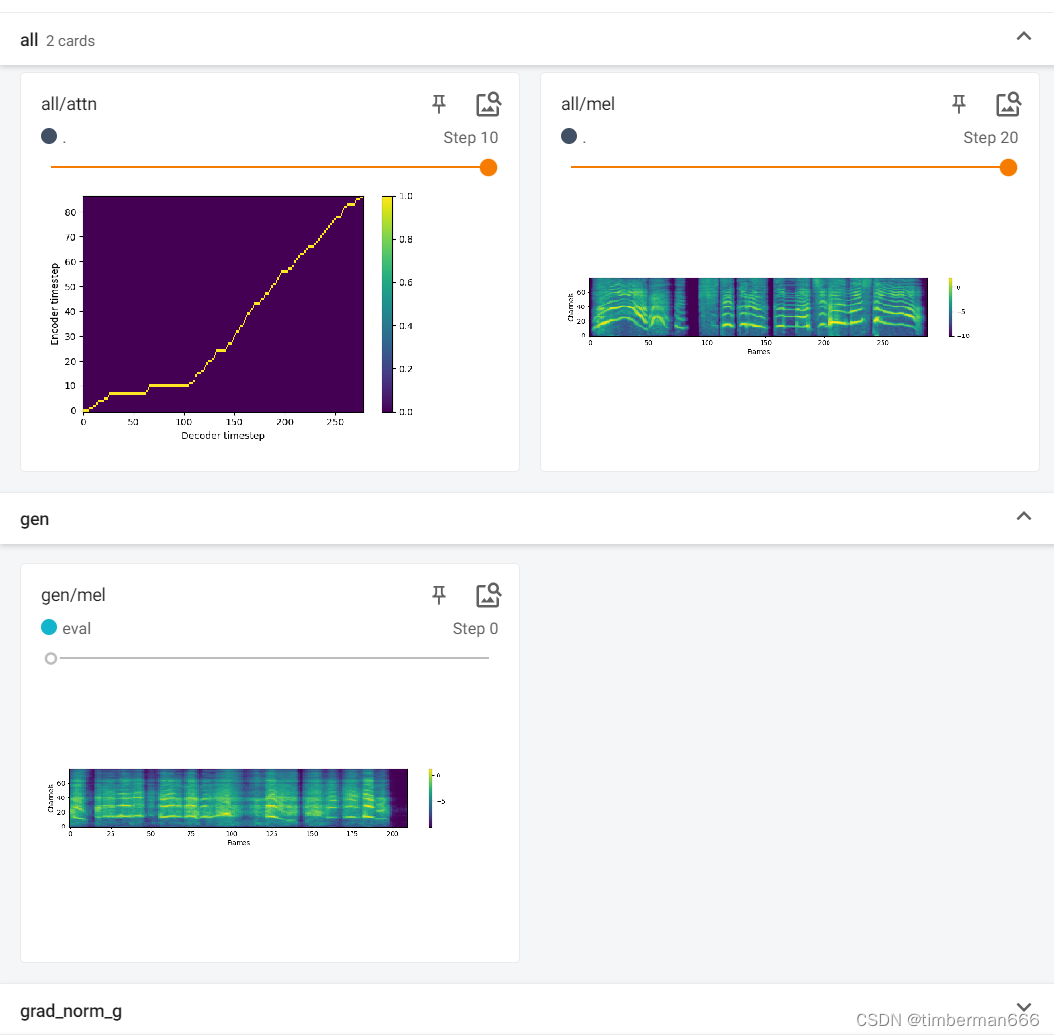
#@markdown 训练时长取决于你录入/上传的音频总数。#@markdown 根据声线和样本质量的不同,所需的训练epochs数也不同。#@markdown 你也可以在Tensorboard中预览合成效果,若效果满意可提前停止。#@markdown Model fine-tuning
#@markdown Total time cost depends on the number of voices you recorded/uploaded.#@markdown Best epoch number varies depending on different uploaded voices / sample quality.#@markdown You can also preview synthezied audio in Tensorboard, it's OK to shut down training manually if you find the quality is satisfying.
import os
os.environ['TENSORBOARD_BINARY'] = '/usr/local/bin/tensorboard'if os.path.exists("/content/drive/MyDrive/"):!python scripts/rearrange_speaker.py!cp ./finetune_speaker.json ../drive/MyDrive/finetune_speaker.json!cp ./moegoe_config.json ../drive/MyDrive/moegoe_config.json%reload_ext tensorboard
%tensorboard --logdir "./OUTPUT_MODEL"
Maximum_epochs = "200" #@param {type:"string"}
#@markdown 继续之前的模型训练/Continue training from previous checkpoint
CONTINUE = True #@param {type:"boolean"}
if CONTINUE:!python finetune_speaker_v2.py -m "./OUTPUT_MODEL" --max_epochs "{Maximum_epochs}" --drop_speaker_embed False --cont True
else:!python finetune_speaker_v2.py -m "./OUTPUT_MODEL" --max_epochs "{Maximum_epochs}" --drop_speaker_embed True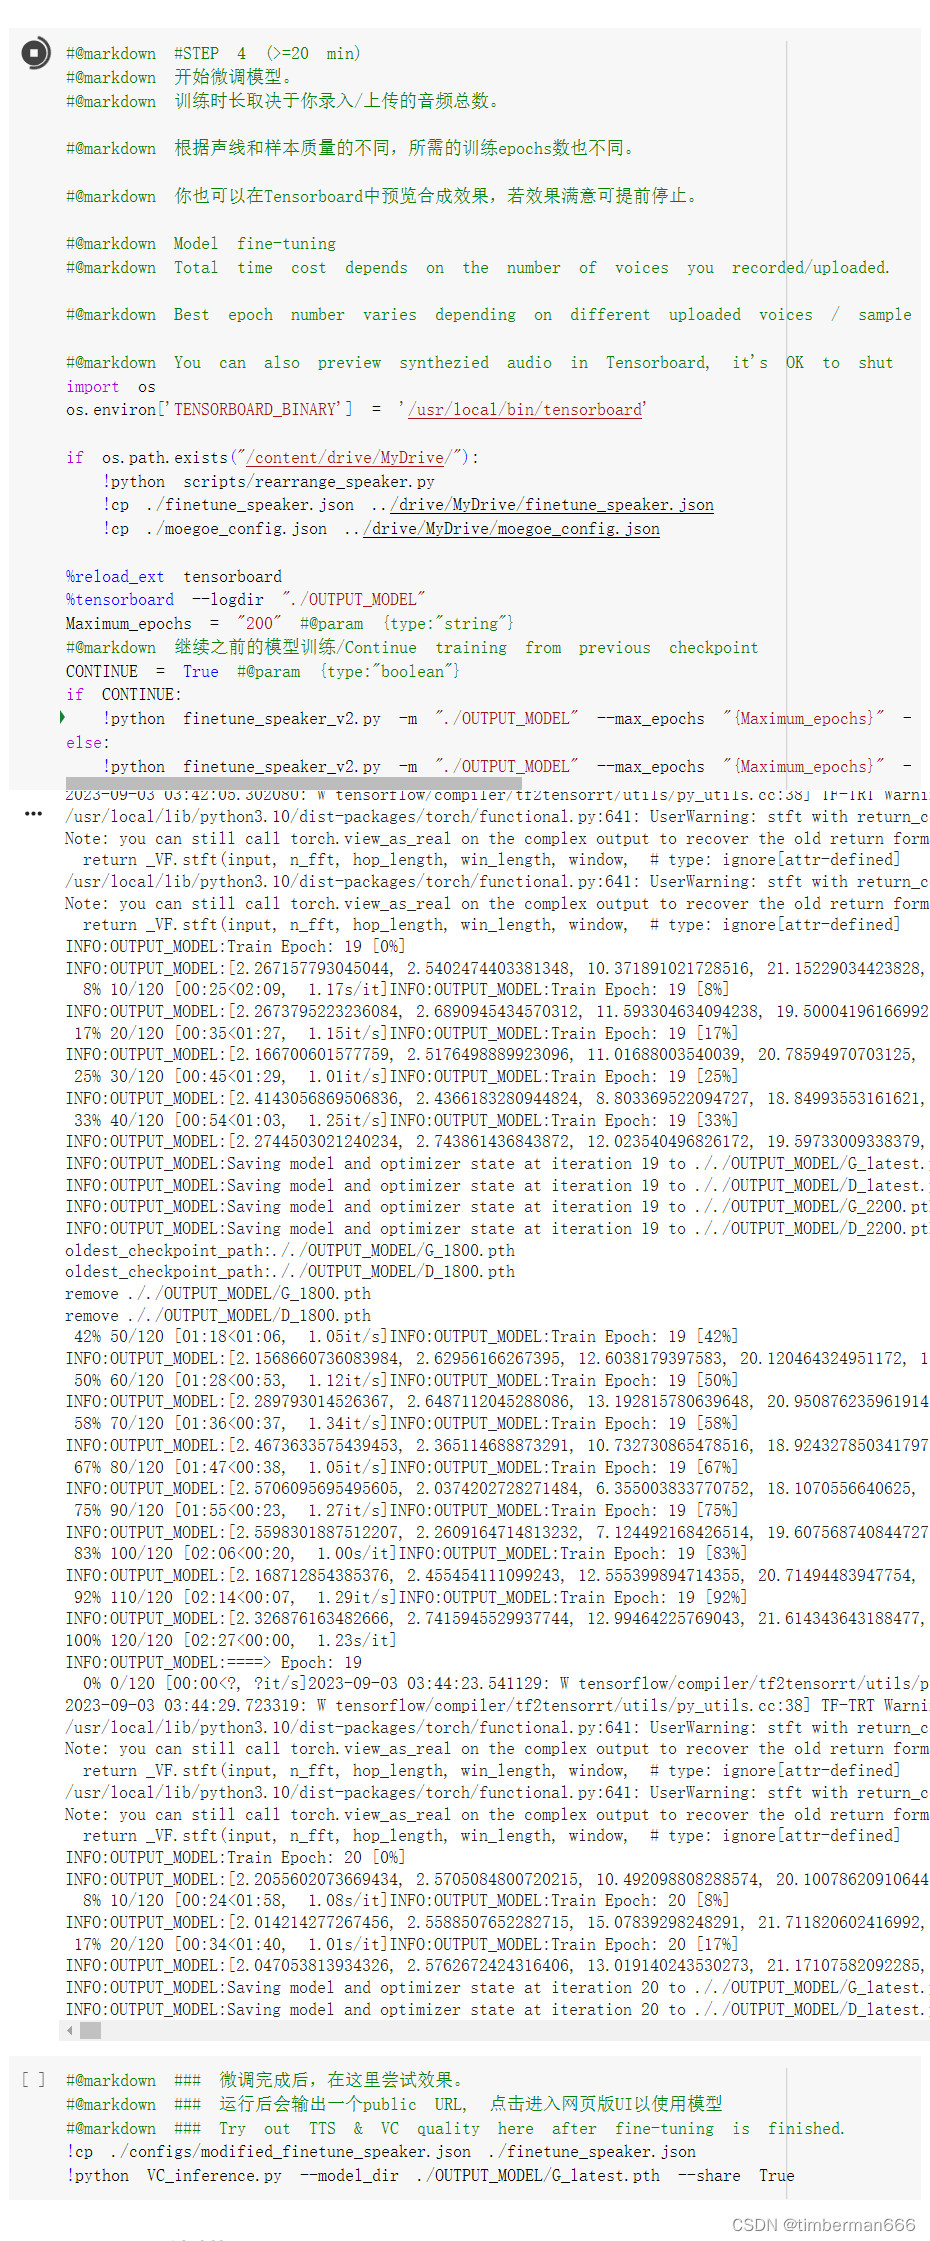
微调完成后,在这里尝试效果
#@markdown ### 微调完成后,在这里尝试效果。
#@markdown ### 运行后会输出一个public URL, 点击进入网页版UI以使用模型
#@markdown ### Try out TTS & VC quality here after fine-tuning is finished.
!cp ./configs/modified_finetune_speaker.json ./finetune_speaker.json
!python VC_inference.py --model_dir ./OUTPUT_MODEL/G_latest.pth --share True
下载模型
#@markdown ### 浏览器自动下载模型和配置文件
#@markdown ### Download option 1: Running this codeblock will download model & config files by your browser.
!python scripts/rearrange_speaker.py
%run scripts/download_model.py
模型演示
Text-to-Speech
text_to_speech
Voice Conversion
Voice Conversion