QT 设计一个串口调试工具,用一个工程就能轻松解决,外加虚拟串口工具模拟调试,在日常工作中可类比模块间通信,非常详细建议收藏
QT 串口调试工具
- 第一节 虚拟串口工具安装
- 第二节 QT创建一个基于QWidget的项目
- 第三节 UI界面设计
- 第三节 项目头文件widget.h
- 第四节 项目实现文件widget.cpp
- 第五节 main函数
- 第六节 编译结果重点
- 第七节 使用QT打包程序,不安装QT的电脑可使用

第一节 虚拟串口工具安装
-----------------------------------------下载所需工具---------------------------------------------------------------------
链接:https://pan.baidu.com/s/1QkT36S4EnH2HEAhZ1TZ8ug?pwd=ilqg
提取码:ilqg
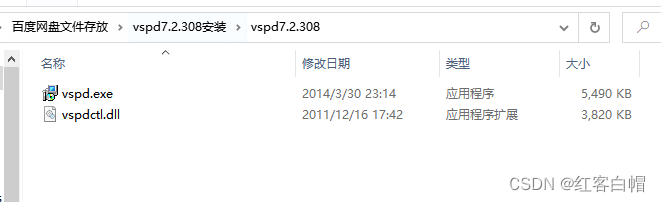
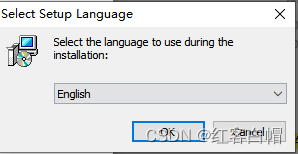
-------------------------------------首先点击.exe文件-----------------------------------------------------------------------
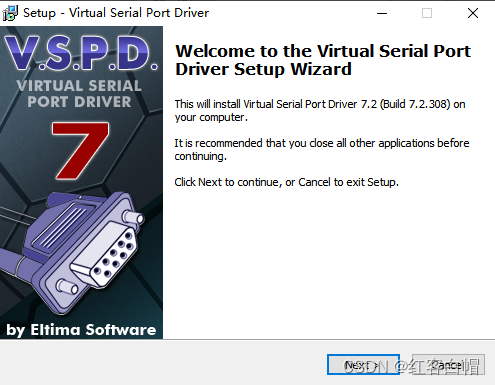


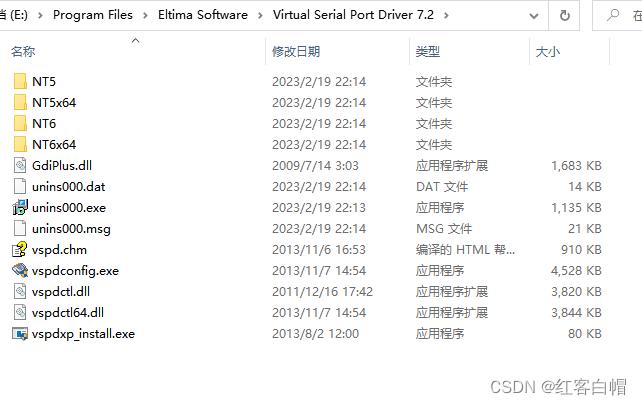
------------------------------------安装在指定目录等下要用--------------------------------------------------
将vspdctl.dll替换掉你安装文件的所在目录,不然出现错误,就掉头发了哦
-------------------------------------打开软件看看有啥---------------------------------------------------=
注意:请记住这里的操作,后面还要用到

-------------------------------------------通过上面的操作,出现以下界面,说明设置成功---------------------
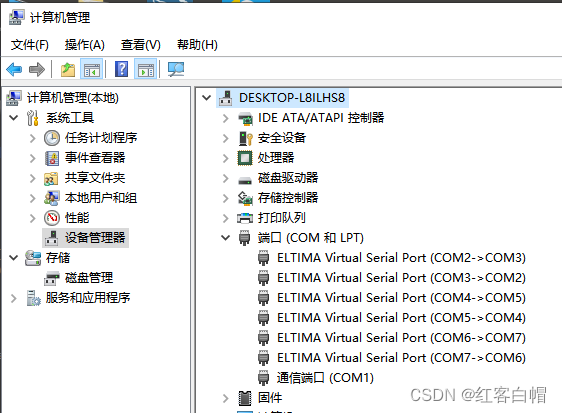
点击电脑—管理—设备管理器–端口–可以看到成功了
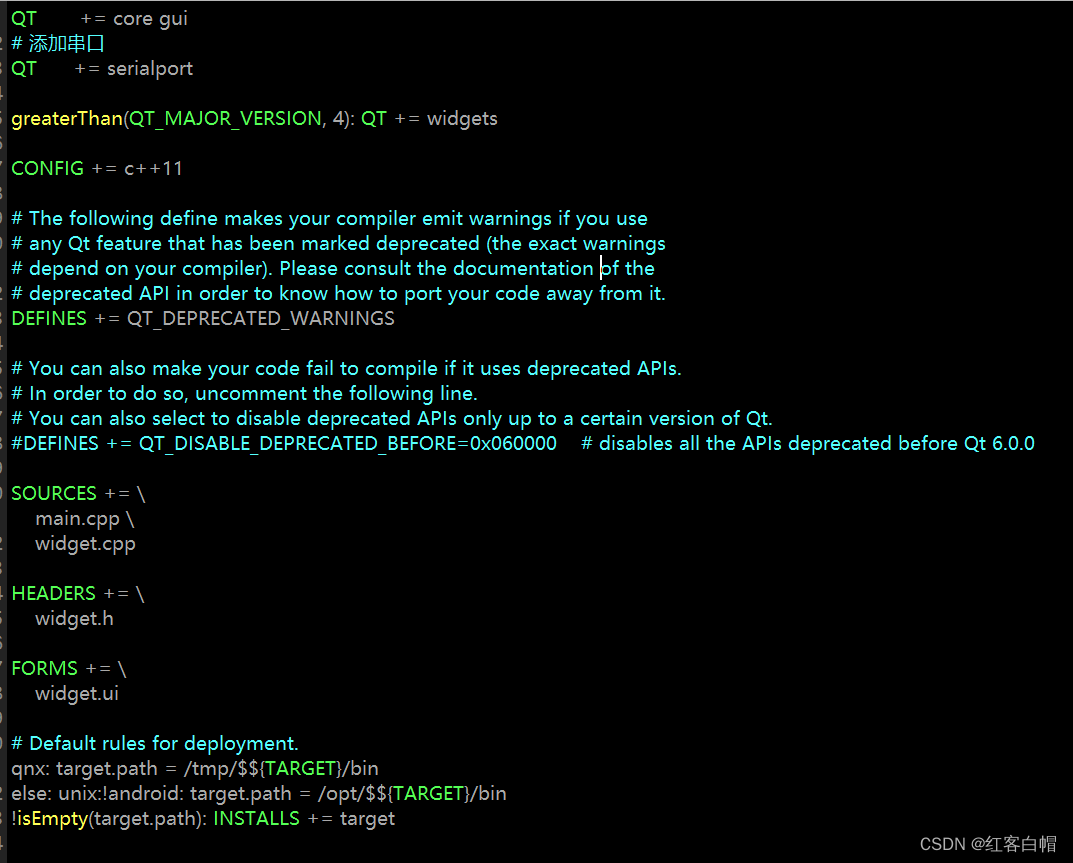
第二节 QT创建一个基于QWidget的项目

项目.pro添加以下信息
# 添加串口
QT      += serialport
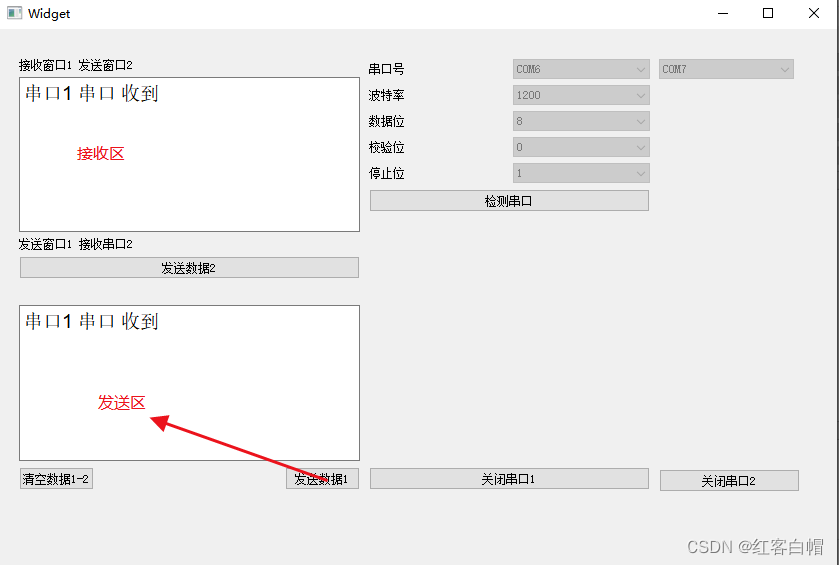
第三节 UI界面设计
这里不多说,只要是按钮都要转到槽,具体槽函数请看源代码

第三节 项目头文件widget.h
使用两个串口对象实现
#ifndef WIDGET_H
#define WIDGET_H#include <QWidget>
#include <QSerialPort>          //提供访问串口得到功能
#include <QSerialPortInfo>   //提供系统中存在的串口信息
#include <QMessageBox>    //信息弹出框
#include <QDebug>QT_BEGIN_NAMESPACE
namespace Ui { class Widget; }
QT_END_NAMESPACE//使用枚举保存波特率
typedef enum
{B1200 =1200,B9600 = 9600,B115200 = 115200,B921600 = 921600
}Baud;class Widget : public QWidget
{Q_OBJECTpublic:Widget(QWidget *parent = nullptr);~Widget();private slots://接收串口数据void SerialPortReadyRead();    //比作COM6void Serial2PortReadyRead();  //比作COM7private slots:void on_PB_receive_clicked();void on_PB_send_clicked();void on_PB_detectserial_clicked();void on_PB_openserial_clicked();void on_comboBox_b_currentIndexChanged(int index);void on_PB_openserial_2_clicked();void on_PB_send_2_clicked();private:Ui::Widget *ui;QSerialPort serial;   //串口1QSerialPort serial2; //串口2
};
#endif // WIDGET_H
-------------------------------------------------------------------------------------------------------------------------------------
第四节 项目实现文件widget.cpp
----------------------实现信号与槽,信号为缓冲区有数据时,槽函数作为接收数据------------------------------------
//连接信号与槽QObject::connect(&serial, SIGNAL(readyRead()),this, SLOT(SerialPortReadyRead()));QObject::connect(&serial2, SIGNAL(readyRead()),this, SLOT(Serial2PortReadyRead()));
------------------------------------------------串口对象一次性读取全部----------------------------------------------------------
//串口2接收串口1数据
void Widget::SerialPortReadyRead()
{qDebug()<<"===============有数据==================";//从缓冲区读取文件QByteArray buffer = serial.readAll();//获取界面已经读取的数据QString recv = ui->plainTextEdit_2->toPlainText();recv +=QString(buffer);//显示全部ui->plainTextEdit_2->appendPlainText(recv);
}
//串口1接收串口2数据
void Widget::Serial2PortReadyRead()
{qDebug()<<"===============有数据2==================";//从缓冲区读取文件QByteArray buffer = serial2.readAll();//获取界面已经读取的数据QString recv = ui->plainTextEdit->toPlainText();recv +=QString(buffer);//显示全部ui->plainTextEdit->appendPlainText(recv);
}
--------------------------------------------------------------向串口写入数据------------------------------------------------------
//作为串口1
void Widget::on_PB_send_clicked()
{//向串口写入数据QByteArray data = ui->plainTextEdit_2->toPlainText().toUtf8();qDebug()<<"发送数据 data = "<<data;serial.write(data);if(!serial.isWritable())qDebug()<<"写入失败";
}
//作为串口2
void Widget::on_PB_send_2_clicked()
{//向串口2写入数据QByteArray data = ui->plainTextEdit->toPlainText().toUtf8();qDebug()<<"发送数据 data2 = "<<data;serial2.write(data);if(!serial2.isWritable())qDebug()<<"写入失败";
}
-----------------------------------------配置串口并打开--------------------------------------------------------------------
void Widget::on_PB_openserial_clicked()
{if(ui->PB_openserial->text() == QString("打开串口1")){//设置串口名serial.setPortName(ui->comboBox_id->currentText());//设置波特率serial.setBaudRate(ui->comboBox_b->currentText().toUInt());//设置数据位switch (ui->comboBox_data->currentIndex()){case 8:serial.setDataBits(QSerialPort::Data8);break;default:break;}//设置奇偶校验 无switch (ui->comboBox_crc->currentIndex()){case 0:serial.setParity(QSerialPort::NoParity);break;default:break;}//设置停止位switch (ui->comboBox_stop->currentIndex()){case 1:serial.setStopBits(QSerialPort::OneStop);break;default:break;}//设置流控 无serial.setFlowControl(QSerialPort::NoFlowControl);//打开串口if(!serial.open(QIODevice::ReadWrite)){QMessageBox::about(NULL,"提示","串口1打开失败");}if(serial.isOpen())QMessageBox::about(NULL,"提示","串口1打开成功");//下拉菜单控件失能ui->comboBox_b->setEnabled(false);ui->comboBox_id->setEnabled(false);ui->comboBox_crc->setEnabled(false);ui->comboBox_data->setEnabled(false);ui->comboBox_stop->setEnabled(false);ui->PB_openserial->setText(tr("关闭串口1"));//发送按键使能ui->PB_send->setEnabled(true);}else{//关闭串口serial.close();//下拉使能ui->comboBox_b->setEnabled(true);ui->comboBox_id->setEnabled(true);ui->comboBox_crc->setEnabled(true);ui->comboBox_data->setEnabled(true);ui->comboBox_stop->setEnabled(true);ui->PB_openserial->setText(tr("打开串口1"));//发送失能ui->PB_send->setEnabled(false);}
}//获取波特率索引
void Widget::on_comboBox_b_currentIndexChanged(int index)
{if(ui->comboBox_b->itemText(index).toUInt() == B9600){qDebug()<<"itemText = "<<ui->comboBox_b->itemText(index);ui->comboBox_b->setCurrentIndex(index);}else if(ui->comboBox_b->itemText(index).toUInt() == B115200){qDebug()<<"itemText = "<<ui->comboBox_b->itemText(index);ui->comboBox_b->setCurrentIndex(index);}
}void Widget::on_PB_openserial_2_clicked()
{if(ui->PB_openserial_2->text() == QString("打开串口2")){//设置串口名serial2.setPortName(ui->comboBox_id_2->currentText());//设置波特率serial2.setBaudRate(ui->comboBox_b->currentText().toUInt());//设置数据位switch (ui->comboBox_data->currentIndex()){case 8:serial2.setDataBits(QSerialPort::Data8);break;default:break;}//设置奇偶校验 无switch (ui->comboBox_crc->currentIndex()){case 0:serial2.setParity(QSerialPort::NoParity);break;default:break;}//设置停止位switch (ui->comboBox_stop->currentIndex()){case 1:serial2.setStopBits(QSerialPort::OneStop);break;default:break;}//设置流控 无serial2.setFlowControl(QSerialPort::NoFlowControl);//打开串口if(!serial2.open(QIODevice::ReadWrite)){QMessageBox::about(NULL,"提示","串口2打开失败");}if(serial2.isOpen())QMessageBox::about(NULL,"提示","串口2打开成功");//下拉菜单控件失能ui->comboBox_b->setEnabled(false);ui->comboBox_id_2->setEnabled(false);ui->comboBox_crc->setEnabled(false);ui->comboBox_data->setEnabled(false);ui->comboBox_stop->setEnabled(false);ui->PB_openserial_2->setText(tr("关闭串口2"));//发送按键使能ui->PB_send_2->setEnabled(true);}else{//关闭串口serial2.close();//下拉使能ui->comboBox_b->setEnabled(true);ui->comboBox_id_2->setEnabled(true);ui->comboBox_crc->setEnabled(true);ui->comboBox_data->setEnabled(true);ui->comboBox_stop->setEnabled(true);ui->PB_openserial_2->setText(tr("打开串口2"));//发送失能ui->PB_send_2->setEnabled(false);}
}
-----------------------------------------------------------------源码------------------------------------------------------------
#include "widget.h"
#include "ui_widget.h"Widget::Widget(QWidget *parent): QWidget(parent), ui(new Ui::Widget)
{ui->setupUi(this);//连接信号与槽QObject::connect(&serial, SIGNAL(readyRead()),this, SLOT(SerialPortReadyRead()));QObject::connect(&serial2, SIGNAL(readyRead()),this, SLOT(Serial2PortReadyRead()));//发送按钮不使能ui->PB_send->setDisabled(true);ui->PB_send_2->setDisabled(true);
}Widget::~Widget()
{delete ui;
}//串口2接收串口1数据
void Widget::SerialPortReadyRead()
{qDebug()<<"===============有数据==================";//从缓冲区读取文件QByteArray buffer = serial.readAll();//获取界面已经读取的数据QString recv = ui->plainTextEdit_2->toPlainText();recv +=QString(buffer);//显示全部ui->plainTextEdit_2->appendPlainText(recv);
}
//串口1接收串口2数据
void Widget::Serial2PortReadyRead()
{qDebug()<<"===============有数据2==================";//从缓冲区读取文件QByteArray buffer = serial2.readAll();//获取界面已经读取的数据QString recv = ui->plainTextEdit->toPlainText();recv +=QString(buffer);//显示全部ui->plainTextEdit->appendPlainText(recv);
}void Widget::on_PB_receive_clicked()
{//清空接收框数据ui->plainTextEdit->clear();ui->plainTextEdit_2->clear();
}
//作为串口1
void Widget::on_PB_send_clicked()
{//向串口写入数据QByteArray data = ui->plainTextEdit_2->toPlainText().toUtf8();qDebug()<<"发送数据 data = "<<data;serial.write(data);if(!serial.isWritable())qDebug()<<"写入失败";
}
//作为串口2
void Widget::on_PB_send_2_clicked()
{//向串口2写入数据QByteArray data = ui->plainTextEdit->toPlainText().toUtf8();qDebug()<<"发送数据 data2 = "<<data;serial2.write(data);if(!serial2.isWritable())qDebug()<<"写入失败";
}
//检测串口
void Widget::on_PB_detectserial_clicked()
{//清空串口idui->comboBox_id->clear();ui->comboBox_id_2->clear();//通过这个类查找可用串口1foreach(const QSerialPortInfo &info, QSerialPortInfo::availablePorts()){qDebug()<<"info.portName() = "<<info.portName();ui->comboBox_id->addItem(info.portName());}//通过这个类查找可用串口2foreach(const QSerialPortInfo &info, QSerialPortInfo::availablePorts()){qDebug()<<"info.portName() = "<<info.portName();ui->comboBox_id_2->addItem(info.portName());}
}void Widget::on_PB_openserial_clicked()
{if(ui->PB_openserial->text() == QString("打开串口1")){//设置串口名serial.setPortName(ui->comboBox_id->currentText());//设置波特率serial.setBaudRate(ui->comboBox_b->currentText().toUInt());//设置数据位switch (ui->comboBox_data->currentIndex()){case 8:serial.setDataBits(QSerialPort::Data8);break;default:break;}//设置奇偶校验 无switch (ui->comboBox_crc->currentIndex()){case 0:serial.setParity(QSerialPort::NoParity);break;default:break;}//设置停止位switch (ui->comboBox_stop->currentIndex()){case 1:serial.setStopBits(QSerialPort::OneStop);break;default:break;}//设置流控 无serial.setFlowControl(QSerialPort::NoFlowControl);//打开串口if(!serial.open(QIODevice::ReadWrite)){QMessageBox::about(NULL,"提示","串口1打开失败");}if(serial.isOpen())QMessageBox::about(NULL,"提示","串口1打开成功");//下拉菜单控件失能ui->comboBox_b->setEnabled(false);ui->comboBox_id->setEnabled(false);ui->comboBox_crc->setEnabled(false);ui->comboBox_data->setEnabled(false);ui->comboBox_stop->setEnabled(false);ui->PB_openserial->setText(tr("关闭串口1"));//发送按键使能ui->PB_send->setEnabled(true);}else{//关闭串口serial.close();//下拉使能ui->comboBox_b->setEnabled(true);ui->comboBox_id->setEnabled(true);ui->comboBox_crc->setEnabled(true);ui->comboBox_data->setEnabled(true);ui->comboBox_stop->setEnabled(true);ui->PB_openserial->setText(tr("打开串口1"));//发送失能ui->PB_send->setEnabled(false);}
}//获取波特率索引
void Widget::on_comboBox_b_currentIndexChanged(int index)
{if(ui->comboBox_b->itemText(index).toUInt() == B9600){qDebug()<<"itemText = "<<ui->comboBox_b->itemText(index);ui->comboBox_b->setCurrentIndex(index);}else if(ui->comboBox_b->itemText(index).toUInt() == B115200){qDebug()<<"itemText = "<<ui->comboBox_b->itemText(index);ui->comboBox_b->setCurrentIndex(index);}
}void Widget::on_PB_openserial_2_clicked()
{if(ui->PB_openserial_2->text() == QString("打开串口2")){//设置串口名serial2.setPortName(ui->comboBox_id_2->currentText());//设置波特率serial2.setBaudRate(ui->comboBox_b->currentText().toUInt());//设置数据位switch (ui->comboBox_data->currentIndex()){case 8:serial2.setDataBits(QSerialPort::Data8);break;default:break;}//设置奇偶校验 无switch (ui->comboBox_crc->currentIndex()){case 0:serial2.setParity(QSerialPort::NoParity);break;default:break;}//设置停止位switch (ui->comboBox_stop->currentIndex()){case 1:serial2.setStopBits(QSerialPort::OneStop);break;default:break;}//设置流控 无serial2.setFlowControl(QSerialPort::NoFlowControl);//打开串口if(!serial2.open(QIODevice::ReadWrite)){QMessageBox::about(NULL,"提示","串口2打开失败");}if(serial2.isOpen())QMessageBox::about(NULL,"提示","串口2打开成功");//下拉菜单控件失能ui->comboBox_b->setEnabled(false);ui->comboBox_id_2->setEnabled(false);ui->comboBox_crc->setEnabled(false);ui->comboBox_data->setEnabled(false);ui->comboBox_stop->setEnabled(false);ui->PB_openserial_2->setText(tr("关闭串口2"));//发送按键使能ui->PB_send_2->setEnabled(true);}else{//关闭串口serial2.close();//下拉使能ui->comboBox_b->setEnabled(true);ui->comboBox_id_2->setEnabled(true);ui->comboBox_crc->setEnabled(true);ui->comboBox_data->setEnabled(true);ui->comboBox_stop->setEnabled(true);ui->PB_openserial_2->setText(tr("打开串口2"));//发送失能ui->PB_send_2->setEnabled(false);}
}
第五节 main函数
#include "widget.h"#include <QApplication>int main(int argc, char *argv[])
{QApplication a(argc, argv);Widget w;w.show();return a.exec();
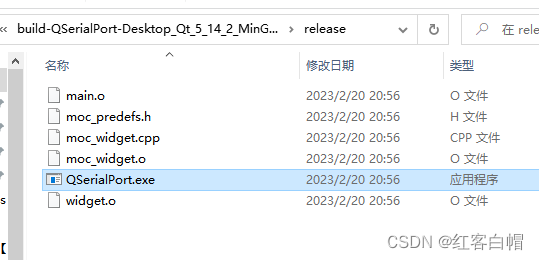
}第六节 编译结果重点


--------------------------------不想编写两个串口的,安装的串口助手里面有一个工具----------------------------------


可以看到,可以实现所需的功能
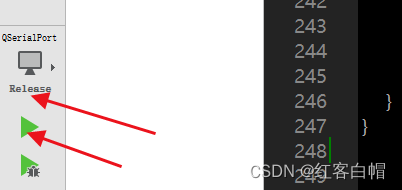
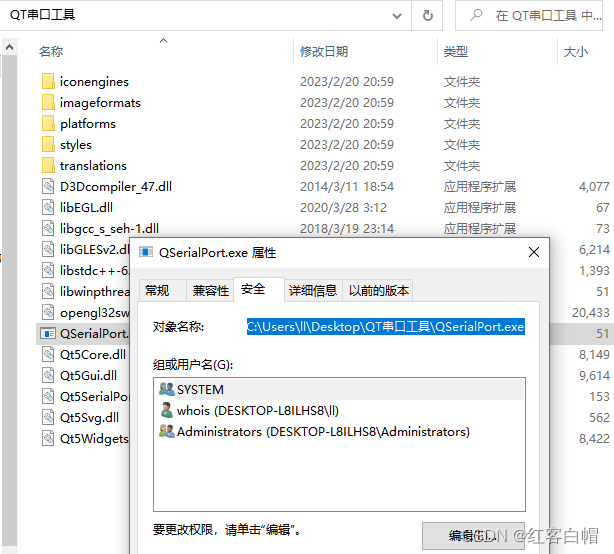
第七节 使用QT打包程序,不安装QT的电脑可使用
第一步QT编译使用如下
第二部,执行上述以后,去以下目录复制.exe文件到一个新建的文件夹
以管理员身份打开cmd,进入的这个新建的文件夹
windeployqt.exe 你的.exe文件名

由于没有一台未安装QT的电脑作为模拟,有些遗憾
为了提高成功率打开如下:

cd D:\Qt\Qt5.14.2\Tools\QtCreator\bin
进入以上目录,执行如下命令
D:\Qt\Qt5.14.2\5.14.2\mingw73_64>windeployqt.exe C:\Users\ll\Desktop\QT串口工具\QSerialPort.exe
-------------------------------------本次任务over-----------------------------------------------------------