FISCO BCOS 搭建区块链,在SpringBoot中调用合约
一、搭建区块链
使用的是FISCO BCOS 和 WeBASE-Front来搭建区块链,详细教程:
https://blog.csdn.net/yueyue763184/article/details/128924144?spm=1001.2014.3001.5501
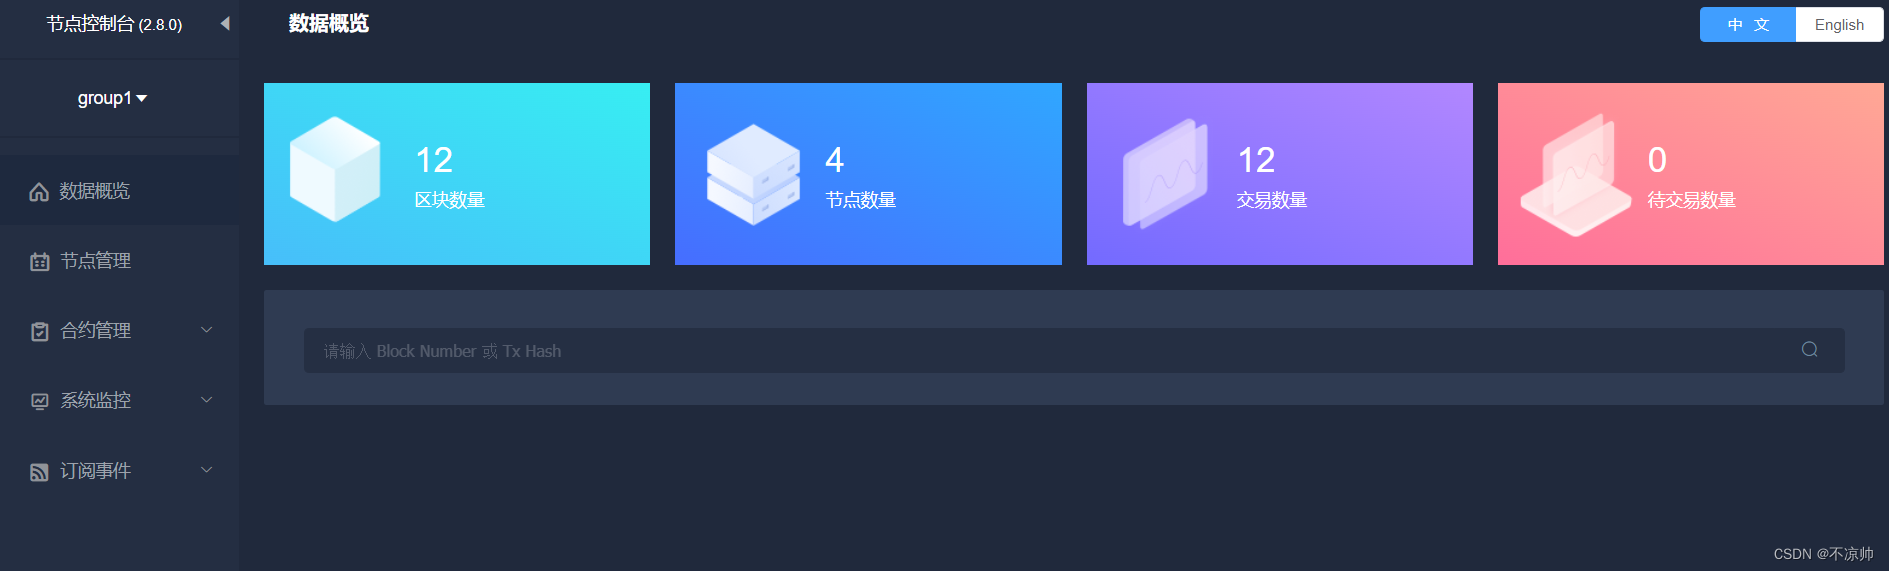
搭建好能达到下图效果即可:
二、部署智能合约与导出java文件、SDK证书下载
1.创建测试用户,导出pem文件
点击“测试用户”,即可“新增用户”。

点击“导出”,选择.pem文件。

2.编译部署智能合约,导出java文件和SDK证书下载
在“合约IDE”中准备智能合约,新建合约文件,合约名称是Asset。
pragma solidity ^0.4.25;contract Asset {address public issuer;mapping (address => uint) public balances;event Sent(address from, address to, uint amount);constructor() {issuer = msg.sender;}function issue(address receiver, uint amount) public {if (msg.sender != issuer) return;balances[receiver] += amount;}function send(address receiver, uint amount) public {if (balances[msg.sender] < amount) return;balances[msg.sender] -= amount;balances[receiver] += amount;emit Sent(msg.sender, receiver, amount);}}
合约IDE会自动保存的,点击“编译”、“部署”后即可得到合约地址contractAddress。

点击“导出java文件”,一般命名与合约名称相同为Asset;
点击“SDK证书下载”;

得到的文件如下:

三、在SpringBoot项目中调用智能合约
1.首先创建SpringBoot项目

2.在pom文件中导入相关依赖
<!-- web -->
<dependency><groupId>org.springframework.boot</groupId><artifactId>spring-boot-starter-web</artifactId>
</dependency>
<!-- test -->
<dependency><groupId>org.springframework.boot</groupId><artifactId>spring-boot-starter-test</artifactId><scope>test</scope>
</dependency>
<!-- fisco bcos -->
<dependency><groupId>org.fisco-bcos.java-sdk</groupId><artifactId>fisco-bcos-java-sdk</artifactId><version>2.9.1</version>
</dependency>
3.将下载的相关文件导入对应的文件目录(sdk要先解压)

4.在application.yaml配置文件编写fisco的配置
注意:要将路径和合约地址换成自己的
fisco:nodeList: 192.168.119.138:20201groupId: 1certPath: src\main\resources\sdkcontractAddress:# Asset合约地址(一定要加引号 不然注解@Value会把按照16进制数字进行转换赋值)asset: "0xc6053e4f71cdcf14e31cc1031263cee4e1ac7768"# 测试用户地址account:# 测试用户秘钥地址accountAddress: src\main\resources\account# 测试用户文件地址accountFilePath: src\main\resources\account\buliangshuai_key_0x3a456344e952d0275e5e4af4766abb450d3b45ac.pem说明:
fisco.nodeList:区块链节点的ip和端口;
fisco.groupId:组ID;
fisco.certPath:证书保存目录;
fisco.contractAddress.asset:合约地址;
fisco.contractAddress.account.accountAddress:测试用户地址;
fisco.contractAddress.account.accountFilePath:测试用户的pem文件地址;
5.编写sdk访问合约方法
在client包中创建2个类,一个是环境配置类ApplicationContext
package com.fisco.bcos.asset.client;import org.fisco.bcos.sdk.BcosSDK;
import org.fisco.bcos.sdk.client.Client;
import org.fisco.bcos.sdk.config.ConfigOption;
import org.fisco.bcos.sdk.config.exceptions.ConfigException;
import org.fisco.bcos.sdk.config.model.ConfigProperty;
import org.fisco.bcos.sdk.crypto.CryptoSuite;
import org.fisco.bcos.sdk.crypto.keypair.CryptoKeyPair;
import org.springframework.beans.factory.annotation.Value;
import org.springframework.context.annotation.Bean;
import org.springframework.context.annotation.Configuration;import java.util.Arrays;
import java.util.HashMap;
import java.util.List;
import java.util.Map;/*** @Description: 配置类*/
@Configuration
public class ApplicationContext {@Value("${fisco.nodeList}")private String nodeLists;@Value("${fisco.groupId}")private Integer groupId;@Value("${fisco.certPath}")private String certPath;@Value("${fisco.account.accountFilePath}")private String accountFilePath;@Bean(name = "configProperty")public ConfigProperty defaultConfigProperty() {ConfigProperty property = new ConfigProperty();// 配置cryptoMaterialMap<String, Object> cryptoMaterialMap = new HashMap<>();cryptoMaterialMap.put("certPath", certPath);property.setCryptoMaterial(cryptoMaterialMap);// 配置networkMap<String, Object> networkMap = new HashMap<>();String[] split = nodeLists.split(",");List<String> nodeList = Arrays.asList(split);networkMap.put("peers", nodeList);property.setNetwork(networkMap);// 配置accountMap<String, Object> accountMap = new HashMap<>();accountMap.put("keyStoreDir", "account");accountMap.put("accountAddress", "");accountMap.put("accountFileFormat", "pem");accountMap.put("password", "");accountMap.put("accountFilePath", accountFilePath);property.setAccount(accountMap);//配置 threadPoolMap<String, Object> threadPoolMap = new HashMap<>();threadPoolMap.put("channelProcessorThreadSize", "16");threadPoolMap.put("receiptProcessorThreadSize", "16");threadPoolMap.put("maxBlockingQueueSize", "102400");property.setThreadPool(threadPoolMap);return property;}@Bean(name = "configOption")public ConfigOption defaultConfigOption(ConfigProperty configProperty) throws ConfigException {return new ConfigOption(configProperty);}@Bean(name = "bcosSDK")public BcosSDK bcosSDK(ConfigOption configOption) {return new BcosSDK(configOption);}@Bean(name = "client")public Client getClient(BcosSDK bcosSDK) {// 为群组初始化clientClient client = bcosSDK.getClient(groupId);return client;}@Beanpublic CryptoKeyPair getCryptoKeyPair(Client client) {// 如果有密钥文件 那么每次读取的就不再是随机的CryptoSuite cryptoSuite = client.getCryptoSuite();CryptoKeyPair cryptoKeyPair = cryptoSuite.getCryptoKeyPair();return cryptoKeyPair;}
}
另一个是合约客户端类AssetClient
package com.fisco.bcos.asset.client;import com.fisco.bcos.asset.contract.Asset;
import org.fisco.bcos.sdk.BcosSDK;
import org.fisco.bcos.sdk.client.Client;
import org.fisco.bcos.sdk.crypto.keypair.CryptoKeyPair;
import org.fisco.bcos.sdk.model.TransactionReceipt;
import org.fisco.bcos.sdk.model.callback.TransactionCallback;
import org.springframework.beans.factory.annotation.Autowired;
import org.springframework.beans.factory.annotation.Value;
import org.springframework.stereotype.Component;import java.math.BigInteger;@Component
public class AssetClient {@Autowiredprivate BcosSDK bcosSDK;@Autowiredprivate Client client;@Autowiredprivate CryptoKeyPair cryptoKeyPair;@Value("${fisco.contractAddress.asset}")private String contractAddress;/*** 发布资产(条件:当前用户是Asset合约发布者)* @param receiver 接收者地址* @param amount 资产数量*/public void issueAsset(String receiver, BigInteger amount) {Asset asset = Asset.load(contractAddress, client, cryptoKeyPair);asset.issue(receiver, amount, new CallbackResponse());}/*** 发送资产(条件:发送者的账号Balance必须大于等于amount)* @param receiver 接收者地址* @param amount 资产数量*/public void sendAsset(String receiver, BigInteger amount) {Asset asset = Asset.load(contractAddress, client, cryptoKeyPair);asset.send(receiver, amount, new CallbackResponse());}private class CallbackResponse extends TransactionCallback {@Overridepublic void onResponse(TransactionReceipt transactionReceipt) {System.out.println("回调结果:");System.out.println(transactionReceipt.getContractAddress());System.out.println(transactionReceipt.getFrom());System.out.println(transactionReceipt.getGasUsed());System.out.println(transactionReceipt.getRemainGas());System.out.println(transactionReceipt.getStatus());System.out.println(transactionReceipt.getMessage());System.out.println(transactionReceipt.getStatusMsg());}}
}
6.编写测试类调用智能合约函数
首先编写测试类AssetClientTest
package com.fisco.bcos.asset.client;import com.fisco.bcos.asset.AssetDemo1Application;
import org.junit.Test;
import org.junit.runner.RunWith;
import org.springframework.beans.factory.annotation.Autowired;
import org.springframework.boot.test.context.SpringBootTest;
import org.springframework.test.context.junit4.SpringJUnit4ClassRunner;import java.math.BigInteger;@RunWith(SpringJUnit4ClassRunner.class)
@SpringBootTest(classes = AssetDemo1Application.class)
public class AssetClientTest {@Autowiredprivate AssetClient assetClient;@Testpublic void testIssueAsset() throws InterruptedException {String receiver = "0xc6053e4f71cdcf14e31cc1031263cee4e1ac7768";BigInteger amount = new BigInteger("10000");assetClient.issueAsset(receiver, amount);Thread.sleep(5000);System.out.println("发布成功!");}@Testpublic void testSendAsset() throws InterruptedException {String receiver = "0xc6053e4f71cdcf14e31cc1031263cee4e1ac7768";BigInteger amount = new BigInteger("50000");assetClient.sendAsset(receiver, amount);Thread.sleep(5000);System.out.println("发送成功!");}}
测试的步骤:
1)先后执行testIssueAsset和testSendAsset测试方法,该测试要保证服务器的20200、20201端口是开放的,命令如下:
firewall-cmd --zone=public --add-port=20201/tcp --permanent # 开放端口
firewall-cmd --zone=public --remove-port=20201/tcp --permanent #关闭端口
firewall-cmd --reload # 配置立即生效
firewall-cmd --zone=public --list-ports # 查看防火墙所有开放的端口
2)执行成功后,在节点控制台的“合约列表”中找到对应的合约,点击“合约调用”,选择balances方法;
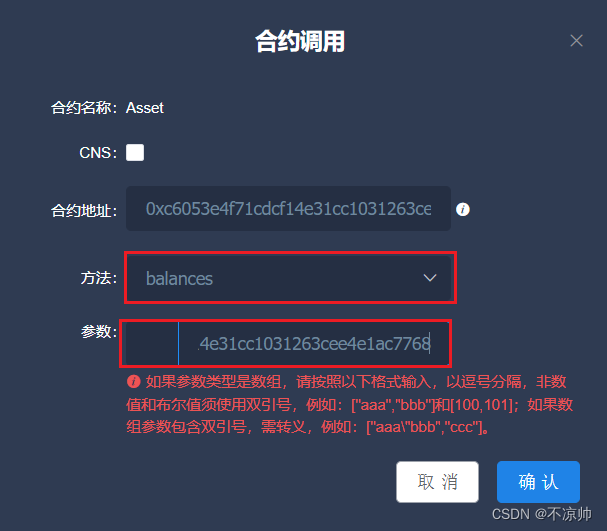
结果如下:
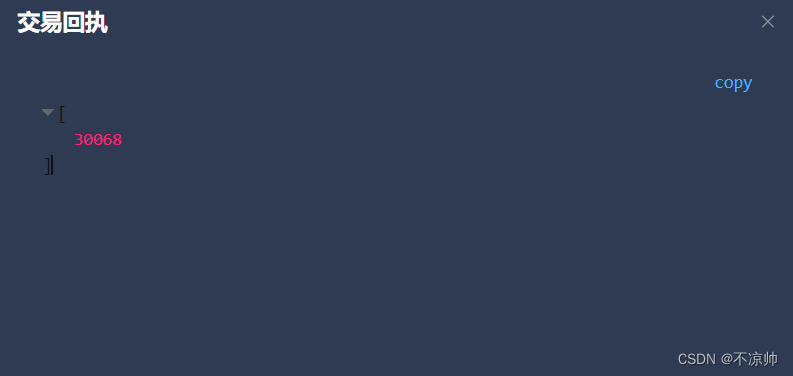
以上就是在Fisco区块链上部署智能合约,并通过Java SDK调用智能合约函数的示例.