[C++项目] Boost文档 站内搜索引擎(5): cpphttplib实现网络服务、html页面实现、服务器部署...

在前四篇文章中, 我们实现了从文档文件的清理 到 搜索的所有内容:
- 项目背景: 🫦[C++项目] Boost文档 站内搜索引擎(1): 项目背景介绍、相关技术栈、相关概念介绍…
- 文档解析、处理模块
parser的实现: 🫦[C++项目] Boost文档 站内搜索引擎(2): 文档文本解析模块parser的实现、如何对文档文件去标签、如何获取文档标题… - 文档 正排索引与倒排索引 建立的接口的实现: 🫦[C++项目] Boost文档 站内搜索引擎(3): 建立文档及其关键字的正排 倒排索引、jieba库的安装与使用…
- 文档的 搜索功能 接口的实现: 🫦[C++项目] Boost文档 站内搜索引擎(4): 实现搜索的相关接口、线程安全的单例index接口、cppjieba分词库的使用…
建议先阅读上面四篇文章
后端的主要功能接口完成之后, 就可以结合网络将其设计为服务器 然后部署到网络上了
网络服务
我们使用cpphttplib库 实现搜索引擎服务器. 所以要先安装cpphttplib库
cpphttplib
使用cpphttplib时, gcc版本不能太低. 而CentOS 7默认的版本是4.8.5, 太低了. 所以安装使用cpphttplib之前, 要先升级gcc到至少7.x以上
gcc升级
我们将gcc升级到8.3.1. 非常的简单, 只需要一共6条指令 就可以完成:
# 安装 centos-release-scl
sudo yum install centos-release-scl
# 安装 devtoolset-8-gcc* (gcc8相关软件包)
sudo yum install devtoolset-8-gcc*# 安装完成, 需要建立软连接
mv /usr/bin/gcc /usr/bin/gcc-4.8.5
ln -s /opt/rh/devtoolset-8/root/bin/gcc /usr/bin/gcc
mv /usr/bin/g++ /usr/bin/g++-4.8.5
ln -s /opt/rh/devtoolset-8/root/bin/g++ /usr/bin/g++
然后就可以看到:
❯ gcc -v
Using built-in specs.
COLLECT_GCC=gcc
COLLECT_LTO_WRAPPER=/opt/rh/devtoolset-8/root/usr/libexec/gcc/x86_64-redhat-linux/8/lto-wrapper
Target: x86_64-redhat-linux
Configured with: ../configure --enable-bootstrap --enable-languages=c,c++,fortran,lto --prefix=/opt/rh/devtoolset-8/root/usr --mandir=/opt/rh/devtoolset-8/root/usr/share/man --infodir=/opt/rh/devtoolset-8/root/usr/share/info --with-bugurl=http://bugzilla.redhat.com/bugzilla --enable-shared --enable-threads=posix --enable-checking=release --enable-multilib --with-system-zlib --enable-__cxa_atexit --disable-libunwind-exceptions --enable-gnu-unique-object --enable-linker-build-id --with-gcc-major-version-only --with-linker-hash-style=gnu --with-default-libstdcxx-abi=gcc4-compatible --enable-plugin --enable-initfini-array --with-isl=/builddir/build/BUILD/gcc-8.3.1-20190311/obj-x86_64-redhat-linux/isl-install --disable-libmpx --enable-gnu-indirect-function --with-tune=generic --with-arch_32=x86-64 --build=x86_64-redhat-linux
Thread model: posix
gcc version 8.3.1 20190311 (Red Hat 8.3.1-3) (GCC)
❯ g++ -v
Using built-in specs.
COLLECT_GCC=g++
COLLECT_LTO_WRAPPER=/opt/rh/devtoolset-8/root/usr/libexec/gcc/x86_64-redhat-linux/8/lto-wrapper
Target: x86_64-redhat-linux
Configured with: ../configure --enable-bootstrap --enable-languages=c,c++,fortran,lto --prefix=/opt/rh/devtoolset-8/root/usr --mandir=/opt/rh/devtoolset-8/root/usr/share/man --infodir=/opt/rh/devtoolset-8/root/usr/share/info --with-bugurl=http://bugzilla.redhat.com/bugzilla --enable-shared --enable-threads=posix --enable-checking=release --enable-multilib --with-system-zlib --enable-__cxa_atexit --disable-libunwind-exceptions --enable-gnu-unique-object --enable-linker-build-id --with-gcc-major-version-only --with-linker-hash-style=gnu --with-default-libstdcxx-abi=gcc4-compatible --enable-plugin --enable-initfini-array --with-isl=/builddir/build/BUILD/gcc-8.3.1-20190311/obj-x86_64-redhat-linux/isl-install --disable-libmpx --enable-gnu-indirect-function --with-tune=generic --with-arch_32=x86-64 --build=x86_64-redhat-linux
Thread model: posix
gcc version 8.3.1 20190311 (Red Hat 8.3.1-3) (GCC)

安装cpphttplib
cpphttplib库的安装非常简单, 因为整个库中 只需要用到一个httplib.h的头文件.
但是, 我们需要选择版本安装, 不能直接安装最新版的. 因为gcc编译器版本不匹配的话 可能 会出现无法编译或运行时错误的情况
这里推荐0.7.16的版本: https://github.com/yhirose/cpp-httplib/tree/v0.7.16
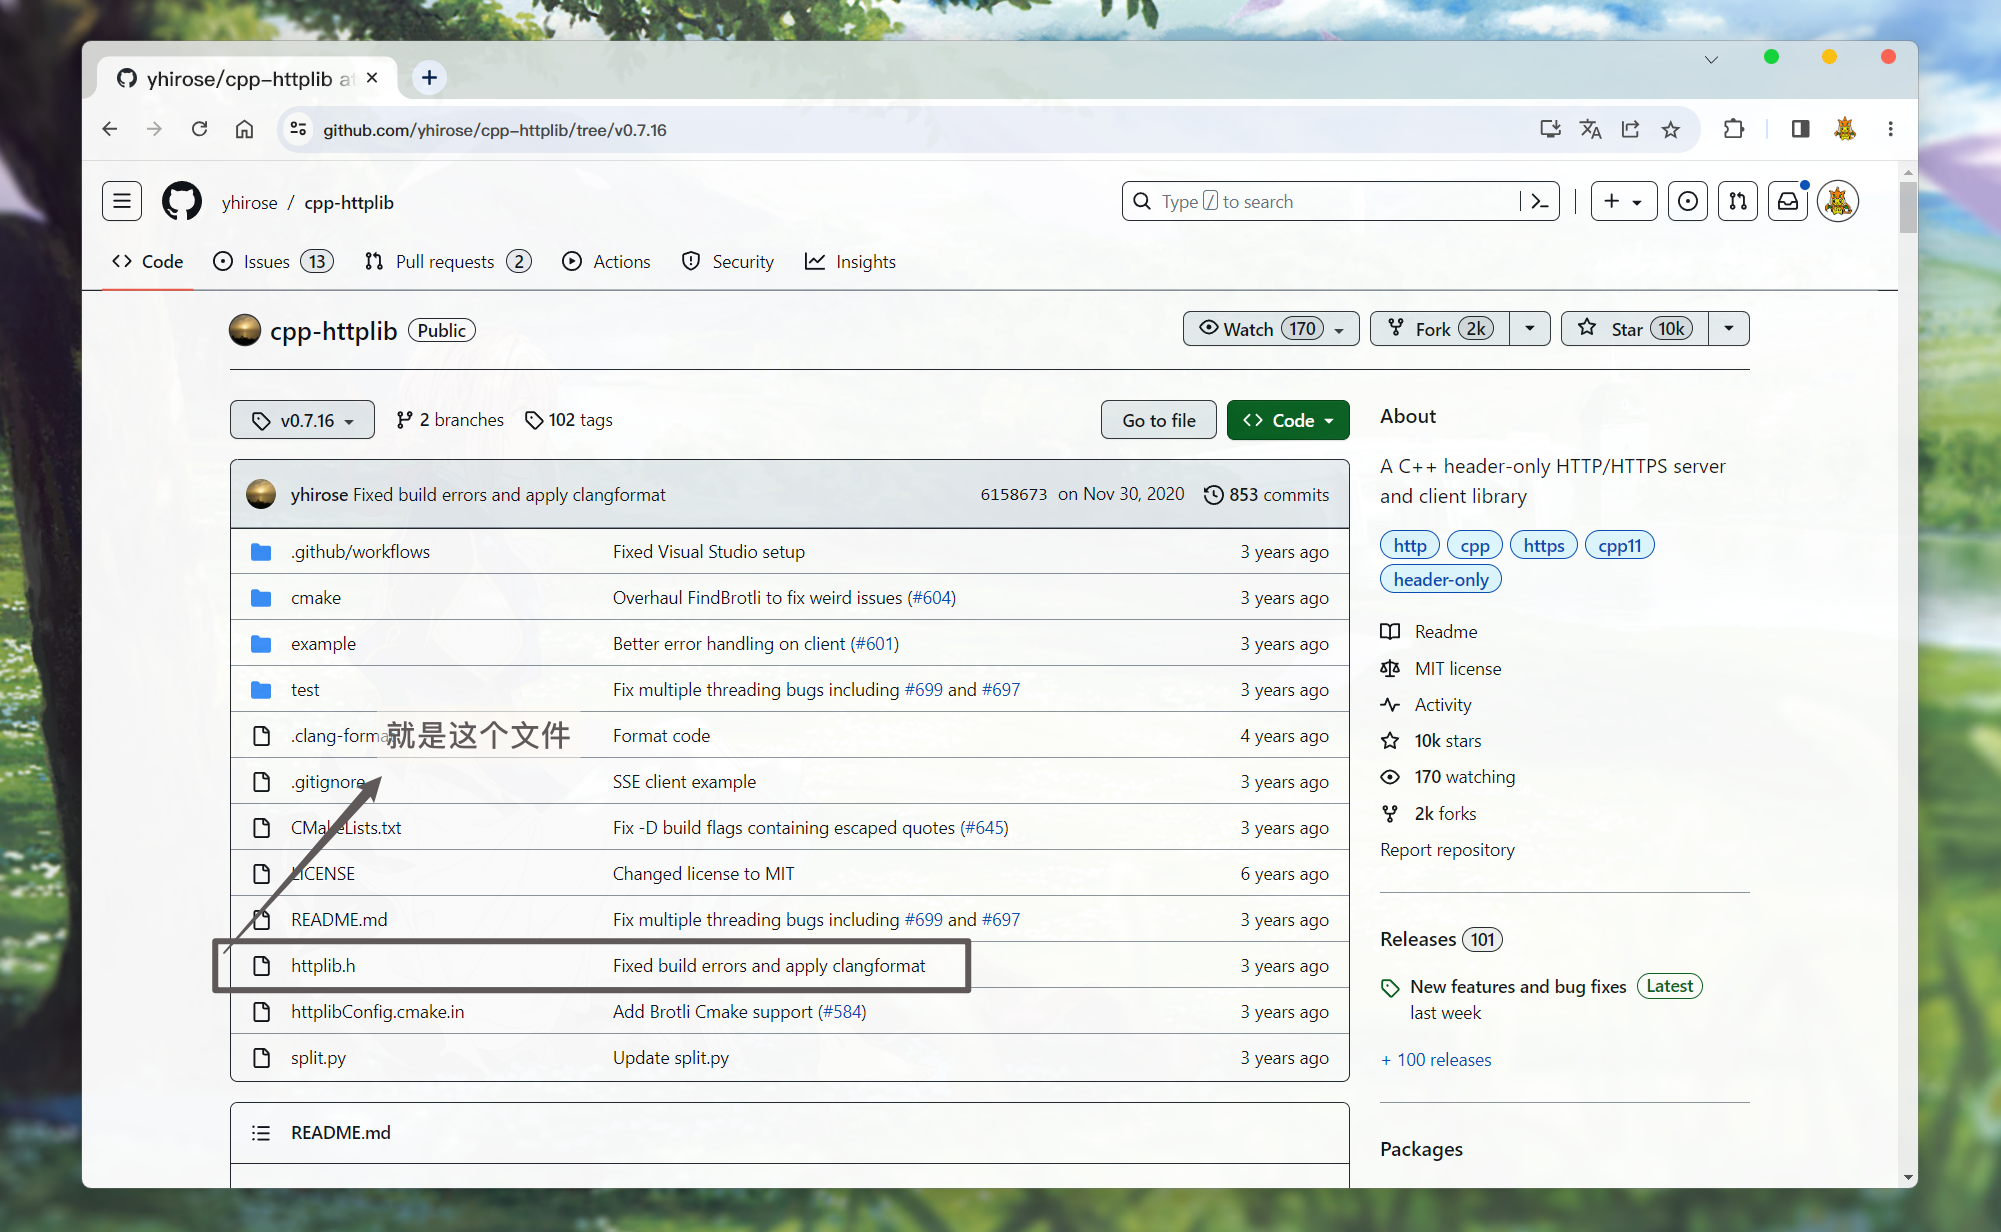
可以直接获取此版本的源码:
❯ wget https://codeload.github.com/yhirose/cpp-httplib/zip/refs/tags/v0.7.16
然后解压出来, 将httplib.h拷贝到项目目录下:
❯ wget https://codeload.github.com/yhirose/cpp-httplib/zip/refs/tags/v0.7.16
--2023-08-08 14:24:23--  https://codeload.github.com/yhirose/cpp-httplib/zip/refs/tags/v0.7.16
Resolving codeload.github.com (codeload.github.com)... 20.205.243.165
Connecting to codeload.github.com (codeload.github.com)|20.205.243.165|:443... connected.
HTTP request sent, awaiting response... 200 OK
Length: unspecified [application/zip]
Saving to: ‘v0.7.16’[   <=>                                                                                                                                     ] 586,948     1.10MB/s   in 0.5s2023-08-08 14:24:25 (1.10 MB/s) - ‘v0.7.16’ saved [586948]❯ unzip v0.7.16
Archive:  v0.7.16... 解压过程extracting: cpp-httplib-0.7.16/test/www3/dir/test.html
❯ ll
total 588K
drwxr-xr-x 6 July July 4.0K Nov 30  2020 cpp-httplib-0.7.16
drwxr-xr-x 9 July July 4.0K Aug  7 00:16 cppjieba
drwxr-xr-x 6 July July 4.0K Aug  8 13:52 gitHub
-rw-r--r-- 1 July July 574K Aug  8 14:24 v0.7.16# 将httplib.h 拷贝到项目目录下:
cp cpp-httplib-0.7.16/httplib.h gitHub/Boost-Doc-Searcher/.
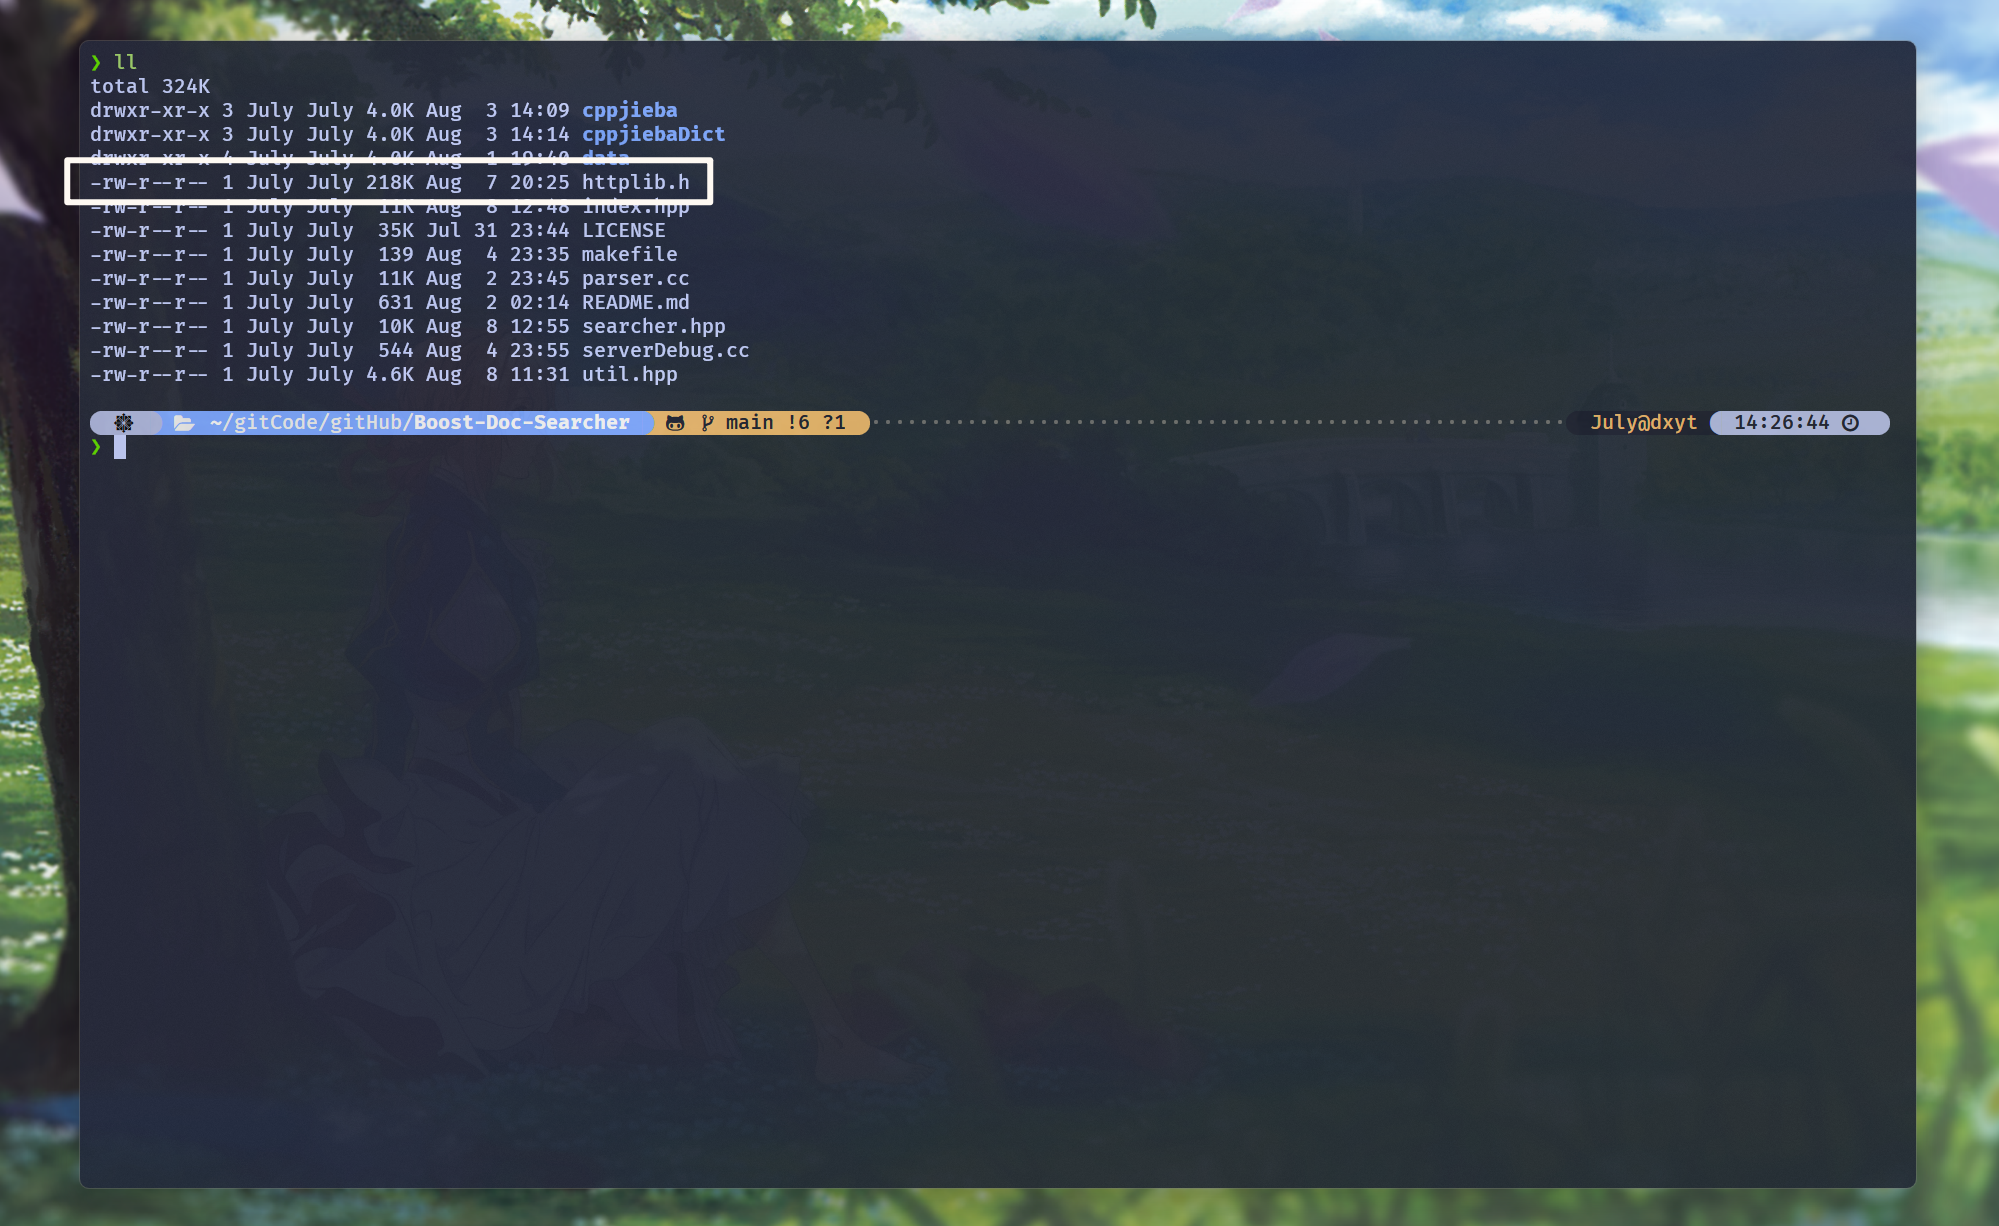
这就算在项目中安装成功了
cpphttplib的简单使用
关于cpphttplib的使用, Github文档有简单的使用介绍

直接使用这段代码 可以实现怎么样的结果呢?
#include <iostream>
#include <pthread.h>
#include "httplib.h"// 由于库中使用了线程相关接口, 所以要包含线程头文件int main() {httplib::Server svr;svr.Get("/hi", [](const httplib::Request&, httplib::Response& res) {res.set_content("Hello World!", "text/plain");});svr.listen("0.0.0.0", 8080);return 0;
}

直接访问根url, 没有任何响应. 但是如果我们在url之后添加/hi. 就能看到Hello World!的字样.
这就是我们设定的 申请/hi资源时, 会响应的内容:

httplib::Server::Get()是用来处理HTTP的GET方法的接口.
-
第一个参数, 用来指定处理 申请某内容的请求.
如果传入
/hi, 就会处理 请求的url是wwwRoot/hi的请求. 如果传入/index.html, 就会处理 请求的url是wwwRoot/hi的请求wwwRoot表示web根目录, 没有设置 即为服务器运行路径 -
第二个参数, 是一个回调函数 用来 接收请求 对请求进行处理, 并响应
此回调函数的第一个参数 就是用来接收请求的.
第二个参数, 可以看作一个输出型参数. 是用来填充响应的
在例子中, 使用
httplib::Response::set_content(), 接口设置响应正文以及相应的类型
最后监听指定端口, 就可以通过ip:port的形式访问服务器.
项目网络服务 **
了解了cpphttplib的最基本使用. 就可以为项目创建网络服务了
但是, 创建网络服务之前. 可以先了解一下 搜索引擎的搜索结果是怎么出现的?

当我们搜索时, 会申请/search这个服务. 并携带了?q=Searcher这个key(q)=value(Searcher)属性.
然后, 就会将搜索结果显示出来.
而cpphttplib提供了检索url中是否存在key的接口, 并且可以通过key获取value值的接口, 所以我们就可以这样来向页面设置内容:
svr.Get("/search", [](const httplib::Request& request, httplib::Response& response) {if (!request.has_param("word")) {// url中没有 word 键值// set_content() 第一个参数是设置正文内容, 第二个参数是 正文内容类型等属性response.set_content("请输入内容后搜索", "text/plain; charset=utf-8");}
});
然后运行服务器并访问/search:

当url中没有key为word的键值时, 就会显示 请输入内容后搜索
如果有key为word的键值, 因为我们没有做任何操作, 所以不会有任何内容:

除了判断是否存在key, 还可以通过接口获得对应的value:
svr.Get("/search", [](const httplib::Request& request, httplib::Response& response) {if (!request.has_param("word")) {// url中没有 word 键值// set_content() 第一个参数是设置正文内容, 第二个参数是 正文内容类型等属性response.set_content("请输入内容后搜索", "text/plain; charset=utf-8");}std::string word = request.get_param_value("word");response.set_content(word, "text/plain; charset=utf-8");
});
此时, 再携带key=value键对:

就获取到了value的内容, 并设置为了响应内容.
既然可以获取url中的键值, 那么 就可以实现根据键值调用searcher::search()接口, 搜索相关文档:
#include <iostream>
#include <pthread.h>
#include "util.hpp"
#include "searcher.hpp"
#include "httplib.h"const std::string& input = "./data/output/raw";int main() {ns_searcher::searcher searcher;searcher.initSearcher(input);httplib::Server svr;svr.Get("/s", [&searcher](const httplib::Request& request, httplib::Response& response {if (!request.has_param("word")) {// url中没有 word 键值// set_content() 第一个参数是设置正文内容, 第二个参数是 正文内容类型等属性response.set_content("请输入内容后搜索", "text/plain; charset=utf-8");}std::string searchContent = request.get_param_value("word");std::cout << "User search:: " << searchContent << std::endl;std::string searchJsonResult;searcher.search(searchContent, &searchJsonResult);// 搜获取到搜索结果之后 设置相应内容response.set_content(searchJsonResult, "application/json");});std::cout << "服务器启动成功..." << std::endl;svr.listen("0.0.0.0", 8080);return 0;
}
编译代码 g++ httpServer.cc -lpthread -ljsoncpp
运行程序. 建立索引 等待服务器开启成功之后:

直接在url添加键值 就可以看到直接的搜索结果.
至此, 网络服务的编写就完成了.
下面要做的, 就是通过网页发送请求, 并根据响应构建结果网页.
网页构建
由于博主没有学过前端的代码, 所以做出来的网页只是能用. 也没有能力去解释一些原理或底层的实现. 只能介绍一下基本功能
所以, 直接列出代码:
./wwwRoot/index.html:
<!doctype html>
<html lang="en"><head><meta charset="UTF-8" /><meta name="viewport" content="width=device-width, initial-scale=1.0" /><script src="http://code.jquery.com/jquery-2.1.1.min.js"></script><link rel="icon" type="image/svg+xml" href="/favicon.svg" /><title>Boost库 文档搜索</title><style>/* 去掉网页中的所有的默认内外边距,html的盒子模型 */* {background-color: #f5f5f7;/* 设置外边距 */margin: 0;/* 设置内边距 */padding: 0;}/* 将我们的body内的内容100%和html的呈现吻合 */html,body {height: 100%;}/* 类选择器.container */.container {text-align: center;/* 设置div的宽度 */width: 800px;/* 通过设置外边距达到居中对齐的目的 */margin: 0px auto;/* 设置外边距的上边距,保持元素和网页的上部距离 */margin-top: 100px;}/* 复合选择器,选中container 下的 search */.container .search {/* 宽度与父标签保持一致 */width: auto;/* 高度设置为52px */height: 52px;}.container .result {margin-top: 30px;text-align: left;width: 100%;}.container .result .item {height: auto;border-radius: 13px;background-color: #fff;box-shadow: 0 0 5px rgb(0, 0, 0, 0.2);margin-top: 15px;padding-bottom: 10px;padding-top: 10px;}.container .result .item a {margin-left: 10px;margin-right: 10px;/* 设置为块级元素,单独站一行 */display: block;background-color: #fff;/* a标签的下划线去掉 */text-decoration: none;/* 设置a标签中的文字的字体大小 */font-size: 20px;/* 设置字体的颜色 */color: #4e6ef2;word-break: break-all;}.container .result .item a:hover {/*设置鼠标放在a之上的动态效果*/text-decoration: underline;}.container .result .item p {margin-left: 10px;margin-top: 10px;margin-right: 10px;display: block;background-color: #fff;font-size: 16px;word-break: break-all;font-family: "Lucida Sans", "Lucida Sans Regular", "Lucida Grande","Lucida SansUnicode", Geneva, Verdana, sans-serif;}.container .result .item i {margin-left: 10px;margin-right: 10px;/* 设置为块级元素,单独站一行 */display: block;font-size: 12px;/* 取消斜体风格 */font-style: normal;background-color: #fff;color: gray;word-break: break-all;}#INDEXBLOGS {text-align: center;width: 75%;}.search-box {width: 666px;margin: auto;display: flex;background-color: #fff;align-items: center;border: 1px solid #ddd;border-radius: 25px;height: 44px;box-shadow: 0 0 5px rgb(0, 0, 0, 0.2);}.search-input {flex: 1;padding: 0 15px;border: none;background-color: #fff;border: 0px solid #ddd;border-radius: 25px;font-size: 16px;height: 43px;}.search-input:focus {outline: none;}.search-button {padding: 0 18px;height: 100%;border: none;border-radius: 0 25px 25px 0;background: #fef9f2;color: #666;font-size: 16px;cursor: pointer;}.suggestion {margin-bottom: 5px;color: #000000;font-size: 14px;}</style></head><body><div class="container"><imgsrc="https://dxyt-july-image.oss-cn-beijing.aliyuncs.com/202308080011153.png"id="INDEXBLOGS"/><p class="suggestion">服务器配置原因, 若搜索结果过多 可能响应较慢, 请耐心等待哦~</p><div class="search-box"><inputtype="text"id="search-input"class="search-input"placeholder=""/><button onclick="Search()" class="search-button">♥ Search</button></div><div class="result">// 这里是展示搜索结果的地方</div></div><script>// 获取输入框元素const input = document.getElementById("search-input");// 输入框按键按下事件监听input.addEventListener("keydown", function (event) {// 判断按键为回车键if (event.keyCode === 13) {// 模拟按钮点击事件document.querySelector(".search-button").click();}});function Search() {// 是浏览器的一个弹出框// alert("hello js!");// 1. 提取数据, $可以理解成就是JQuery的别称let query = $(".container .search-input").val();console.log("query = " + query); //console是浏览器的对话框,可以用来进行查看js数据//2. 发起http请求,ajax: 属于一个和后端进行数据交互的函数,JQuery中的$.ajax({type: "GET",url: "/s?word=" + query,success: function (data) {console.log(data);BuildHtml(data);},});}function BuildHtml(data) {// 获取html中的result标签let result_lable = $(".container .result");// 清空历史搜索结果result_lable.empty();for (let elem of data) {// console.log(elem.title);// console.log(elem.url);let a_lable = $("<a>", {text: elem.title,href: elem.url,// 跳转到新的页面target: "_blank",});let i_lable = $("<i>", {text: elem.url,});let p_lable = $("<p>", {text: elem.desc,});let div_lable = $("<div>", {class: "item",});a_lable.appendTo(div_lable);i_lable.appendTo(div_lable);p_lable.appendTo(div_lable);div_lable.appendTo(result_lable);}}</script></body>
</html>
这个html文件是创建在项目目录下的wwwRoot目录下的:

一个是页面
html文件, 一个是图标文件
大概解释一下这个html代码:
-
首先最外层 是
html最基本的框架:<!DOCTYPE html> <html lang="en"><head><meta charset="UTF-8"><meta name="viewport" content="width=device-width, initial-scale=1.0"><title></title></head><body></body> </html><body> </body>之间的内容, 就是要在页面中显示的内容 -
在
<body> </body>之间. 先设置了一个<div class="container"> </div>可以看作是在页面内容中设置了一个框架, 之后只要在这个
<div>内部的 都会显示在这个框架中 -
然后
<div class="container"></div>内最主要的就是:-
<div class="search-box"><inputtype="text"id="search-input"class="search-input"placeholder=""/><button onclick="Search()" class="search-button">♥ Search</button></div>又设置了一个
<div>并在其内部设置了:一个搜索框
<input type="text" id="search-input" class="search-input" placeholder="" />一个搜索按钮
<button onclick="Search()" class="search-button">♥ Search</button><button> </button>之间是按钮上显示的内容,onclick="Search()"表示点击按钮执行的函数 -
<div class="result">// 这里是展示搜索结果的地方</div>搜索框下面就是要展示的内容了
设置了
<div class="result"> </div>, 这个<div>内部就是展示搜索结果用的搜索结果用这个元素
item表示:<div class="item"><a href="" target="_blank">跳转标题</a><i>url</i><p>摘要</p> </div>
-
-
布局设置完毕之后, 就需要使用
JavaScriptJQueryajax来发送请求, 接收响应 和 设置搜索结果了<script>// 获取输入框元素const input = document.getElementById("search-input");// 输入框按键按下事件监听input.addEventListener("keydown", function (event) {// 判断按键为回车键if (event.keyCode === 13) {// 模拟按钮点击事件document.querySelector(".search-button").click();}});function Search() {// 是浏览器的一个弹出框// alert("hello js!");// 1. 提取数据, $可以理解成就是JQuery的别称let query = $(".container .search-input").val();console.log("query = " + query); //console是浏览器的对话框,可以用来进行查看js数据//2. 发起http请求,ajax: 属于一个和后端进行数据交互的函数,JQuery中的$.ajax({type: "GET",url: "/s?word=" + query,success: function (data) {console.log(data);BuildHtml(data);},});}function BuildHtml(data) {// 获取html中的result标签let result_lable = $(".container .result");// 清空历史搜索结果result_lable.empty();for (let elem of data) {// console.log(elem.title);// console.log(elem.url);let a_lable = $("<a>", {text: elem.title,href: elem.url,// 跳转到新的页面target: "_blank",});let i_lable = $("<i>", {text: elem.url,});let p_lable = $("<p>", {text: elem.desc,});let div_lable = $("<div>", {class: "item",});a_lable.appendTo(div_lable);i_lable.appendTo(div_lable);p_lable.appendTo(div_lable);div_lable.appendTo(result_lable);}} </script><script> </script>内部, 首先设置了一个监听按键的函数. 为了实现 按下回车搜索然后就是
Search()函数, 获取search-input搜索框内的数据为query, 然后创建HTTP的GET方法请求, 并携带?word=query发送给服务器.然后成功接收到响应之后, 根据响应数据 执行
Build()函数 在<div class="result"></div>内部 设置item元素
编写完index.html之后, 需要在httpServer.cc主函数内, 将服务器的web根文件设置为./wwwRoot/index.html
const std::string& rootPath = "./wwwRoot/index.html";svr.set_base_dir(rootPath.c_str());
然后再编译运行服务器:
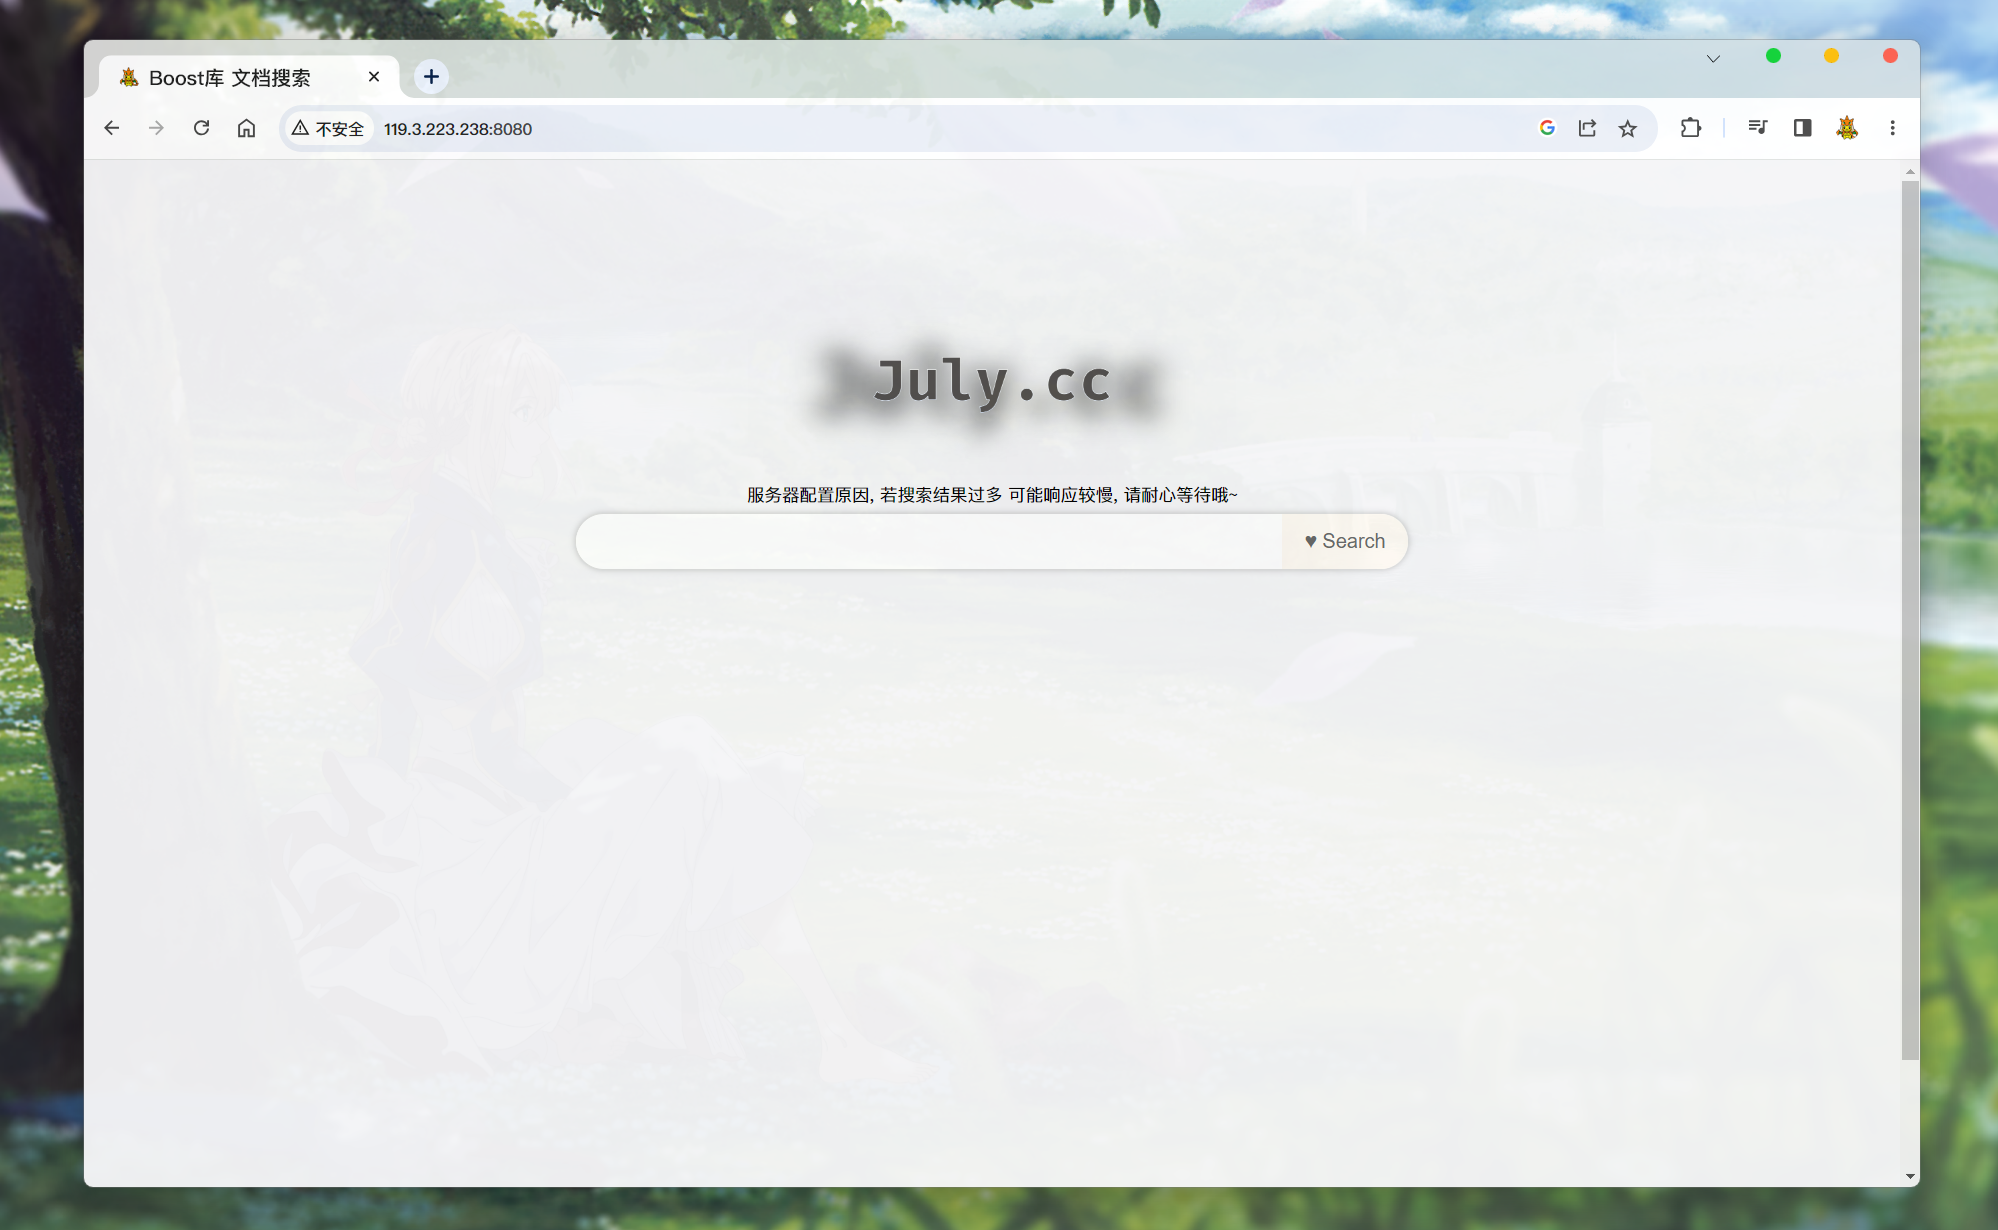
-
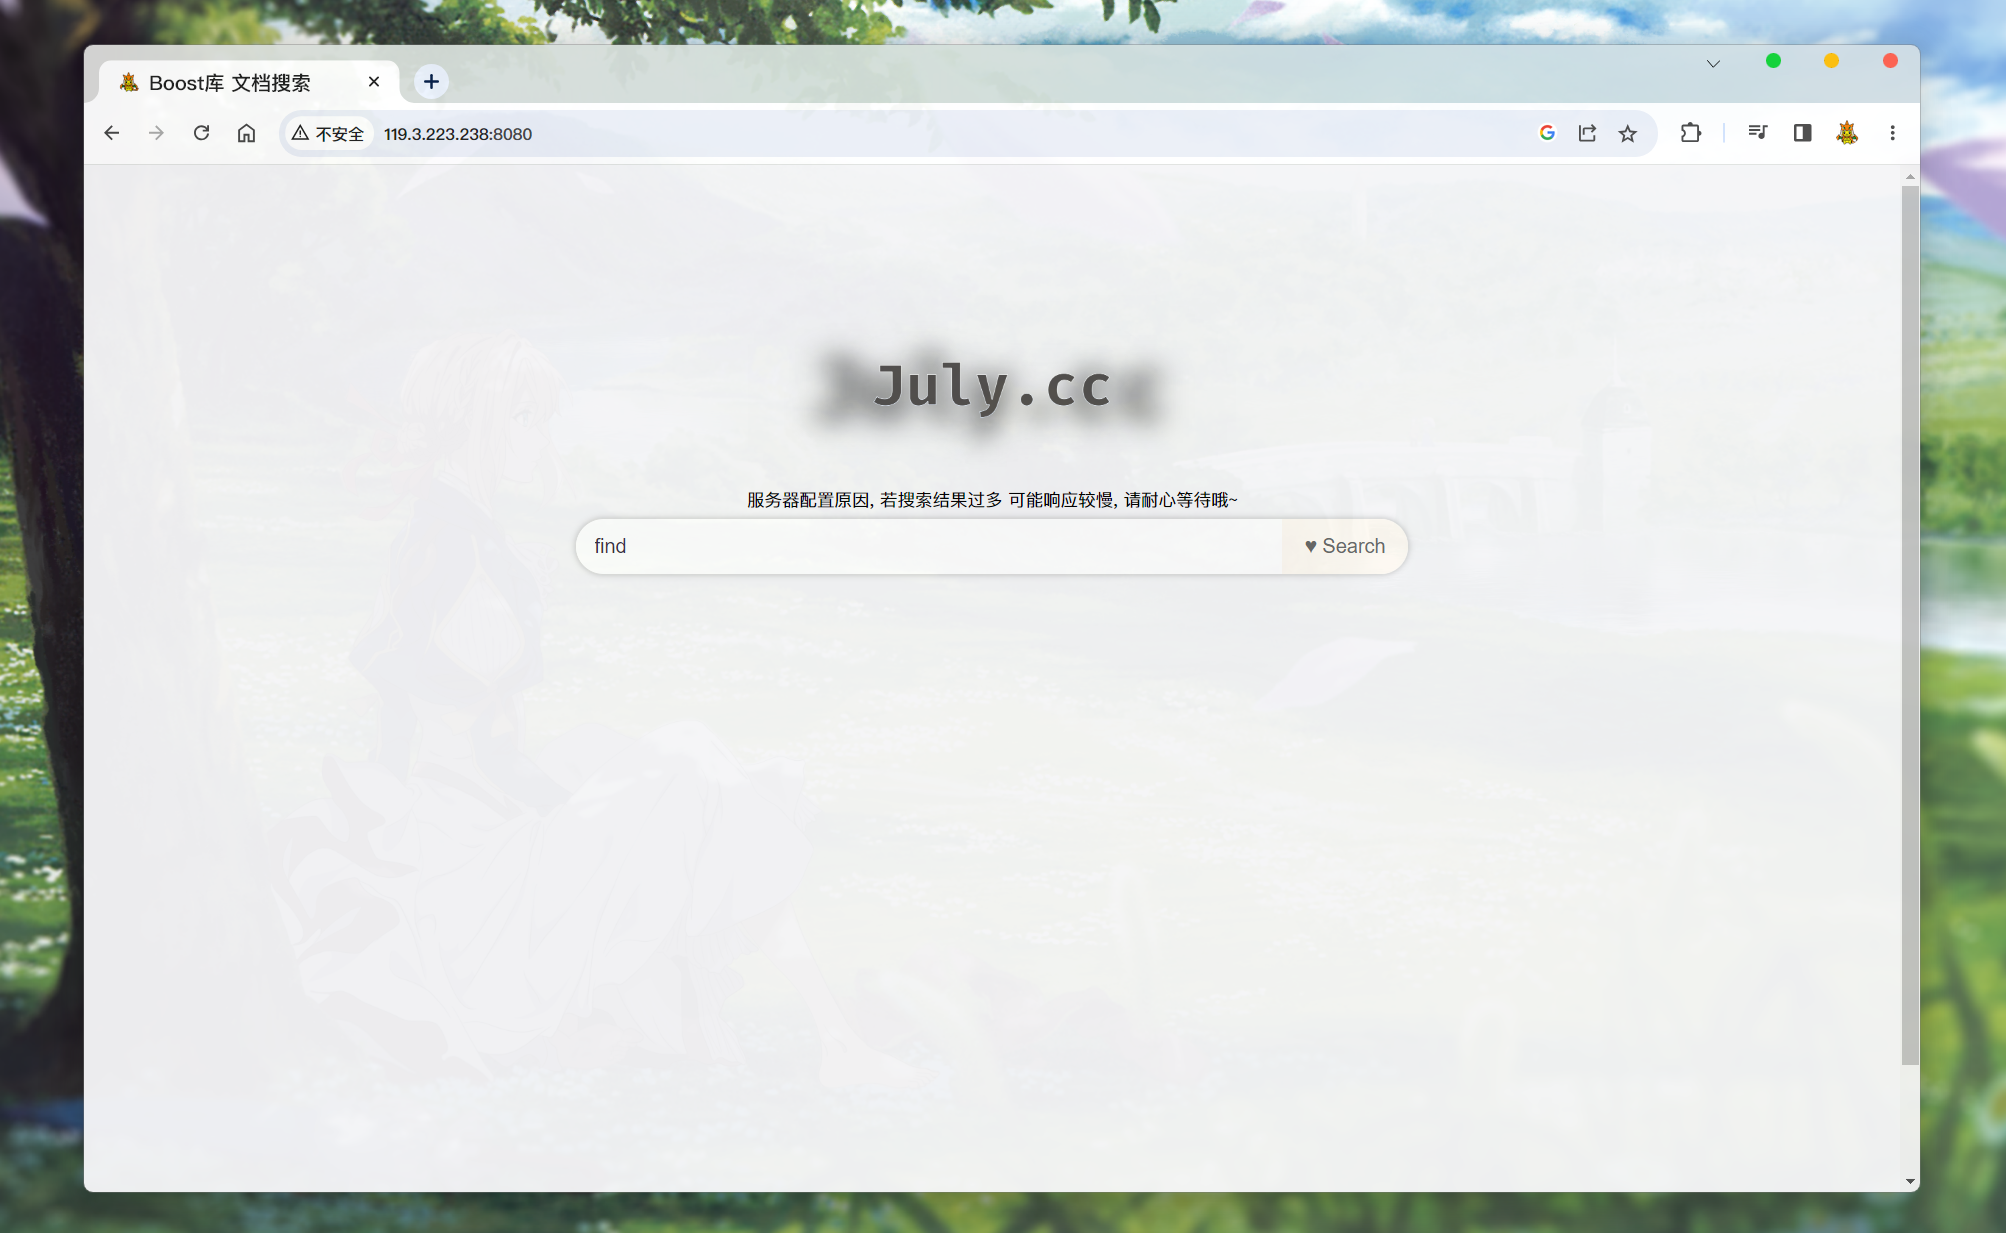
没有执行搜索的界面:
-
执行了搜索之后的界面:
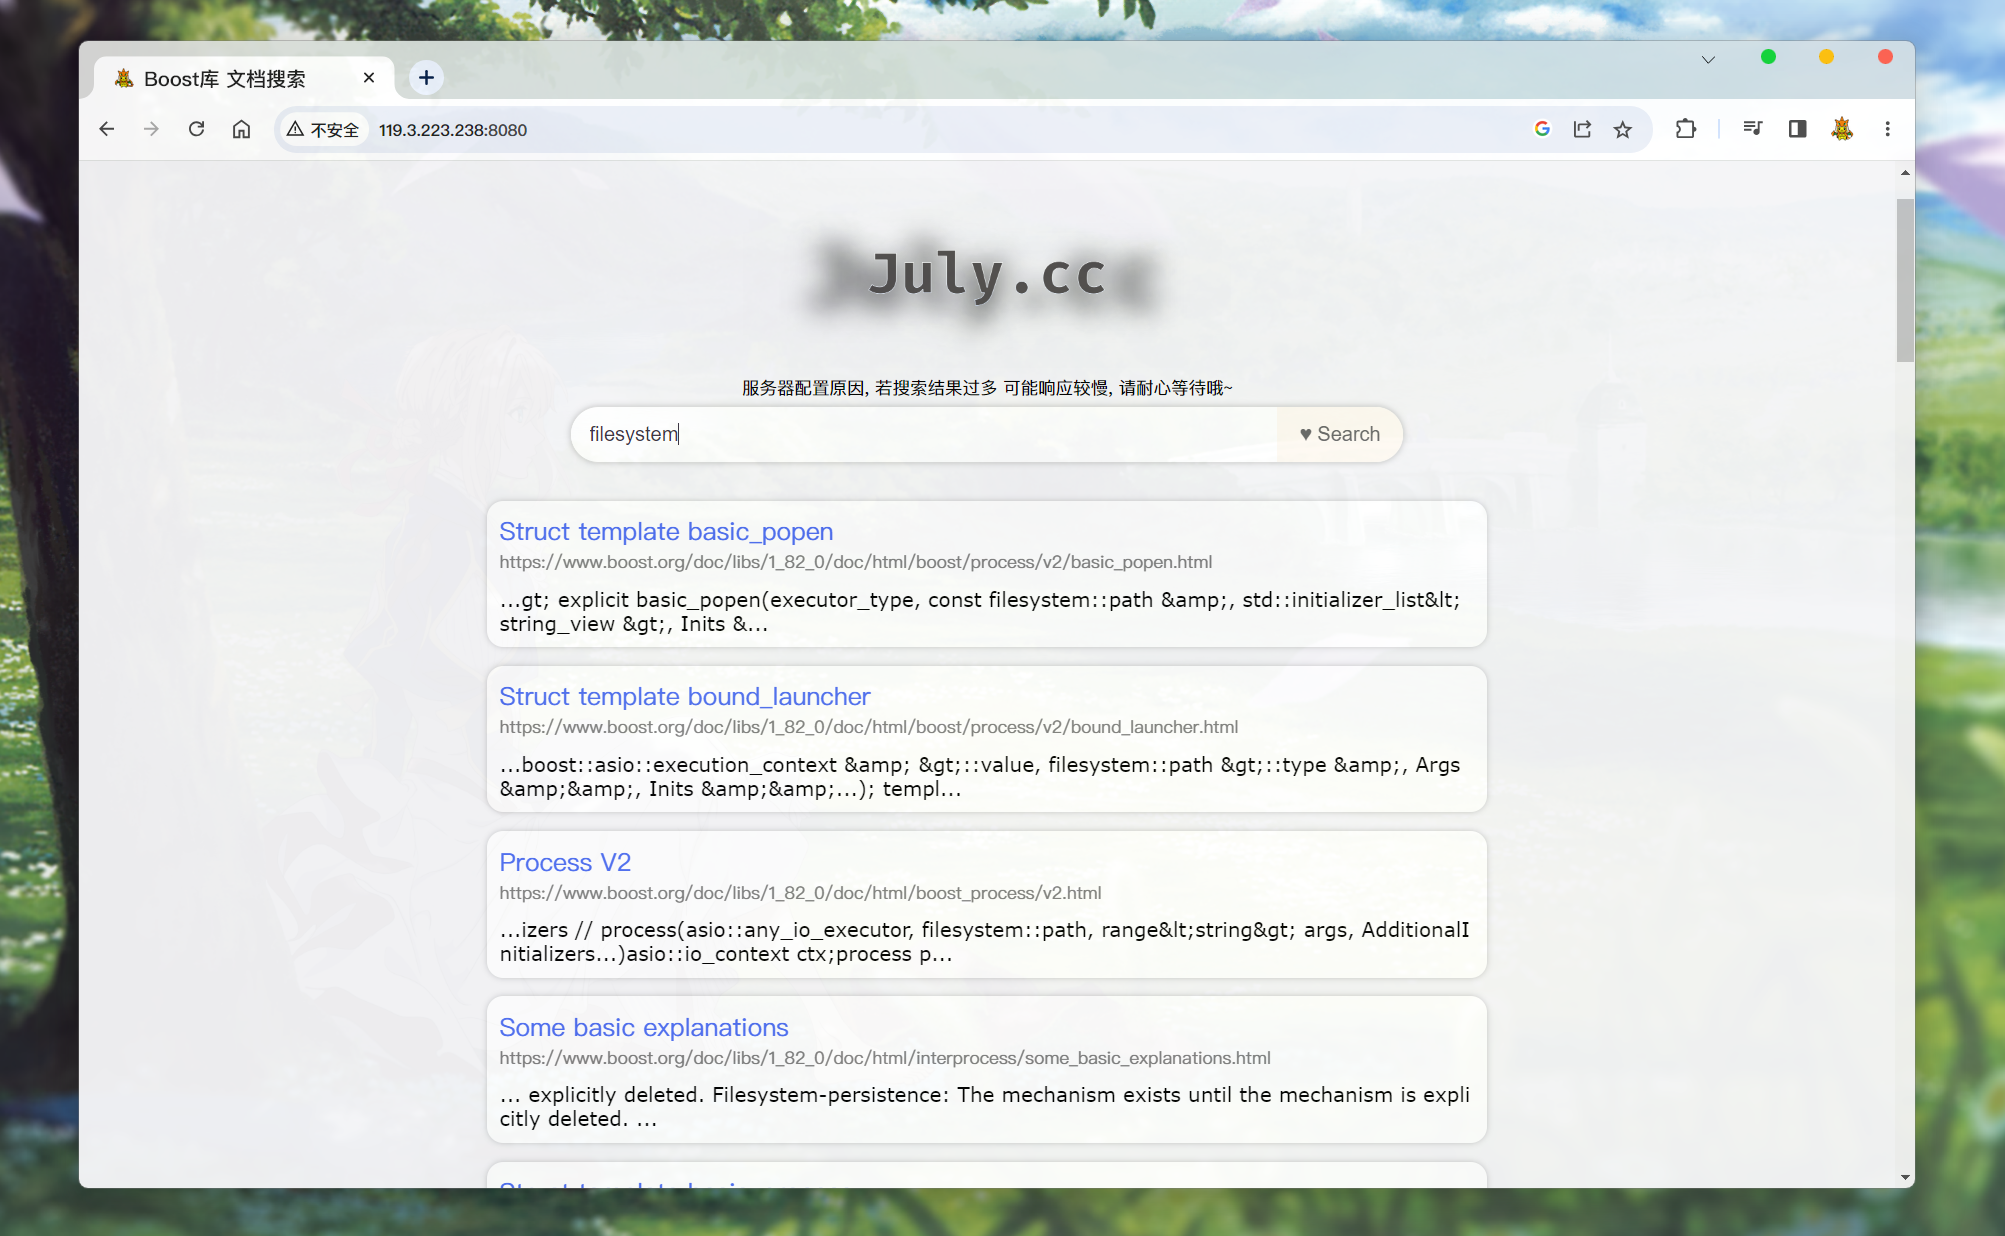
搜索结果, 都会按照权重一个个排列在下面
至此, 我们的Boost搜索引擎就可以使用了!
不过, 还有一些地方需要优化和修改
代码优化
当前的搜索引擎还有问题:
-
没有搜索到内容时, 不会有任何反应. 可能会让用户认为服务器没有运作.
所以可以考虑在没有搜索到任何文档的时候, 响应一个没有任何内容的
item元素. 并实现, 点击标题 跳转回主页:/* searcher.hpp */// 排序之后, allInvertedElemOut 中文档的排序就是倒序了 // 然后 通过遍历此数组, 获取文档id, 根据id获取文档在正排索引中的内容 // 然后再将 所有内容序列化 Json::Value root; if (allInvertedElemOut.empty()) {// 如果没有查找到一个文档Json::Value elem;elem["url"] = "http://119.3.223.238:8080";elem["title"] = "Search nothing!";// 关于文档的内容, 搜索结果中是不展示文档的全部内容的, 应该只显示包含关键词的摘要, 点进文档才显示相关内容// 而docInfo中存储的是文档去除标签之后的所有内容, 所以不能直接将 doc._content 存储到elem对应key:value中elem["desc"] = "Search nothing!";root.append(elem);// 处理url 都设置为无效值 } else {for (auto& elemOut : allInvertedElemOut) {// 通过Json::Value 对象, 存储文档内容Json::Value elem;// 通过elemOut._docId 获取正排索引中 文档的内容信息ns_index::docInfo_t* doc = _index->getForwardIndex(elemOut._docId);// elem赋值elem["url"] = doc->_url;elem["title"] = doc->_title;// 关于文档的内容, 搜索结果中是不展示文档的全部内容的, 应该只显示包含关键词的摘要, 点进文档才显示相关内容// 而docInfo中存储的是文档去除标签之后的所有内容, 所以不能直接将 doc._content 存储到elem对应key:value中elem["desc"] = getDesc(doc->_content, elemOut._keywords[0]); // 只根据第一个关键词来获取摘要// for Debug// 这里有一个bug, jsoncpp 0.10.5.2 是不支持long或long long 相关类型的, 所以需要转换成 double// 这里转换成 double不会有什么影响, 因为这两个参数只是本地调试显示用的.elem["docId"] = (double)doc->_docId;elem["weight"] = (double)elemOut._weight;root.append(elem);} }此时, 搜索不到内容:
点击就会跳转至主页.
-
可能没有标题:
当搜索到的文章没有标题时, 就不会显示出来. 显示不出来也就无法通过标题跳转至指定的页面:
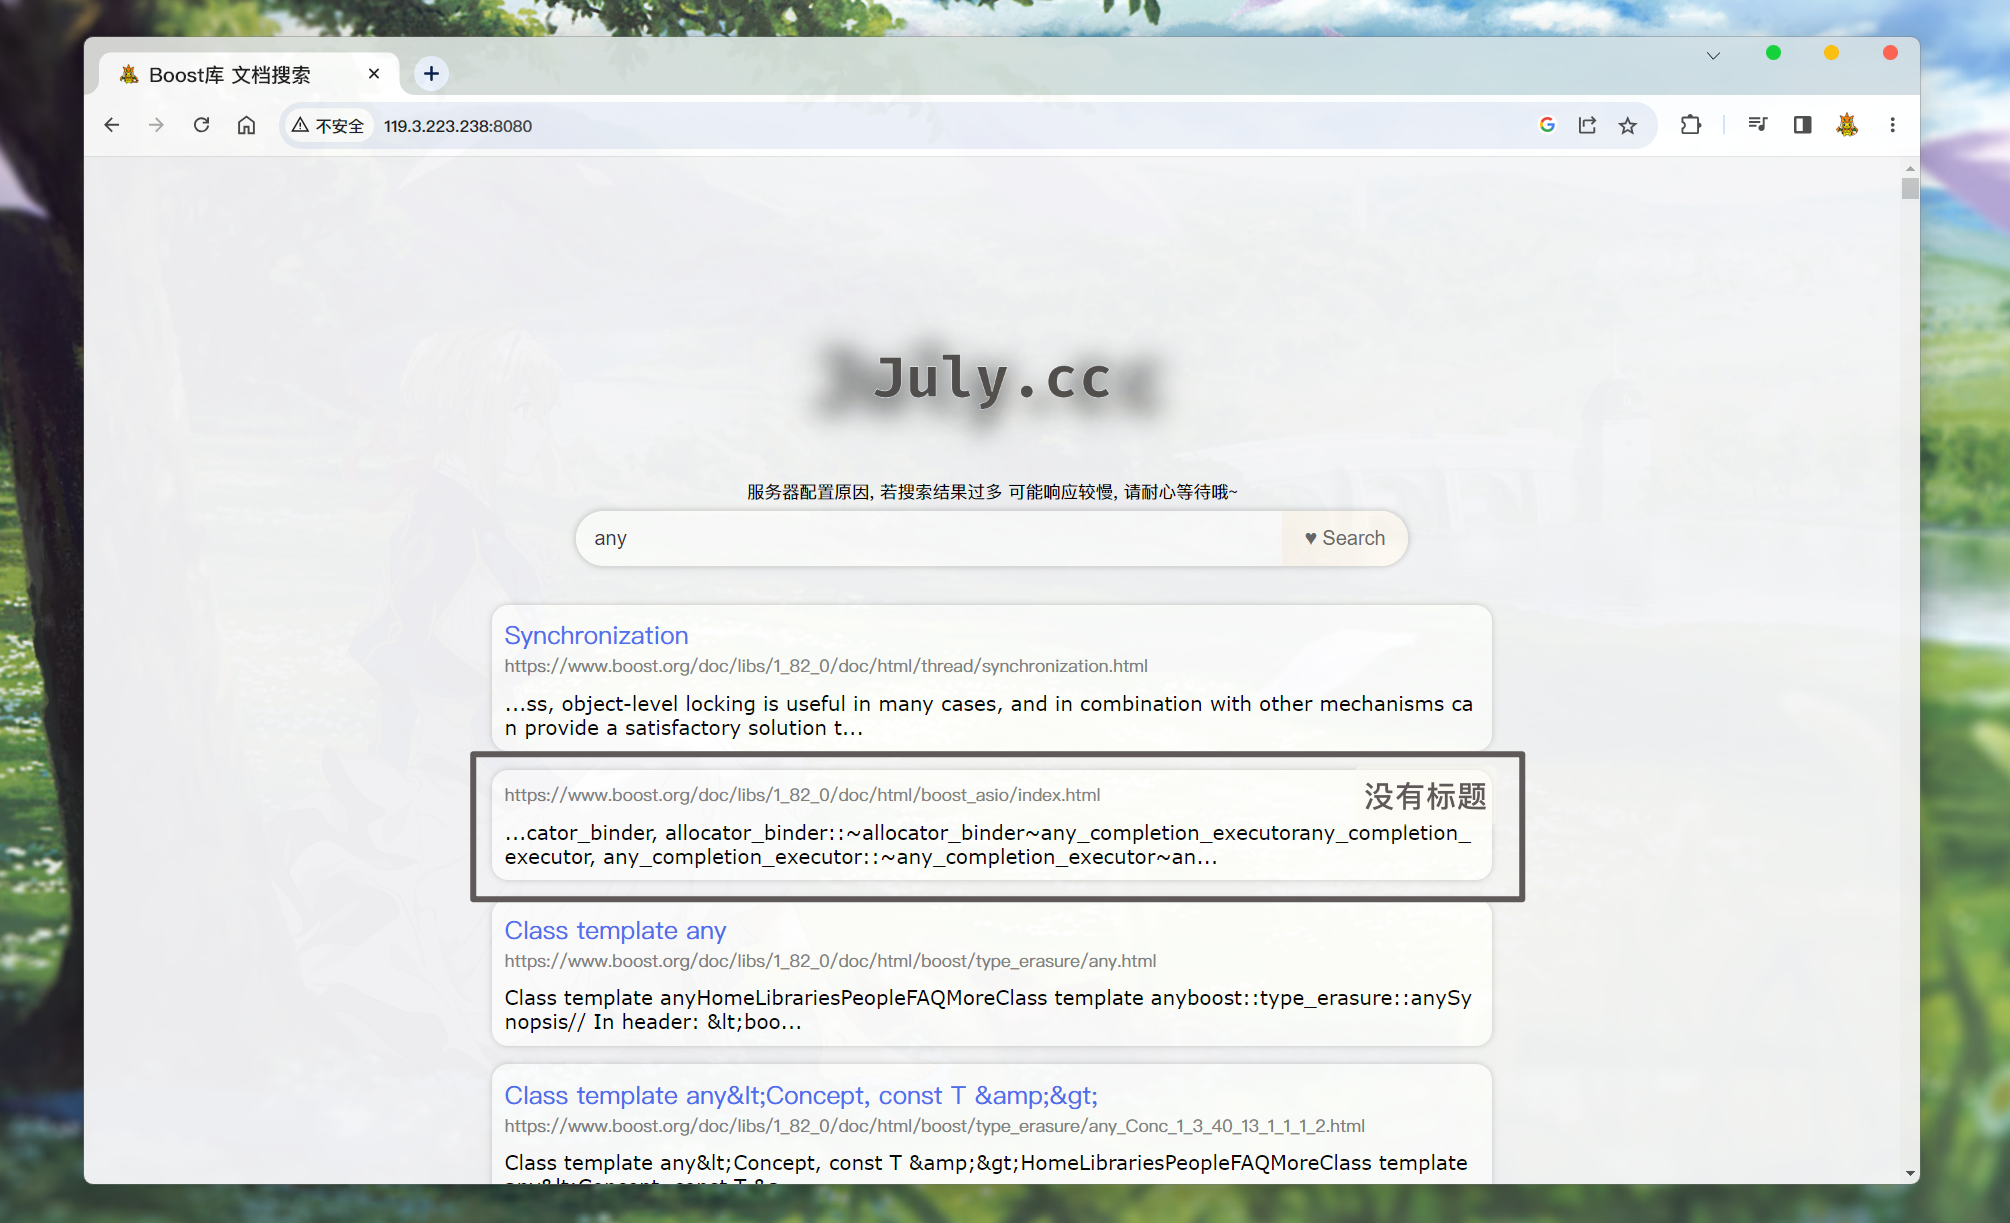
为什么没有标题呢? 不是因为出错了, 是因为 这篇文章本身就没有标题:

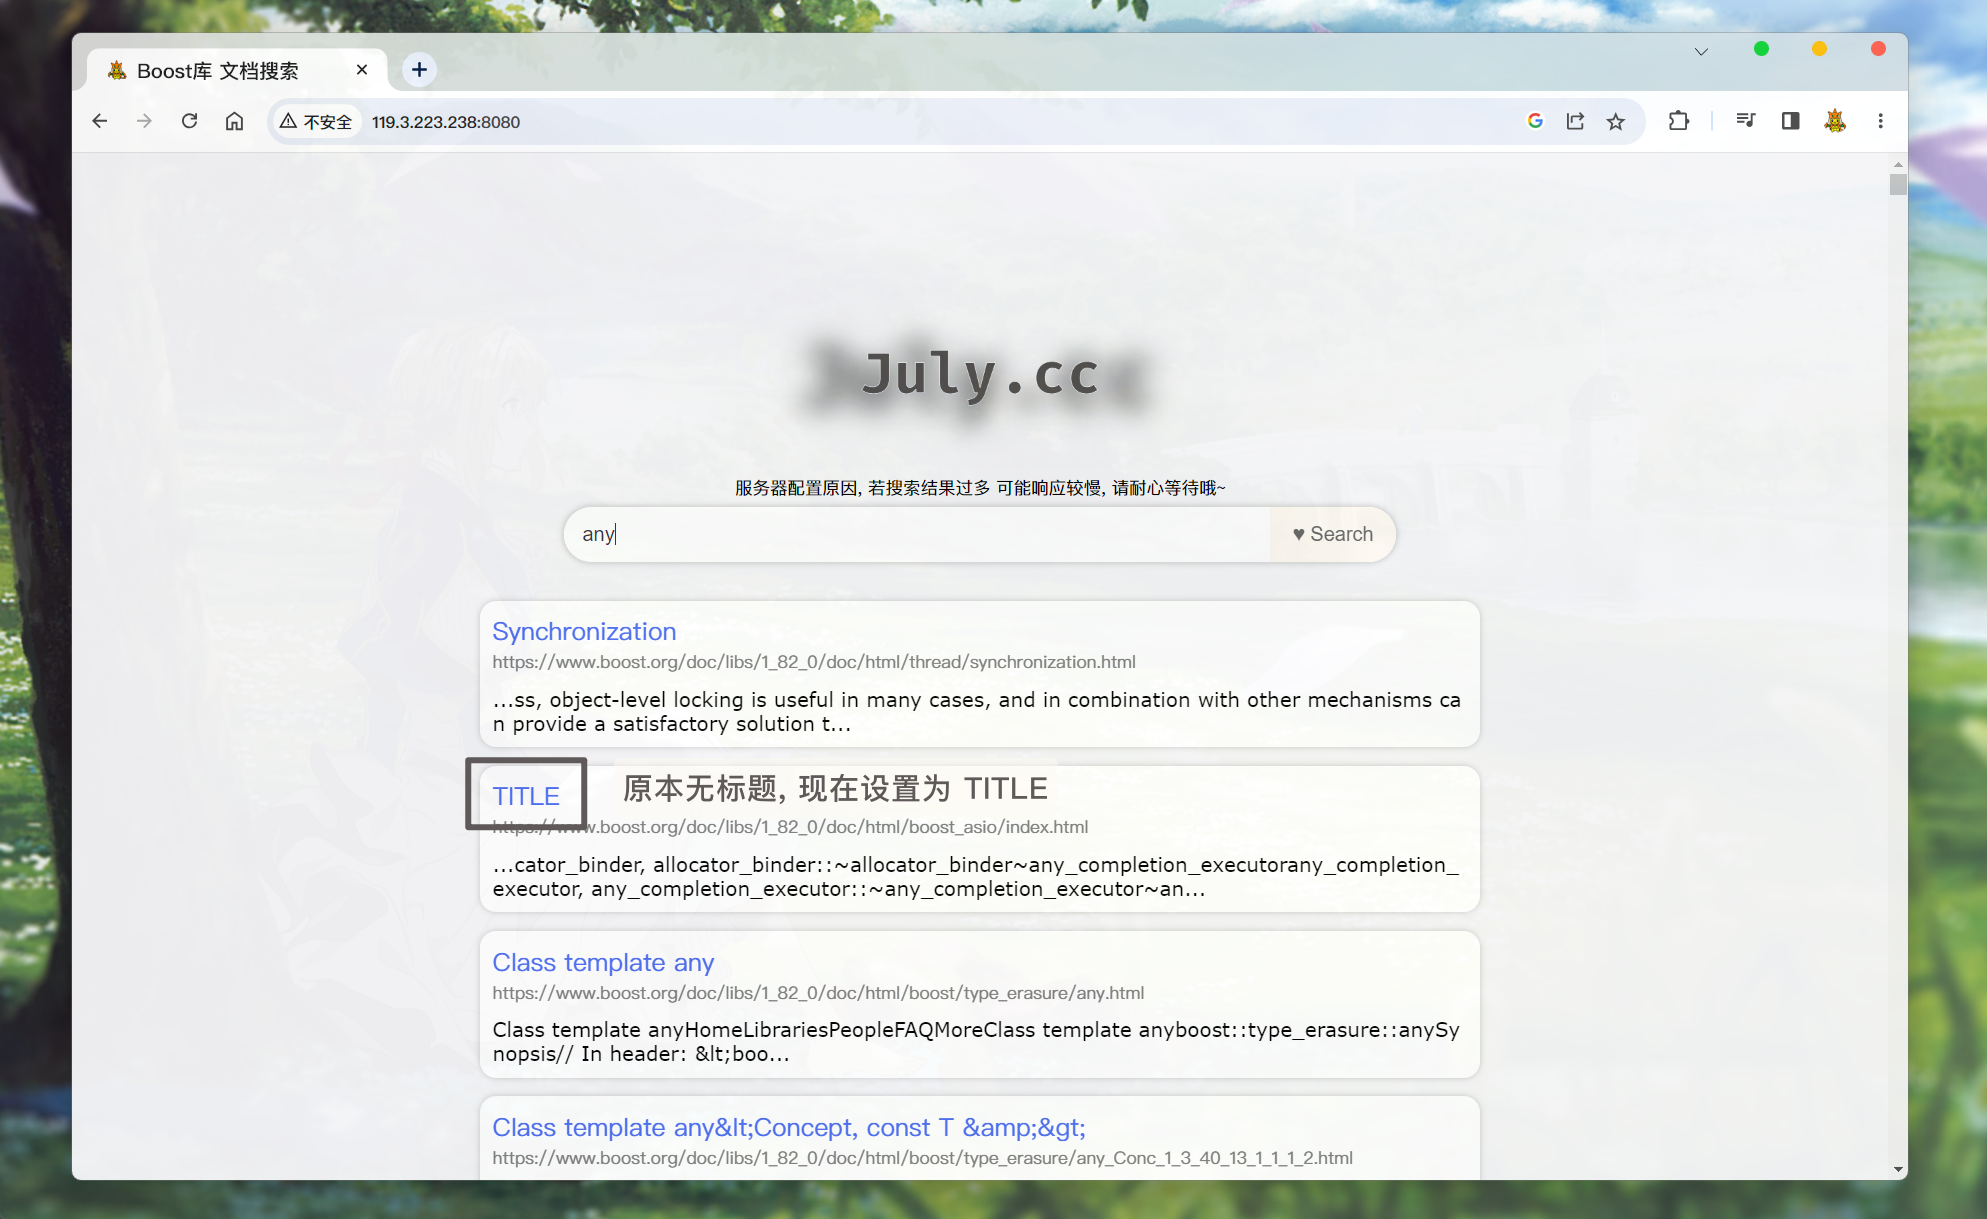
所以, 我们可以考虑修改搜索时获取标题的代码:
/* searcher.hpp */Json::Value root;
if (allInvertedElemOut.empty()) {Json::Value elem;elem["url"] = "http://119.3.223.238:8080";elem["title"] = "Search nothing!";// 关于文档的内容, 搜索结果中是不展示文档的全部内容的, 应该只显示包含关键词的摘要, 点进文档才显示相关内容// 而docInfo中存储的是文档去除标签之后的所有内容, 所以不能直接将 doc._content 存储到elem对应key:value中elem["desc"] = "Search nothing!";root.append(elem);
}
else {for (auto& elemOut : allInvertedElemOut) {// 通过Json::Value 对象, 存储文档内容Json::Value elem;// 通过elemOut._docId 获取正排索引中 文档的内容信息ns_index::docInfo_t* doc = _index->getForwardIndex(elemOut._docId);// elem赋值elem["url"] = doc->_url;elem["title"] = doc->_title;if (doc->_title.empty()) {// 如果无标题, 将标题设置为TITLEelem["title"] = "TITLE";}// 关于文档的内容, 搜索结果中是不展示文档的全部内容的, 应该只显示包含关键词的摘要, 点进文档才显示相关内容// 而docInfo中存储的是文档去除标签之后的所有内容, 所以不能直接将 doc._content 存储到elem对应key:value中elem["desc"] = getDesc(doc->_content, elemOut._keywords[0]); // 只根据第一个关键词来获取摘要// for Debug// 这里有一个bug, jsoncpp 0.10.5.2 是不支持long或long long 相关类型的, 所以需要转换成 double// 这里转换成 double不会有什么影响, 因为这两个参数只是本地调试显示用的.elem["docId"] = (double)doc->_docId;elem["weight"] = (double)elemOut._weight;root.append(elem);}
}
然后, 再搜索:
-
我们之前为了方便观测调试, 把文档的
docId和weight也存储并发送了. 现在可以去除 -
在使用
parser模块处理文档html文件的时候, 有三个符号被转换成了编码<: <>: >&: &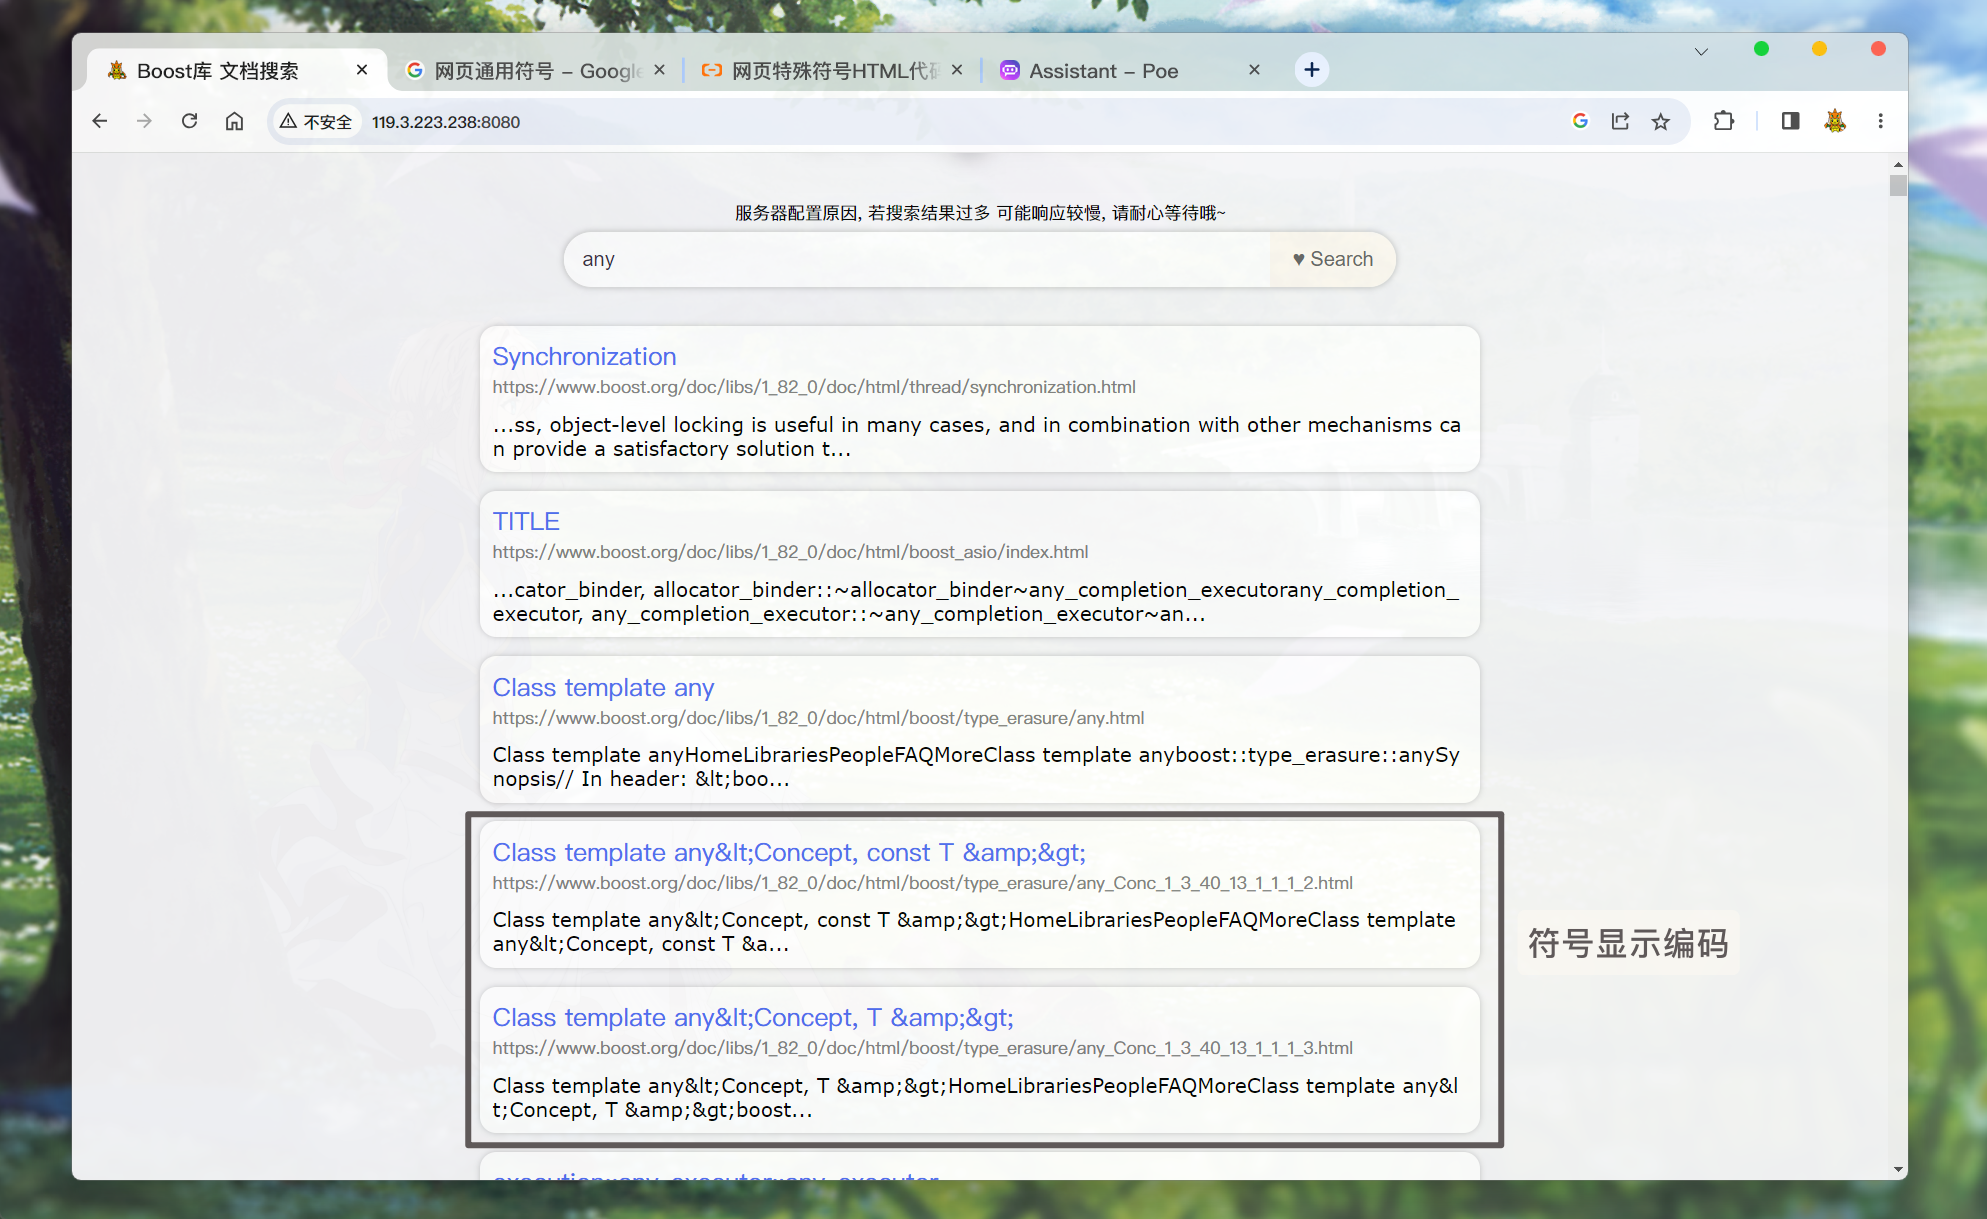
搜索的结果在页面中显示的时候,
<>&符号会以编码的形式显示. 所以我们可以在构建结果的的时候, 再将其转换回去:/*index.html*/for (let elem of data) {// console.log(elem.title);// console.log(elem.url);let a_lable = $("<a>", {text: elem.title.replace(/</g, "<").replace(/>/g, ">").replace(/&/g, "&"),href: elem.url,// 跳转到新的页面target: "_blank",});let i_lable = $("<i>", {text: elem.url,});let p_lable = $("<p>", {text: elem.desc.replace(/</g, "<").replace(/>/g, ">").replace(/&/g, "&"),});let div_lable = $("<div>", {class: "item",});a_lable.appendTo(div_lable);i_lable.appendTo(div_lable);p_lable.appendTo(div_lable);div_lable.appendTo(result_lable); }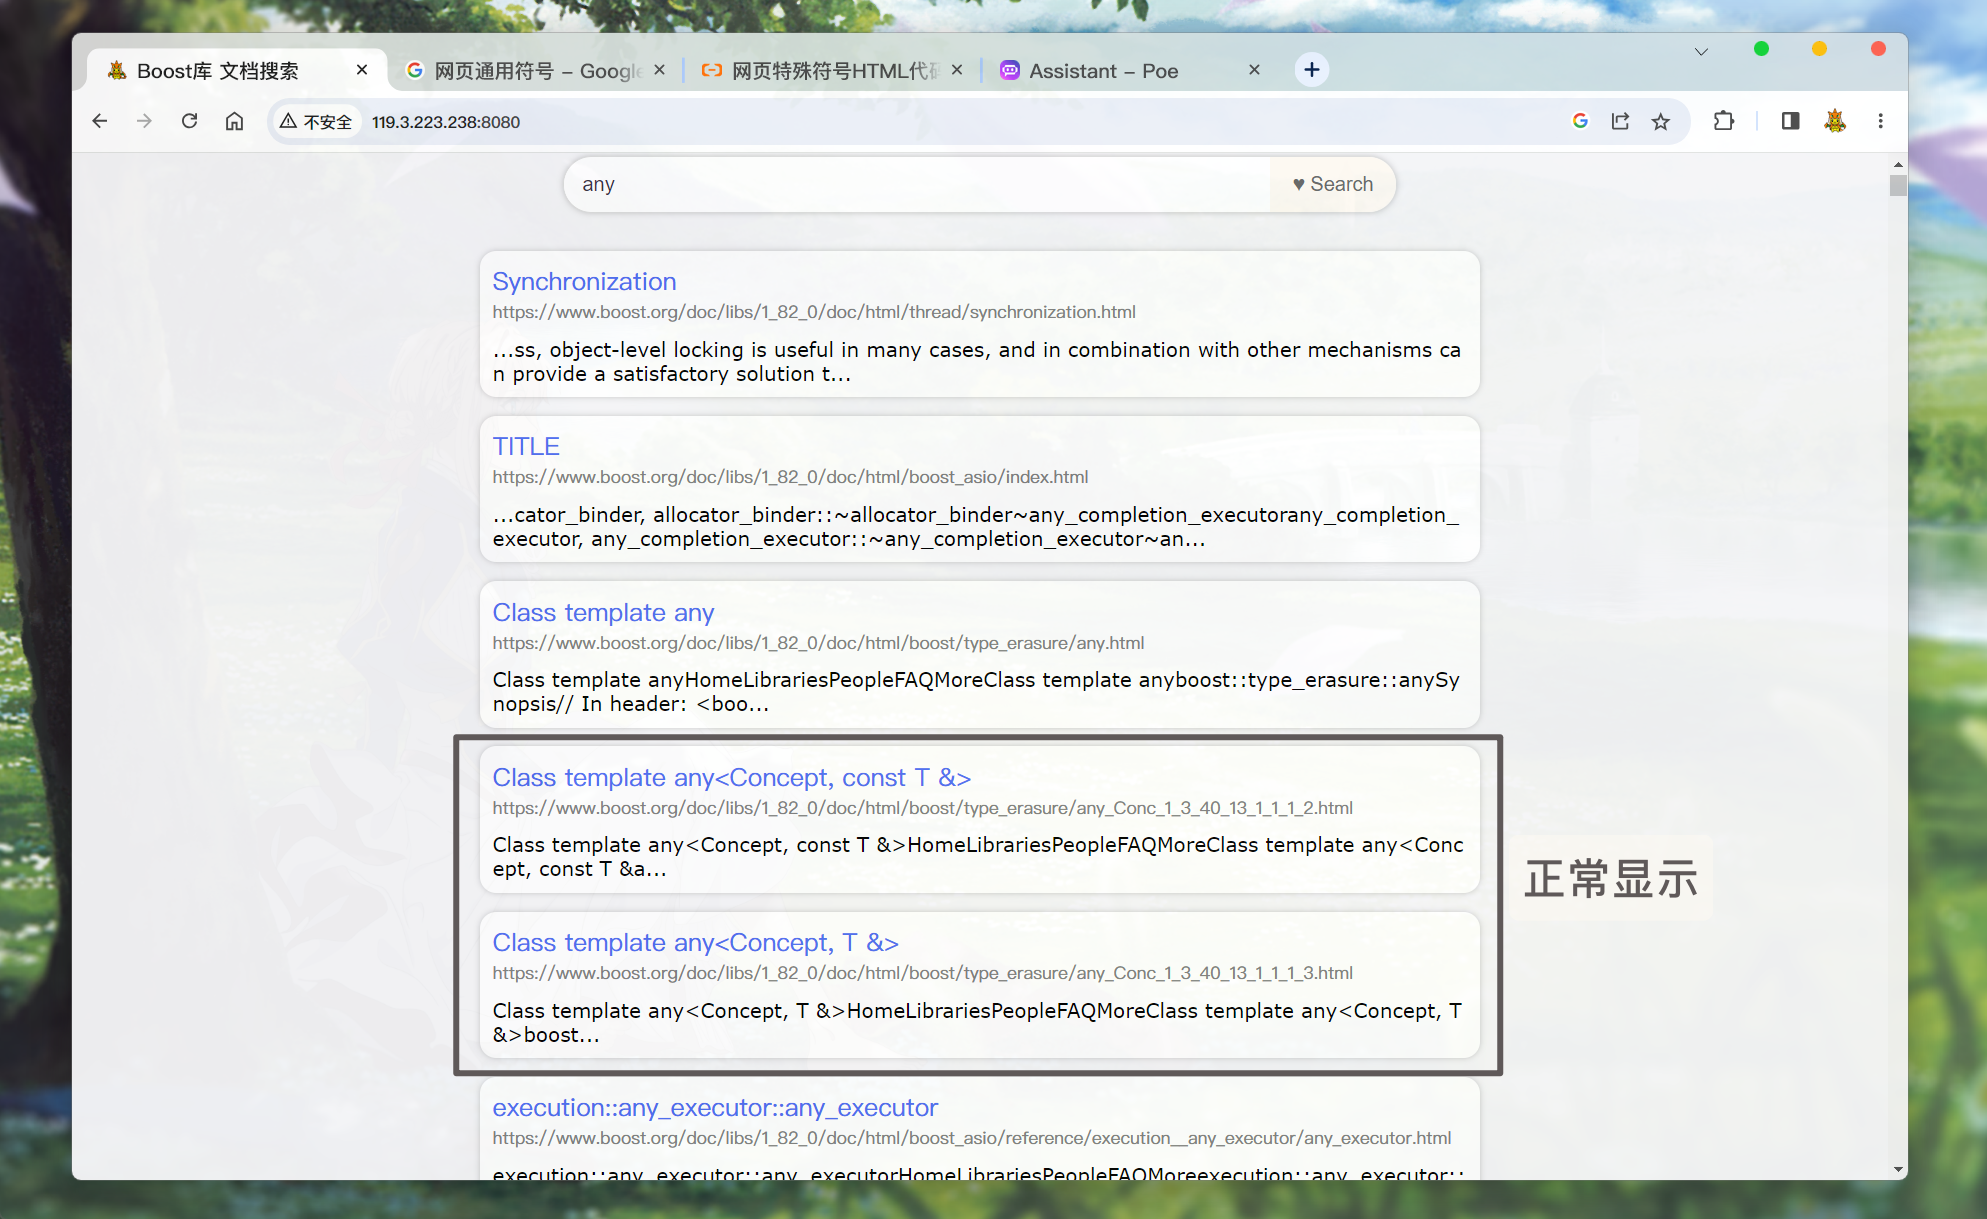
添加日志 并 部署服务器
这部分涉及到守护进程相关内容, 建议阅读博主文章了解:
🫦[Linux] 守护进程介绍、服务器的部署、日志文件…
直接在项目中引入两个文件, 这两个文件都是之前实现过 只不过做了一点点修改的. 很简单:
logMessage.hpp:
/* 日志相关 */#pragma once#include <cassert>
#include <cerrno>
#include <cstdarg>
#include <cstdio>
#include <cstdlib>
#include <cstring>
#include <ctime>
#include <fcntl.h>
#include <sys/stat.h>
#include <sys/types.h>
#include <unistd.h>// 宏定义 四个日志等级
#define DEBUG 0
#define NOTICE 1
#define WARNING 2
#define FATAL 3#define LOGFILEPATH "serverLog.log"const char* log_level[] = {"DEBUG", "NOTICE", "WARNING", "FATAL"};class log {
public:log(): _logFd(-1) {}void enable() {umask(0);_logFd = open(LOGFILEPATH, O_WRONLY | O_CREAT | O_APPEND, 0666);assert(_logFd != -1);dup2(_logFd, STDOUT_FILENO);dup2(_logFd, STDERR_FILENO);}~log() {if (_logFd != -1) {// 将系统缓冲区内容刷入文件fsync(_logFd);close(_logFd);}}private:int _logFd;
};#define LOG(LEVEL, MESSAGE, ...) logMessage(LEVEL, (__FILE__), (__LINE__), MESSAGE, ##__VA_ARGS__)
// 实现一个 可以输出: 日志等级、日志时间、用户、以及相关日志内容的
// 日志消息打印接口
void logMessage(int level, const char* file, int line, const char* format, ...) {// 通过可变参数实现, 传入日志等级, 日志内容格式, 日志内容相关参数// 确保日志等级正确assert(level >= DEBUG);assert(level <= FATAL);// 获取当前用户名char* name = getenv("USER");// 简单的定义log缓冲区char logInfo[1024];// 定义一个指向可变参数列表的指针va_list ap;// 将 ap 指向可变参数列表中的第一个参数, 即 format 之后的第一个参数va_start(ap, format);// 此函数 会通过 ap 遍历可变参数列表, 然后根据 format 字符串指定的格式,// 将ap当前指向的参数以字符串的形式 写入到logInfo缓冲区中vsnprintf(logInfo, sizeof(logInfo) - 1, format, ap);// ap 使用完之后, 再将 ap置空va_end(ap); // ap = NULL// 通过判断日志等级, 来选择是标准输出流还是标准错误流FILE* out = (level == FATAL) ? stderr : stdout;// 获取本地时间time_t tm = time(nullptr);struct tm* localTm = localtime(&tm);char* localTmStr = asctime(localTm);char* nC = strstr(localTmStr, "\n");if (nC) {*nC = '\0';}fprintf(out, "%s | %s | %s | %s | %s:%d\n", log_level[level], localTmStr,name == nullptr ? "unknow" : name, logInfo, file, line);// 将C缓冲区的内容 刷入系统fflush(out);// 将系统缓冲区的内容 刷入文件fsync(fileno(out));
}
daemonize.hpp:
/* 守护进程接口 */
#pragma once#include <cstdio>
#include <fcntl.h>
#include <iostream>
#include <signal.h>
#include <sys/stat.h>
#include <sys/types.h>
#include <unistd.h>void daemonize() {int fd = 0;// 1. 忽略SIGPIPEsignal(SIGPIPE, SIG_IGN);// 2. 改变工作路径// chdir(const char *__path);// 3. 不要成为进程组组长if (fork() > 0) {exit(0);}// 4. 创建独立会话setsid();// 重定向文件描述符0 1 2if ((fd = open("/dev/null", O_RDWR)) != -1) { // 执行成功fd大概率为3dup2(fd, STDIN_FILENO);dup2(fd, STDOUT_FILENO);dup2(fd, STDERR_FILENO);// dup2三个标准流之后, fd就没有用了if (fd > STDERR_FILENO) {close(fd);}}
}
在项目中引入这两个文件之后, 就可以将httpServer.cc设置为守护进程.
并将 整个项目中所有向标准输出和标准错误打印日志的信息, 都改为LOG(LEVEL, MESSAGE, ...)形式 向文件中打印日志:
#include <iostream>
#include <pthread.h>
#include "util.hpp"
#include "daemonize.hpp"
#include "searcher.hpp"
#include "logMessage.hpp"
#include "httplib.h"const std::string& input = "./data/output/raw";
const std::string& rootPath = "./wwwRoot";int main() {// 守护进程设置, 部署服务器daemonize();// 日志系统class log logSvr;logSvr.enable();ns_searcher::searcher searcher;searcher.initSearcher(input);httplib::Server svr;svr.set_base_dir(rootPath.c_str());svr.Get("/s", [&searcher](const httplib::Request& request, httplib::Response& response) {// 首先, 网页发起请求 如果需要带参数, 则是需要以 key=value的格式在url中 或者 正文有效中传参的// 就像我们使用一般搜索引擎搜索一样:// 如果在 google搜索http, 那么 url就会变为 https://www.google.com/search?q=http&sxsrf=AB5stBgDxDV91zrABB// 其中 q=http 就是一对 key=value 值, 而 httplib::Request::has_param() 就是识别请求url中是否携带了 某个key=value// 本项目中, 我们把搜索内容 的key=value对, 设置为word=搜索内容if (!request.has_param("word")) {// url中没有 word 键值// set_content() 第一个参数是设置正文内容, 第二个参数是 正文内容类型等属性response.set_content("请输入内容后搜索", "text/plain; charset=utf-8");}std::string searchContent = request.get_param_value("word");LOG(NOTICE, "User search:: %s", searchContent.c_str()); 	// 调用LOG()// std::cout << "User search:: " << searchContent << std::endl;std::string searchJsonResult;searcher.search(searchContent, &searchJsonResult);// 搜获取到搜索结果之后 设置相应内容response.set_content(searchJsonResult, "application/json");});// svr.Get("/hi", [](const httplib::Request&, httplib::Response& res) {//  res.set_content("Hello World!", "text/plain");// });LOG(NOTICE, "服务器启动成功...");// std::cout << "服务器启动成功..." << std::endl;svr.listen("0.0.0.0", 8080);return 0;
}
执行了daemonize()之后, 服务器就会变成守护进程. 只要服务器主机不关机 或者 不主动kill掉进程. 服务就会一直在后台运行. 所有人都可以随时随地访问.
欢迎访问: Boost库 文档搜索
不欢迎搞破坏!!
项目的完整目录结构 以及 完整代码 展示
目录结构
❯ pwd
/home/July/gitCode/gitHub/Boost-Doc-Searcher
❯ tree -L 3
.
├── cppjieba
│   ├── DictTrie.hpp
│   ├── ...(jieba库相关头文件)
│   └── Unicode.hpp
├── cppjiebaDict
│   ├── hmm_model.utf8
│   ├── ...(jieba库提供的分词库)
│   └── user.dict.utf8
├── daemonize.hpp
├── data
│   ├── input
│   │   ├── about.html
│   │   ├── ...(Boost库文档文件)
│   │   └── yap.html
│   └── output
│       └── raw
├── httplib.h
├── httpServer.cc
├── index.hpp
├── LICENSE
├── logMessage.hpp
├── makefile
├── parser
├── parser.cc
├── README.md
├── searcher.hpp
├── searcherServerd
├── serverLog.log
├── util.hpp
└── wwwRoot├── favicon.svg└── index.html64 directories, 287 files
完整代码
整个项目的完整代码已提交至Github: Boost-Doc-Searcher
欢迎收藏使用~
本篇文章至此结束. 但此项目还有扩展内容, 可以关注一下专栏等待后续更新~
感谢阅读~