Python识别抖音Tiktok、巨量引擎滑块验证码识别
由于最近比较忙,所以本周搞了一个相对简单的验证码,就是抖音Tiktok的滑块验证码,这也是接到客户的一个需求。这种验证码通常在电脑端登录抖音、巨量引擎的的时候出现。
首先看一下最终的效果:
验证码识别过程
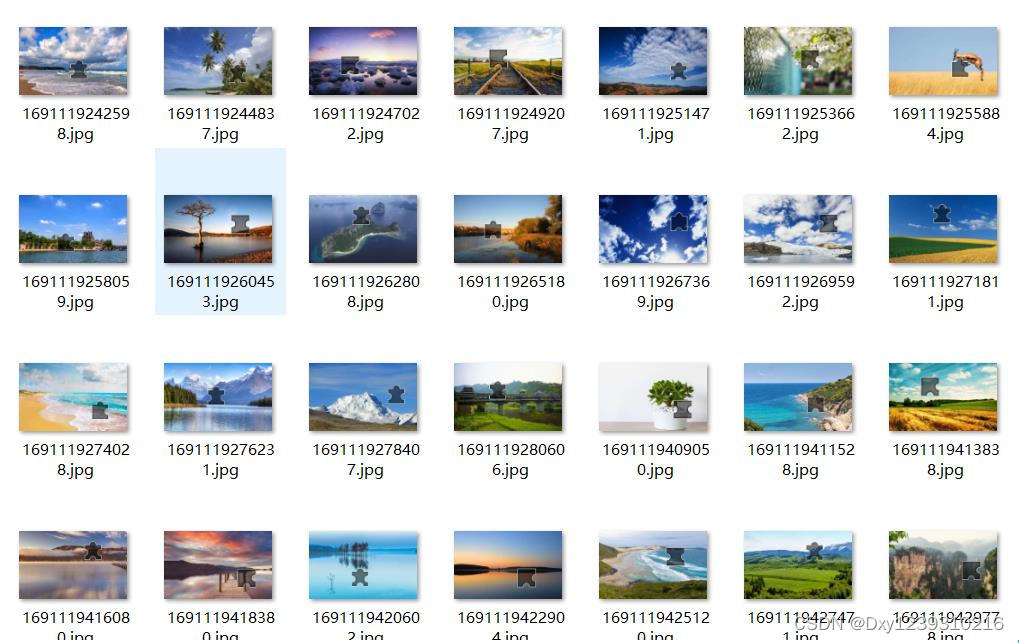
1、利用爬虫采集图像
由于是识别滑块缺口位置,分析了一下,大图已经包含了滑块缺口的位置信息,所以这里只需要采集大图就够了。不需要小图进行比对,这样可以简单一点。
(1)采集大图
2、人工标记
为了保障识别的精度,这里需要进行大量的人工标记,最好将误差控制在1-2像素以内,这样训练出来的识别模型效果才好。

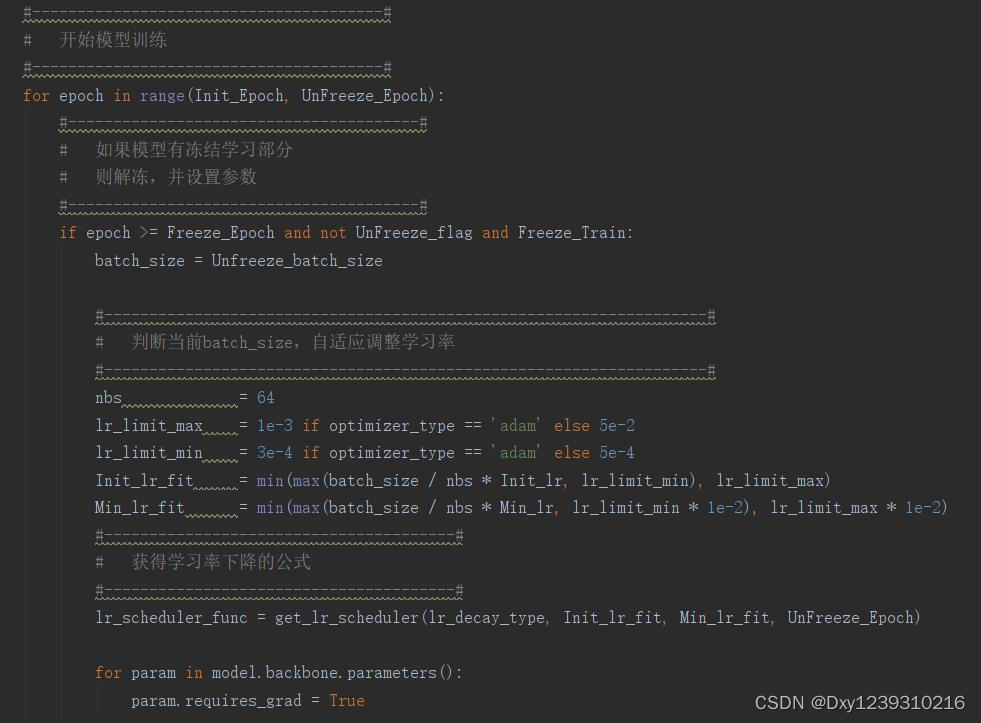
3、训练模型
4、测试验证
我们将训练好的模型用100张图片来进行测试,发现全部都能正确识别位置,所以正确率接近100%。因为100张测试图片比较少,所以保守估计正确率应该在99%左右。
如果再想提升正确率,可以再增加训练的数据量,就需要再投入大量人力,这个投入与提升产出比需要自己权衡。
5、实战测试
这里我就直接上代码,就是文章开通动图的演示效果。我也将模型封装成了免费的接口给感兴趣的小伙伴调用:得塔云
__author__ = "dengxinyan"import io
import time
import json
import requests
import urllib
import random
import base64
from io import BytesIO
from PIL import Image, ImageDraw, ImageFont
from selenium import webdriver
from selenium.webdriver.support.wait import WebDriverWait
from selenium.webdriver.common.action_chains import ActionChains
from selenium.webdriver.common.keys import Keys
from selenium.webdriver import ChromeOptions
from selenium.webdriver import FirefoxOptions# PIL图片保存为base64编码
def PIL_base64(img, coding='utf-8'):img_format = img.formatif img_format == None:img_format = 'JPEG'format_str = 'JPEG'if 'png' == img_format.lower():format_str = 'PNG'if 'gif' == img_format.lower():format_str = 'gif'if img.mode == "P":img = img.convert('RGB')if img.mode == "RGBA":format_str = 'PNG'img_format = 'PNG'output_buffer = BytesIO()# img.save(output_buffer, format=format_str)img.save(output_buffer, quality=100, format=format_str)byte_data = output_buffer.getvalue()base64_str = 'data:image/' + img_format.lower() + ';base64,' + base64.b64encode(byte_data).decode(coding)return base64_str# 验证码识别接口
def shibie(img):url = "http://www.detayun.cn/openapi/verify_code_identify/"data = {# 用户的key"key":"nWrzPFUgFuqXQrCJJUME",# 验证码类型"verify_idf_id":"6",# 样例图片"img_base64":PIL_base64(img),"img_byte": None,# 中文点选,空间语义类型验证码的文本描述(这里缺省为空字符串)"words":""}header = {"Content-Type": "application/json"}# 发送请求调用接口response = requests.post(url=url, json=data, headers=header)print(response.text)return response.json()def run(headless=False):# 配置参数options = FirefoxOptions()if headless:options.add_argument('--headless')else:options.add_argument('--window-size=100,100')options.add_argument('--disable-blink-features=AutomationControlled')options.add_argument('--disable-dev-shm-usage')options.set_preference('general.useragent.override', 'Mozilla/5.0 (Windows NT 10.0; Win64; x64) AppleWebKit/537.36 (KHTML, like Gecko) Chrome/92.0.4515.107 Safari/537.36')driver = webdriver.Firefox(executable_path=r'F:\验证码项目\小红书旋转验证码\webdriver\geckodriver.exe', options=options)# 伪装浏览器driver.execute_script("Object.defineProperty(navigator, 'webdriver', {get: () => false,});")navigator_webdriver = driver.execute_script("return navigator.webdriver")driver.execute_script("Object.defineProperty(navigator, 'plugins', {get: () => [1, 2, 3, 4, 5],});")plugins_length = driver.execute_script("return navigator.plugins.length")# 发送请求driver.get('https://business.oceanengine.com/login?appKey=51')# 等待【请输入邮箱】元素出现WebDriverWait(driver, 20).until(lambda x: x.find_element_by_xpath('//input[@placeholder="请输入邮箱"]'))# 找到【请输入邮箱】元素tag1 = driver.find_element_by_xpath('//input[@placeholder="请输入邮箱"]')# 点击【请输入邮箱】元素tag1.click()# 输入邮箱tag1.send_keys('123451111@qq.com')# 等待【密码】元素出现WebDriverWait(driver, 20).until(lambda x: x.find_element_by_xpath('//input[@placeholder="密码"]'))# 找到【密码】元素tag2 = driver.find_element_by_xpath('//input[@placeholder="密码"]')# 点击【密码】元素tag2.click()# 输入密码tag2.send_keys('13611112222')# 等待【用户协议】元素出现WebDriverWait(driver, 20).until(lambda x: x.find_element_by_xpath('//div[@class="account-center-agreement-check"]'))# 找到【用户协议】元素tag3 = driver.find_element_by_xpath('//div[@class="account-center-agreement-check"]')# 点击【用户协议】元素tag3.click()# 等待【登录】元素出现WebDriverWait(driver, 20).until(lambda x: x.find_element_by_xpath('//button[@class="ace-ui-btn account-center-action-button active ace-ui-btn-primary"]'))# 找到【登录】元素tag4 = driver.find_element_by_xpath('//button[@class="ace-ui-btn account-center-action-button active ace-ui-btn-primary"]')# 点击【登录】元素tag4.click()# 可能一次不成功,需要多次滑动for i in range(5):# 等待【验证码大图】元素出现WebDriverWait(driver, 20).until(lambda x: x.find_element_by_xpath('//img[@id="captcha-verify-image"]'))# 找到【验证码大图】元素tag5 = driver.find_element_by_xpath('//img[@id="captcha-verify-image"]')# 获取图像链接img_url = tag5.get_attribute('src')print(img_url)header = {"Host": "p9-catpcha.byteimg.com","User-Agent": "Mozilla/5.0 (Windows NT 10.0; Win64; x64; rv:72.0) Gecko/20100101 Firefox/72.0","Accept": "text/html,application/xhtml+xml,application/xml;q=0.9,image/webp,*/*;q=0.8","Accept-Language": "zh-CN,zh;q=0.8,zh-TW;q=0.7,zh-HK;q=0.5,en-US;q=0.3,en;q=0.2","Accept-Encoding": "gzip, deflate, br","Connection": "keep-alive","Upgrade-Insecure-Requests": "1",}# 下载图片response = requests.get(url=img_url)img = Image.open(BytesIO(response.content))y = shibie(img)# 获得滑动像素距离y = int(str(y['data']['res_str']).replace('滑动','').replace('px',''))# 等待【滑块】元素出现WebDriverWait(driver, 20).until(lambda x: x.find_element_by_xpath('//div[@class="secsdk-captcha-drag-icon sc-kEYyzF fiQtnm"]'))# 找到【滑块】元素tag6 = driver.find_element_by_xpath('//div[@class="secsdk-captcha-drag-icon sc-kEYyzF fiQtnm"]')# 滑动滑块action = ActionChains(driver)action.click_and_hold(tag6).perform()time.sleep(1)# 计算实际滑动距离 = 像素距离 * 滑动系数move_x = y * 0.61# 滑动1:直接滑动action.move_by_offset(move_x + 20, 5)time.sleep(0.5)action.move_by_offset(-10, -15)time.sleep(0.5)action.move_by_offset(-10, 10)# 滑动2:分段滑动# n = (random.randint(5, 8))# move_x = move_x / n# for i in range(n):#     action.move_by_offset(move_x, 5)#     time.sleep(0.5)time.sleep(1)# 释放鼠标action.release().perform()time.sleep(2)# 判断是否滑动成功try:# 等待【错误提示】元素出现WebDriverWait(driver, 5).until(lambda x: x.find_element_by_xpath('//div[@class="sc-htoDjs jwiskW"]'))# 等待【刷新】元素出现WebDriverWait(driver, 20).until(lambda x: x.find_element_by_xpath('//span[@class="secsdk_captcha_refresh--text sc-bwzfXH gBXrMn"]'))# 找到【刷新】元素tag7 = driver.find_element_by_xpath('//span[@class="secsdk_captcha_refresh--text sc-bwzfXH gBXrMn"]')# 点击【刷新】元素tag7.click()time.sleep(1)except:breakif __name__ == '__main__':run(headless=False)
6、总结分析
(1)抖音图片标注工作比较复杂,我统计了一下背景图的种类超过800中,所以给标注、识别增加了一定难度
(2)抖音的滑动轨迹检测比较厉害,直接滑动到位完全无法通过,分段轨迹也很难通过。所以我首先滑过,再返回对齐,这样就能完美一次通过验证(最前面动图就是这样的效果)
(3)抖音页面有很强的反爬措施,检测我使用 selenium 始终无法通过验证,始终不会条验证码。这一点如何防检测 selenium 也请各位大神指点。所以我代码使用的巨量引擎(巨量引擎是字节跳动旗下的品牌)网站进行的测试
各位大神也请指出我的不足,或者有其他建议都可以给我留言,或私信我,谢谢指点。