5分钟学会网络服务搭建,飞凌i.MX9352 + Linux 6.1实战示例
在“万物互联”的技术浪潮下,网络服务已成为连接物理世界与数字世界的核心纽带,它不仅赋予了终端设备“开口说话”的能力,更构建了智能设备的开发范式。
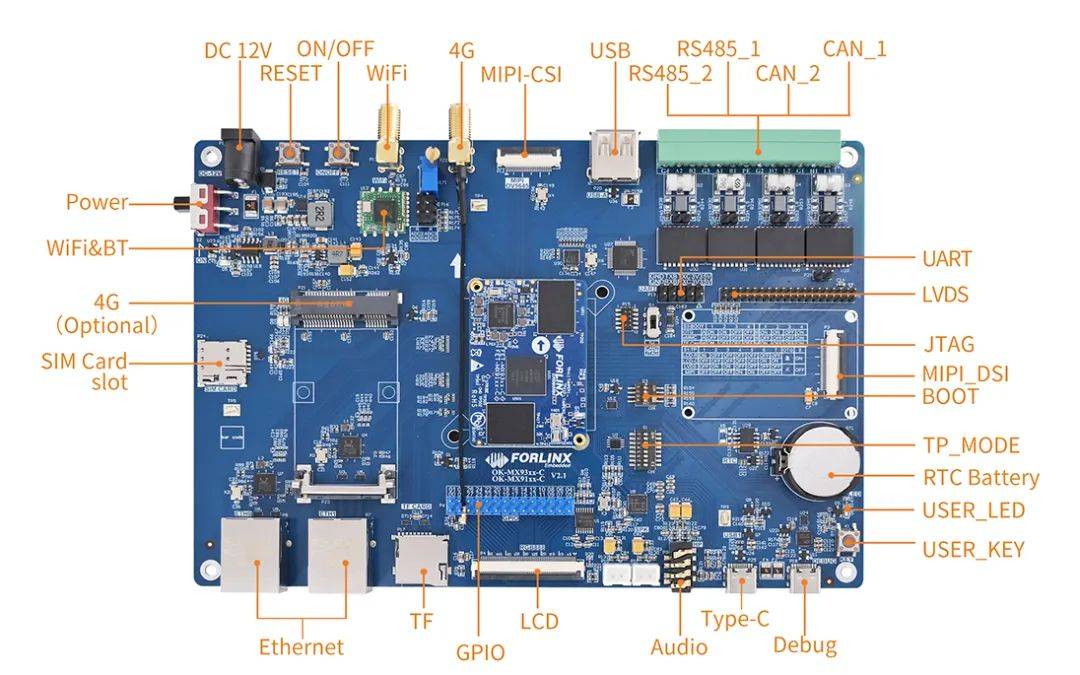
本文就将以飞凌嵌入式OK-MX9352-C开发板(搭载了在工业物联网领域广泛应用的NXP i.MX9352处理器)为平台,介绍如何在Linux6.1.36开发环境当中如何搭建常用的网络服务,各位工程师朋友可以参考本文进行操作。

1、TFTP服务搭建
TFTP(简单文件传输协议),是TCP/IP协议族中用来在客户机和服务器之间进行简单文件传输的协议,通常用于内核调试。在嵌入式Linux开发过程中,内核调试是其中一个基础、重要的环节。
1.1 安装服务器、客户端和守护进程
forlinx@ubuntu:~$ sudo apt-get install tftp-hpa tftpd-hpa xinetd1.2 服务器配置
首先,在根目录下建一个tftpboot,并把属性改成任意用户可读写:
forlinx@ubuntu:~$ cd /forlinx@ubuntu:/$ sudo mkdir tftpbootforlinx@ubuntu:/$ sudo chmod 777 tftpboot然后,进入目录/etc/xinetd.d/,并在其中新建文件tftp,把指定的内容加入到tftp文件中:
forlinx@ubuntu:/$ cd /etc/xinetd.d/forlinx@ubuntu:/etc/xinetd.d$ sudo vim tftp添加以下内容到tftp文件
service tftp{disable = no 138socket_type = dgramprotocol = udpwait = yesuser = rootserver = /usr/sbin/in.tftpdserver_args = -s /tftpboot -cper_source = 11cps = 100 2}最后,修改配置文件/etc/default/tftpd-hpa
forlinx@ubuntu:/etc/xinetd.d$ cd /forlinx@ubuntu:/$ sudo vim /etc/default/tftpd-hpa这里需要注意,将“TFTP_DIRECTORY”改为新建tftpboot目录所在的路径。
1.3 重新启动服务
forlinx@ubuntu:/$ sudo /etc/init.d/xinetd reloadforlinx@ubuntu:/$ sudo /etc/init.d/xinetd restartforlinx@ubuntu:/$ sudo /etc/init.d/tftpd-hpa restart1.4 测试服务器
测试一下,在/tftpboot文件夹下新建一个文件
forlinx@ubuntu:/$ cd /tftpboot/forlinx@ubuntu:/tftpboot$ sudo touch abc进入另外一个文件夹:
forlinx@ubuntu:/tftpboot$ cd /home/forlinx@ubuntu:/home$ sudo tftp 192.168.2.57 //192.168.2.57为本机IPtftp> get abctftp> quitforlinx@ubuntu:/home$ lsabc如果可以下载说明服务器已经安装成功,将开发板同PC通过网线进行连接后即可使用tftp下载文件。
bootz ${loadaddr} - ${fdt_addr};
2、NFS服务搭建
NFS(网络文件系统),可以通过网络让不同机器、不同系统之间可以实现文件共享。通过NFS,可以访问远程共享目录,就像访问本地磁盘一样。
2.1 Ubuntu下搭建NFS服务器方法如下
软件下载安装
forlinx@ubuntu:~# sudo apt-get install nfs-kernel-server nfs-common portmap
创建NFS目录并解压文件系统(以rootfs.tar.bz2文件系统为例,当前目录为根目录)
forlinx@ubuntu:~# cd /forlinx@ubuntu:/# sudo mkdir nfs_rootfsforlinx@ubuntu:/# sudo tar -xvf rootfs.tar.bz2 -C /nfs_rootfs/修改配置文件
forlinx@ubuntu:/# sudo vim /etc/exports在文件中添加以下配置:
/nfs_rootfs *(rw,sync,no_root_squash,no_subtree_check)重启配置文件和服务
forlinx@ubuntu:/# sudo exportfs -rvforlinx@ubuntu:/# sudo /etc/init.d/rpcbind restartforlinx@ubuntu:/# sudo /etc/init.d/nfs-kernel-server restart2.2 在i.MX9352开发板上验证NFS服务器
执行完以下命令将NFS服务器挂载到开发板的/mnt目录
root@ok-mx93:~# mount -t nfs4 -o vers=4 192.168.0.57:/nfs_rootfs /mnt挂载成功后,查看/mnt目录,会看到刚才解压的文件系统
root@ok-mx93:~# ls /mnt/注:192.168.0.57为NFS服务器主机Ubuntu的IP,Ubuntu的网络需设置为桥接模式,并跟i.MX9352开发板在同一网段。
3、SSH服务搭建
SSH是较可靠的专为远程登录会话和其他网络服务提供安全性的协议,利用SSH协议可以有效防止远程管理过程中的信息泄露问题。SSH最初是UNIX系统上的一个程序,后来又迅速扩展到其他操作平台。
3.1 安装SSH
在Ubuntu(Linux主机)终端键入以下指令,安装SSH服务:
forlinx@ubuntu:/$ sudo apt-get install ssh3.2 启动SSH服务
forlinx@ubuntu:/$ sudo service ssh start3.3 查看SSH服务的状态
forlinx@ubuntu:/$ sudo service ssh status● ssh.service - OpenBSD Secure Shell serverLoaded: loaded (/lib/systemd/system/ssh.service; enabled; vendor preset: enabled)Active: active (running) since Mon 2021-08-23 17:19:57 CST; 45s agoMain PID: 7383 (sshd)Tasks: 1 (limit: 2292)CGroup: /system.slice/ssh.service└─7383 /usr/sbin/sshd -D8月 23 17:19:57 ubuntu systemd[1]: Starting OpenBSD Secure Shell server...8月 23 17:19:57 ubuntu sshd[7383]: Server listening on 0.0.0.0 port 22.8月 23 17:19:57 ubuntu sshd[7383]: Server listening on :: port 22.8月 23 17:19:57 ubuntu systemd[1]: Started OpenBSD Secure Shell server.3.4 关闭SSH服务
forlinx@ubuntu:/$ sudo service ssh stop3.5 测试方法
i.MX9352开发板通过SSH访问Linux主机:
root@ok-mx93:~# ssh forlinx@192.168.0.57Host '192.168.0.57' is not in the trusted hosts file.(ecdsa-sha2-nistp256 fingerprint md5 07:72:76:56:47:e0:da:5e:77:a2:58:b1:b5:9f:cb:2a)Do you want to continue connecting? (y/n) y //首次登录需要确认,输入yforlinx@192.168.0.57's password: //输入forlinx账户密码Welcome to Ubuntu 22.04.1 LTS (GNU/Linux 5.15.0-56-generic x86_64)* Documentation: https://help.ubuntu.com* Management: https://landscape.canonical.com* Support: https://ubuntu.com/advantage0 updates can be applied immediately.The programs included with the Ubuntu system are free software;the exact distribution terms for each program are described in theindividual files in /usr/share/doc/*/copyright.Ubuntu comes with ABSOLUTELY NO WARRANTY, to the extent permitted byapplicable law.forlinx@ubuntu:~$ //通过用户名和主机名确认ssh登录成功Linux主机通过SSH登录i.MX9352开发板:
forlinx@ubuntu:~$ ssh -oHostKeyAlgorithms=+ssh-rsa root@192.168.0.232The authenticity of host '192.168.0.232 (192.168.0.232)' can't be established.RSA key fingerprint is SHA256:fsa3SVdSPDtCMacfd8PjHF1RIPsnXB22gKS97qJpwys.This key is not known by any other namesAre you sure you want to continue connecting (yes/no/[fingerprint])? yes //首次登录需要确认,输入yesWarning: Permanently added '192.168.0.232' (RSA) to the list of known hosts.root@ok-mx93:~# //通过用户名和主机名确认ssh登录成功以上就是在飞凌嵌入式OK-MX9352-C开发板的Linux6.1.36系统上完成网络服务搭建的方法,希望能够对各位工程师朋友有所帮助。需要注意的是,本文的操作方法适用于飞凌嵌入式OK-MX9352-C平台的Linux6.1.36操作系统,其他平台可能会存在差异,本文的方法仅作为参考。
