pytest框架 - 第二集 allure报告
一、断言assert
二、Pytest 结合 allure-pytest 插件生成美观的 Allure 报告
(1) 安装 allure 环境
- 安装 allure-pytest 插件:
pip install allure-pytest - 在 github 下载 allure 报告文件
- 地址:Releases · allure-framework/allure2 · GitHub
- 下载:allure-2.21.0.zip
- 配置 path 环境变量(不能有中文):D:\allure-2.21.0\bin
- 重启 Pycharm 并验证是否安装成功
在 dos 和 pycharm 中输入:allure --version能看到版本号说明 OK
(2) 生成 allure 报告
- 生成临时的 json 报告
addopts = -vs --alluredir=temps --clean-alluredir (ini)
解释:--alluredir=temps生成临时的 json 报告--clean-alluredir每一次运行清空临时的 json 报告
- 根据 json 报告生成 html 的 allure 报告
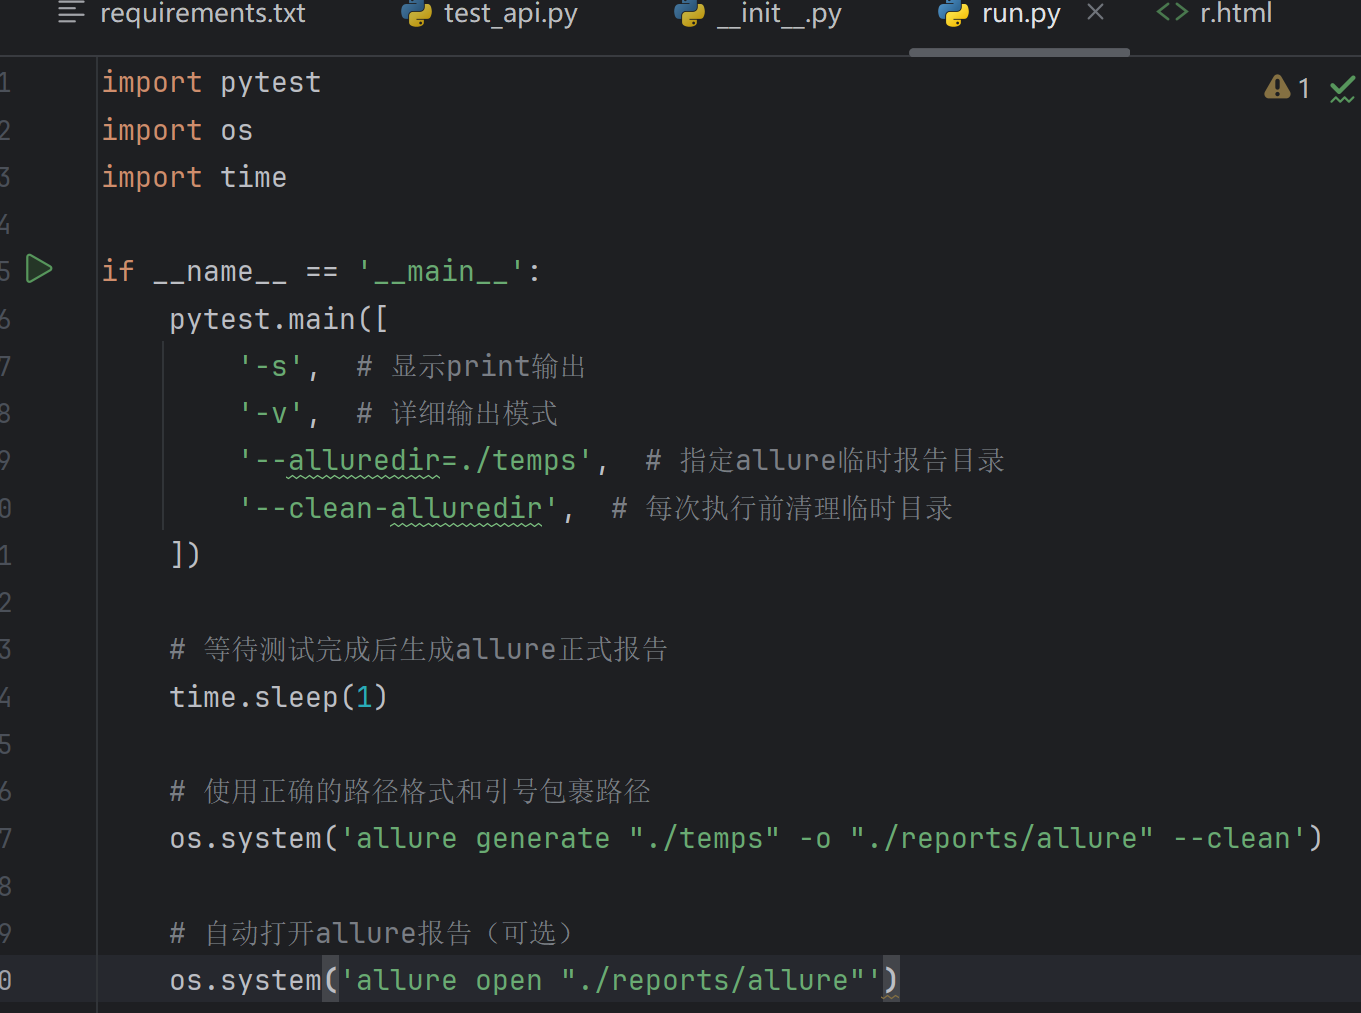
if __name__ == '__main__':pytest.main()time.sleep(3)os.system("allure generate./temps -o./reports --clean")
./temps 临时 json 报告文件夹
-o output 输出
./reports allure 报告的路径
--clean 每一次运行清空 allure 报告
上面这个运行起来有问题 故优化代码为:
就是把ini的设定放到run里面
(3) 企业级 allure 报告定制
1. 企业 LOGO 定制
更改 D:\allure-2.21.0\config 目录下的 allure.yml 配置文件,加入自定义 logo
yaml
plugins:- junit-xml-plugin- xunit-xml-plugin- trx-plugin- behaviors-plugin- packages-plugin- screen-diff-plugin- xctest-plugin- jira-plugin- xray-plugin- custom-logo-plugin
2. 更改图标
在 D:\allure-2.21.0 - 测试 \plugins\custom-logo-plugin\static 目录下加入 logo 图片
3. 更改样式
在 D:\allure-2.21.0 - 测试 \plugins\custom-logo-plugin\static 目录下修改 style.css 的样式
css
/*
.side-nav__brand {background: url('logo.png') no-repeat left center!important;margin-left: 10px;
}
*/.side-nav__brand{background: url('logo.png') no-repeat left center!important;margin-left: 22px;height: 90px;background-size: contain!important;
}.side-nav__brand-text{display: none;
}
最后根据margin-left: 22px;和height: 90px;样式调整 logo 大小和位置。
2. 项目结构的报告定制
报告左边的定制
@allure.epic("项目名称:码尚教育金融项目接口自动化报告")
@allure.feature("模块名称:用户管理模块")
class TestApi:@allure.story("接口名称:登陆接口")#@allure.title("验证登陆接口成功返回数据")def test_login(self):print("登陆测试用例")allure.dynamic.title("接口登陆成功")assert "a" in "abc"
报告右边的定制
优先级:BLOCKER(致命),CRITICAL(严重),NORMAL(一般),MINOR(提示),TRIVIAL(轻微)
@allure.epic("项目名称: 金融项目接口自动化报告")
@allure.feature("模块名称: 用户管理模块")
class TestApi:@allure.story("接口名称: 登陆接口")#@allure.title("验证登陆接口成功返回数据")@allure.severity(allure.severity_level.BLOCKER)def test_login(self):print("登陆测试用例")allure.dynamic.title("接口登陆成功")assert "a" in "abc"@allure.story("接口名称: 登陆接口")@allure.title("验证登陆失败")def test_login2(self):print("登陆测试用例")assert "a" in "abc"def test_register(self):print("注册测试用例")
装饰器部分
@allure.epic("项目名称:金融项目接口自动化报告")
allure.epic 装饰器用于定义测试用例所属的史诗级(项目级)别的标题,这里指定了项目名称为 “金融项目接口自动化报告” ,在 Allure 报告中会以项目维度进行展示,方便从宏观层面归类测试用例。
@allure.feature("模块名称:用户管理模块")
allure.feature 装饰器用来标识测试用例所属的功能模块,这里表明这些测试用例属于 “用户管理模块” ,可以将同一功能模块下的测试用例聚合展示在 Allure 报告中。
@allure.story("接口名称:登陆接口")
allure.story 装饰器用于进一步细化测试用例所属的用户故事,这里表示测试用例围绕 “登陆接口” 展开,可帮助在报告中按不同接口维度组织测试用例。
@allure.title("验证登陆失败")
allure.title 装饰器用于指定测试用例在 Allure 报告中显示的标题。在test_login2方法上使用,意味着该测试用例在报告中展示的标题为 “验证登陆失败” ,可使报告中的用例标题更清晰易读。
@allure.severity(allure.severity_level.BLOCKER)
allure.severity 装饰器用于设置测试用例的严重级别,这里设置为allure.severity_level.BLOCKER(致命级别),表示这个测试用例对应的问题如果失败,会严重影响系统功能,导致系统无法正常使用。在 Allure 报告中会根据严重级别对测试用例进行分类展示和统计。
@allure.link(url="http://www.baidu.com",name="接口访问链接"):在 Allure 报告中添加一个指向指定网址的链接,名称为 “接口访问链接”,方便查看与接口相关的外部资源。@allure.issue(url="http://www.baidu.com",name="bug链接"):在报告中添加指向 bug 跟踪系统等的链接,名称为 “bug 链接”,用于关联该测试用例可能存在的问题记录。@allure.testcase(url="http://www.baidu.com",name="测试用例链接"):在报告中添加指向测试用例详细文档等的链接,名称为 “测试用例链接”,方便追溯测试用例的设计和详细说明。

allure.attach() 是 Allure 框架提供的一个核心方法,用于在测试报告中添加额外的附件(如截图、日志、请求响应数据等),丰富测试结果的可视化信息。这些附件会显示在测试报告的详情页中,帮助测试人员更直观地定位问题。
核心功能
-
添加附件到测试报告
可以将各种类型的文件或数据(如图片、文本、JSON、XML 等)作为附件嵌入到 Allure 报告中。 -
支持多种附件类型
通过attachment_type参数指定附件类型,常见类型包括:allure.attachment_type.PNG/JPEG:图片allure.attachment_type.TEXT:文本allure.attachment_type.JSON:JSON 数据allure.attachment_type.HTML:HTML 片段allure.attachment_type.XML:XML 数据
方法参数
allure.attach(body: Union[str, bytes],         # 附件内容(字符串或字节流)name: str = None,                # 附件名称(显示在报告中)attachment_type: allure.attachment_type = None,  # 附件类型extension: str = None            # 附件扩展名(可选)
)