从零开始构建情绪可视化日记平台 - React + TypeScript + Vite
从零开始构建情绪可视化日记平台 - React + TypeScript + Vite 完整教程
这里写目录标题
- 从零开始构建情绪可视化日记平台 - React + TypeScript + Vite 完整教程
- 前言
- 项目概述
- 技术栈
- 第一步:项目初始化
- 1.1 创建项目
- 1.2 安装依赖
- 1.3 配置Tailwind CSS
- 第二步:项目结构设计
- 第三步:核心功能实现
- 3.1 状态管理 (Zustand)
- 3.2 主应用组件
- 3.3 日记记录页面
- 3.4 数据分析页面
- 第四步:高级功能实现
- 4.1 相机拍照功能
- 4.2 语音识别功能
- 第五步:部署和优化
- 5.1 构建生产版本
- 5.2 性能优化
- 5.3 部署到GitHub Pages
- 项目特色功能
- 1. 智能情绪分析
- 2. 多媒体记录
- 3. 数据可视化
- 4. 冥想引导
- 技术亮点
- 总结
- 源码地址
- 扩展阅读
前言
在当今快节奏的生活中,情绪管理变得越来越重要。本文将带你从零开始构建一个功能完整的情绪可视化日记平台,使用现代化的前端技术栈:React 18、TypeScript、Vite、Tailwind CSS 和 Zustand 状态管理。
项目概述
我们的情绪可视化日记平台包含以下核心功能:
- 📝 智能日记记录(文字、语音、拍照)
- 📊 情绪数据可视化分析
- 🧘 冥想引导功能
- 📱 响应式设计,支持移动端
- 🎨 现代化UI设计
技术栈
- 前端框架: React 18 + TypeScript
- 构建工具: Vite 4.5
- 样式框架: Tailwind CSS
- 状态管理: Zustand
- 路由管理: React Router
- 图表库: Chart.js
- UI组件: Headless UI
- 图标库: Heroicons
第一步:项目初始化
1.1 创建项目
npm create vite@latest emotion-diary-platform -- --template react-ts
cd emotion-diary-platform
1.2 安装依赖
npm install react-router-dom zustand chart.js react-chartjs-2 @headlessui/react @heroicons/react
npm install -D tailwindcss postcss autoprefixer
1.3 配置Tailwind CSS
npx tailwindcss init -p
第二步:项目结构设计
src/
├── components/          # 可复用组件
│   ├── Layout.tsx      # 布局组件
│   ├── CameraCapture.tsx # 拍照组件
│   └── VoiceRecognition.tsx # 语音识别组件
├── pages/              # 页面组件
│   ├── Dashboard.tsx   # 仪表板
│   ├── Diary.tsx       # 日记页面
│   ├── Analytics.tsx   # 数据分析
│   ├── Meditation.tsx  # 冥想页面
│   └── Settings.tsx    # 设置页面
├── store/              # 状态管理
│   └── index.ts        # Zustand store
├── types/              # TypeScript类型定义
│   └── index.ts
├── App.tsx             # 主应用组件
└── main.tsx            # 入口文件
第三步:核心功能实现
3.1 状态管理 (Zustand)
// src/store/index.ts
import { create } from 'zustand'
import { persist } from 'zustand/middleware'interface DiaryEntry {id: stringdate: stringcontent: stringemotion: stringmood: numbertags: string[]images?: string[]voiceNote?: string
}interface AppState {entries: DiaryEntry[]addEntry: (entry: Omit<DiaryEntry, 'id'>) => voidupdateEntry: (id: string, updates: Partial<DiaryEntry>) => voiddeleteEntry: (id: string) => void
}export const useAppStore = create<AppState>()(persist((set) => ({entries: [],addEntry: (entry) =>set((state) => ({entries: [...state.entries,{ ...entry, id: Date.now().toString() }]})),updateEntry: (id, updates) =>set((state) => ({entries: state.entries.map((entry) =>entry.id === id ? { ...entry, ...updates } : entry)})),deleteEntry: (id) =>set((state) => ({entries: state.entries.filter((entry) => entry.id !== id)}))}),{name: 'emotion-diary-storage'})
)
3.2 主应用组件
// src/App.tsx
import { BrowserRouter as Router, Routes, Route } from 'react-router-dom'
import Layout from './components/Layout'
import Dashboard from './pages/Dashboard'
import Diary from './pages/Diary'
import Analytics from './pages/Analytics'
import Meditation from './pages/Meditation'
import Settings from './pages/Settings'function App() {return (<Router><Layout><Routes><Route path="/" element={<Dashboard />} /><Route path="/diary" element={<Diary />} /><Route path="/analytics" element={<Analytics />} /><Route path="/meditation" element={<Meditation />} /><Route path="/settings" element={<Settings />} /></Routes></Layout></Router>)
}export default App
3.3 日记记录页面
// src/pages/Diary.tsx
import { useState } from 'react'
import { useAppStore } from '../store'
import CameraCapture from '../components/CameraCapture'
import VoiceRecognition from '../components/VoiceRecognition'export default function Diary() {const [content, setContent] = useState('')const [emotion, setEmotion] = useState('')const [mood, setMood] = useState(5)const [showCamera, setShowCamera] = useState(false)const [showVoice, setShowVoice] = useState(false)const { addEntry } = useAppStore()const emotions = [{ name: '开心', emoji: '😊', color: 'bg-yellow-400' },{ name: '平静', emoji: '😌', color: 'bg-blue-400' },{ name: '焦虑', emoji: '😰', color: 'bg-orange-400' },{ name: '愤怒', emoji: '😠', color: 'bg-red-400' },{ name: '悲伤', emoji: '😢', color: 'bg-gray-400' }]const handleSubmit = () => {if (!content.trim()) returnaddEntry({date: new Date().toISOString(),content,emotion,mood,tags: []})setContent('')setEmotion('')setMood(5)}return (<div className="max-w-4xl mx-auto p-6"><h1 className="text-3xl font-bold text-gray-800 mb-8">记录今天的心情</h1>{/* 情绪选择 */}<div className="mb-6"><h3 className="text-lg font-semibold mb-3">选择当前情绪</h3><div className="flex gap-4">{emotions.map((e) => (<buttonkey={e.name}onClick={() => setEmotion(e.name)}className={`p-4 rounded-lg transition-all ${emotion === e.name ? e.color : 'bg-gray-100 hover:bg-gray-200'}`}><div className="text-2xl mb-1">{e.emoji}</div><div className="text-sm">{e.name}</div></button>))}</div></div>{/* 心情评分 */}<div className="mb-6"><h3 className="text-lg font-semibold mb-3">心情评分 (1-10)</h3><inputtype="range"min="1"max="10"value={mood}onChange={(e) => setMood(Number(e.target.value))}className="w-full h-2 bg-gray-200 rounded-lg appearance-none cursor-pointer"/><div className="text-center mt-2 text-lg font-semibold">{mood}/10</div></div>{/* 日记内容 */}<div className="mb-6"><h3 className="text-lg font-semibold mb-3">写下你的想法</h3><textareavalue={content}onChange={(e) => setContent(e.target.value)}placeholder="今天发生了什么?你的感受如何?..."className="w-full h-32 p-4 border border-gray-300 rounded-lg resize-none focus:ring-2 focus:ring-blue-500 focus:border-transparent"/></div>{/* 多媒体功能 */}<div className="mb-6 flex gap-4"><buttononClick={() => setShowCamera(true)}className="px-4 py-2 bg-blue-500 text-white rounded-lg hover:bg-blue-600">📷 拍照记录</button><buttononClick={() => setShowVoice(true)}className="px-4 py-2 bg-green-500 text-white rounded-lg hover:bg-green-600">🎤 语音记录</button></div>{/* 提交按钮 */}<buttononClick={handleSubmit}disabled={!content.trim()}className="w-full py-3 bg-purple-600 text-white rounded-lg font-semibold hover:bg-purple-700 disabled:opacity-50 disabled:cursor-not-allowed">保存日记</button>{/* 相机组件 */}{showCamera && (<CameraCaptureonClose={() => setShowCamera(false)}onCapture={(image) => {// 处理拍照结果setShowCamera(false)}}/>)}{/* 语音识别组件 */}{showVoice && (<VoiceRecognitiononClose={() => setShowVoice(false)}onResult={(text) => {setContent(text)setShowVoice(false)}}/>)}</div>)
}
3.4 数据分析页面
// src/pages/Analytics.tsx
import { useAppStore } from '../store'
import {Chart as ChartJS,CategoryScale,LinearScale,PointElement,LineElement,Title,Tooltip,Legend,ArcElement
} from 'chart.js'
import { Line, Doughnut } from 'react-chartjs-2'ChartJS.register(CategoryScale,LinearScale,PointElement,LineElement,Title,Tooltip,Legend,ArcElement
)export default function Analytics() {const { entries } = useAppStore()// 处理数据const last7Days = Array.from({ length: 7 }, (_, i) => {const date = new Date()date.setDate(date.getDate() - i)return date.toISOString().split('T')[0]}).reverse()const moodData = last7Days.map(date => {const dayEntries = entries.filter(entry => entry.date.startsWith(date))return dayEntries.length > 0 ? dayEntries.reduce((sum, entry) => sum + entry.mood, 0) / dayEntries.length: 0})const emotionCounts = entries.reduce((acc, entry) => {acc[entry.emotion] = (acc[entry.emotion] || 0) + 1return acc}, {} as Record<string, number>)const lineChartData = {labels: last7Days.map(date => new Date(date).toLocaleDateString()),datasets: [{label: '平均心情评分',data: moodData,borderColor: 'rgb(147, 51, 234)',backgroundColor: 'rgba(147, 51, 234, 0.1)',tension: 0.4}]}const doughnutData = {labels: Object.keys(emotionCounts),datasets: [{data: Object.values(emotionCounts),backgroundColor: ['#FCD34D', // 黄色 - 开心'#60A5FA', // 蓝色 - 平静'#FB923C', // 橙色 - 焦虑'#F87171', // 红色 - 愤怒'#9CA3AF'  // 灰色 - 悲伤]}]}return (<div className="max-w-6xl mx-auto p-6"><h1 className="text-3xl font-bold text-gray-800 mb-8">情绪分析</h1><div className="grid grid-cols-1 lg:grid-cols-2 gap-8">{/* 心情趋势图 */}<div className="bg-white p-6 rounded-lg shadow-lg"><h2 className="text-xl font-semibold mb-4">最近7天心情趋势</h2><Line data={lineChartData} /></div>{/* 情绪分布图 */}<div className="bg-white p-6 rounded-lg shadow-lg"><h2 className="text-xl font-semibold mb-4">情绪分布</h2><Doughnut data={doughnutData} /></div></div>{/* 统计信息 */}<div className="mt-8 grid grid-cols-1 md:grid-cols-4 gap-6"><div className="bg-white p-6 rounded-lg shadow-lg text-center"><div className="text-3xl font-bold text-purple-600">{entries.length}</div><div className="text-gray-600">总日记数</div></div><div className="bg-white p-6 rounded-lg shadow-lg text-center"><div className="text-3xl font-bold text-blue-600">{entries.length > 0 ? (entries.reduce((sum, entry) => sum + entry.mood, 0) / entries.length).toFixed(1): 0}</div><div className="text-gray-600">平均心情评分</div></div><div className="bg-white p-6 rounded-lg shadow-lg text-center"><div className="text-3xl font-bold text-green-600">{new Set(entries.map(entry => entry.date.split('T')[0])).size}</div><div className="text-gray-600">记录天数</div></div><div className="bg-white p-6 rounded-lg shadow-lg text-center"><div className="text-3xl font-bold text-orange-600">{Object.keys(emotionCounts).length}</div><div className="text-gray-600">情绪种类</div></div></div></div>)
}
第四步:高级功能实现
4.1 相机拍照功能
// src/components/CameraCapture.tsx
import { useRef, useState } from 'react'interface CameraCaptureProps {onClose: () => voidonCapture: (image: string) => void
}export default function CameraCapture({ onClose, onCapture }: CameraCaptureProps) {const videoRef = useRef<HTMLVideoElement>(null)const canvasRef = useRef<HTMLCanvasElement>(null)const [stream, setStream] = useState<MediaStream | null>(null)const startCamera = async () => {try {const mediaStream = await navigator.mediaDevices.getUserMedia({video: { facingMode: 'environment' }})setStream(mediaStream)if (videoRef.current) {videoRef.current.srcObject = mediaStream}} catch (error) {console.error('无法访问相机:', error)}}const capturePhoto = () => {if (videoRef.current && canvasRef.current) {const context = canvasRef.current.getContext('2d')if (context) {canvasRef.current.width = videoRef.current.videoWidthcanvasRef.current.height = videoRef.current.videoHeightcontext.drawImage(videoRef.current, 0, 0)const imageData = canvasRef.current.toDataURL('image/jpeg')onCapture(imageData)}}}const stopCamera = () => {if (stream) {stream.getTracks().forEach(track => track.stop())}onClose()}return (<div className="fixed inset-0 bg-black bg-opacity-50 flex items-center justify-center z-50"><div className="bg-white rounded-lg p-6 max-w-md w-full mx-4"><h3 className="text-lg font-semibold mb-4">拍照记录</h3><div className="relative"><videoref={videoRef}autoPlayplaysInlineclassName="w-full rounded-lg"onLoadedMetadata={startCamera}/><canvas ref={canvasRef} className="hidden" /></div><div className="flex gap-4 mt-4"><buttononClick={capturePhoto}className="flex-1 py-2 bg-blue-500 text-white rounded-lg hover:bg-blue-600">拍照</button><buttononClick={stopCamera}className="flex-1 py-2 bg-gray-500 text-white rounded-lg hover:bg-gray-600">取消</button></div></div></div>)
}
4.2 语音识别功能
// src/components/VoiceRecognition.tsx
import { useState, useEffect } from 'react'interface VoiceRecognitionProps {onClose: () => voidonResult: (text: string) => void
}export default function VoiceRecognition({ onClose, onResult }: VoiceRecognitionProps) {const [isRecording, setIsRecording] = useState(false)const [transcript, setTranscript] = useState('')const [recognition, setRecognition] = useState<any>(null)useEffect(() => {if ('webkitSpeechRecognition' in window || 'SpeechRecognition' in window) {const SpeechRecognition = window.SpeechRecognition || window.webkitSpeechRecognitionconst recognitionInstance = new SpeechRecognition()recognitionInstance.continuous = truerecognitionInstance.interimResults = truerecognitionInstance.lang = 'zh-CN'recognitionInstance.onresult = (event: any) => {let finalTranscript = ''for (let i = event.resultIndex; i < event.results.length; i++) {if (event.results[i].isFinal) {finalTranscript += event.results[i][0].transcript}}setTranscript(finalTranscript)}recognitionInstance.onerror = (event: any) => {console.error('语音识别错误:', event.error)setIsRecording(false)}setRecognition(recognitionInstance)}}, [])const startRecording = () => {if (recognition) {recognition.start()setIsRecording(true)}}const stopRecording = () => {if (recognition) {recognition.stop()setIsRecording(false)}}const handleSubmit = () => {onResult(transcript)}return (<div className="fixed inset-0 bg-black bg-opacity-50 flex items-center justify-center z-50"><div className="bg-white rounded-lg p-6 max-w-md w-full mx-4"><h3 className="text-lg font-semibold mb-4">语音记录</h3><div className="mb-4"><textareavalue={transcript}onChange={(e) => setTranscript(e.target.value)}placeholder="语音识别结果将显示在这里..."className="w-full h-32 p-4 border border-gray-300 rounded-lg resize-none"/></div><div className="flex gap-4"><buttononClick={isRecording ? stopRecording : startRecording}className={`flex-1 py-2 rounded-lg ${isRecording ? 'bg-red-500 text-white hover:bg-red-600' : 'bg-green-500 text-white hover:bg-green-600'}`}>{isRecording ? '停止录音' : '开始录音'}</button><buttononClick={handleSubmit}disabled={!transcript.trim()}className="flex-1 py-2 bg-blue-500 text-white rounded-lg hover:bg-blue-600 disabled:opacity-50">确认</button><buttononClick={onClose}className="flex-1 py-2 bg-gray-500 text-white rounded-lg hover:bg-gray-600">取消</button></div></div></div>)
}
第五步:部署和优化
5.1 构建生产版本
npm run build
5.2 性能优化
- 代码分割: 使用React.lazy()进行路由级别的代码分割
- 图片优化: 使用WebP格式和响应式图片
- 缓存策略: 合理设置HTTP缓存头
- PWA支持: 添加Service Worker实现离线功能
5.3 部署到GitHub Pages
npm install -D gh-pages
在package.json中添加:
{"scripts": {"predeploy": "npm run build","deploy": "gh-pages -d dist"},"homepage": "https://yourusername.github.io/emotion-diary-platform"
}
项目特色功能
1. 智能情绪分析
- 基于文本内容的情绪关键词识别
- 情绪趋势分析和预测
- 个性化情绪建议
2. 多媒体记录
- 拍照记录生活瞬间
- 语音转文字记录
- 支持图片和语音的混合记录
3. 数据可视化
- 情绪变化趋势图
- 情绪分布饼图
- 统计信息仪表板
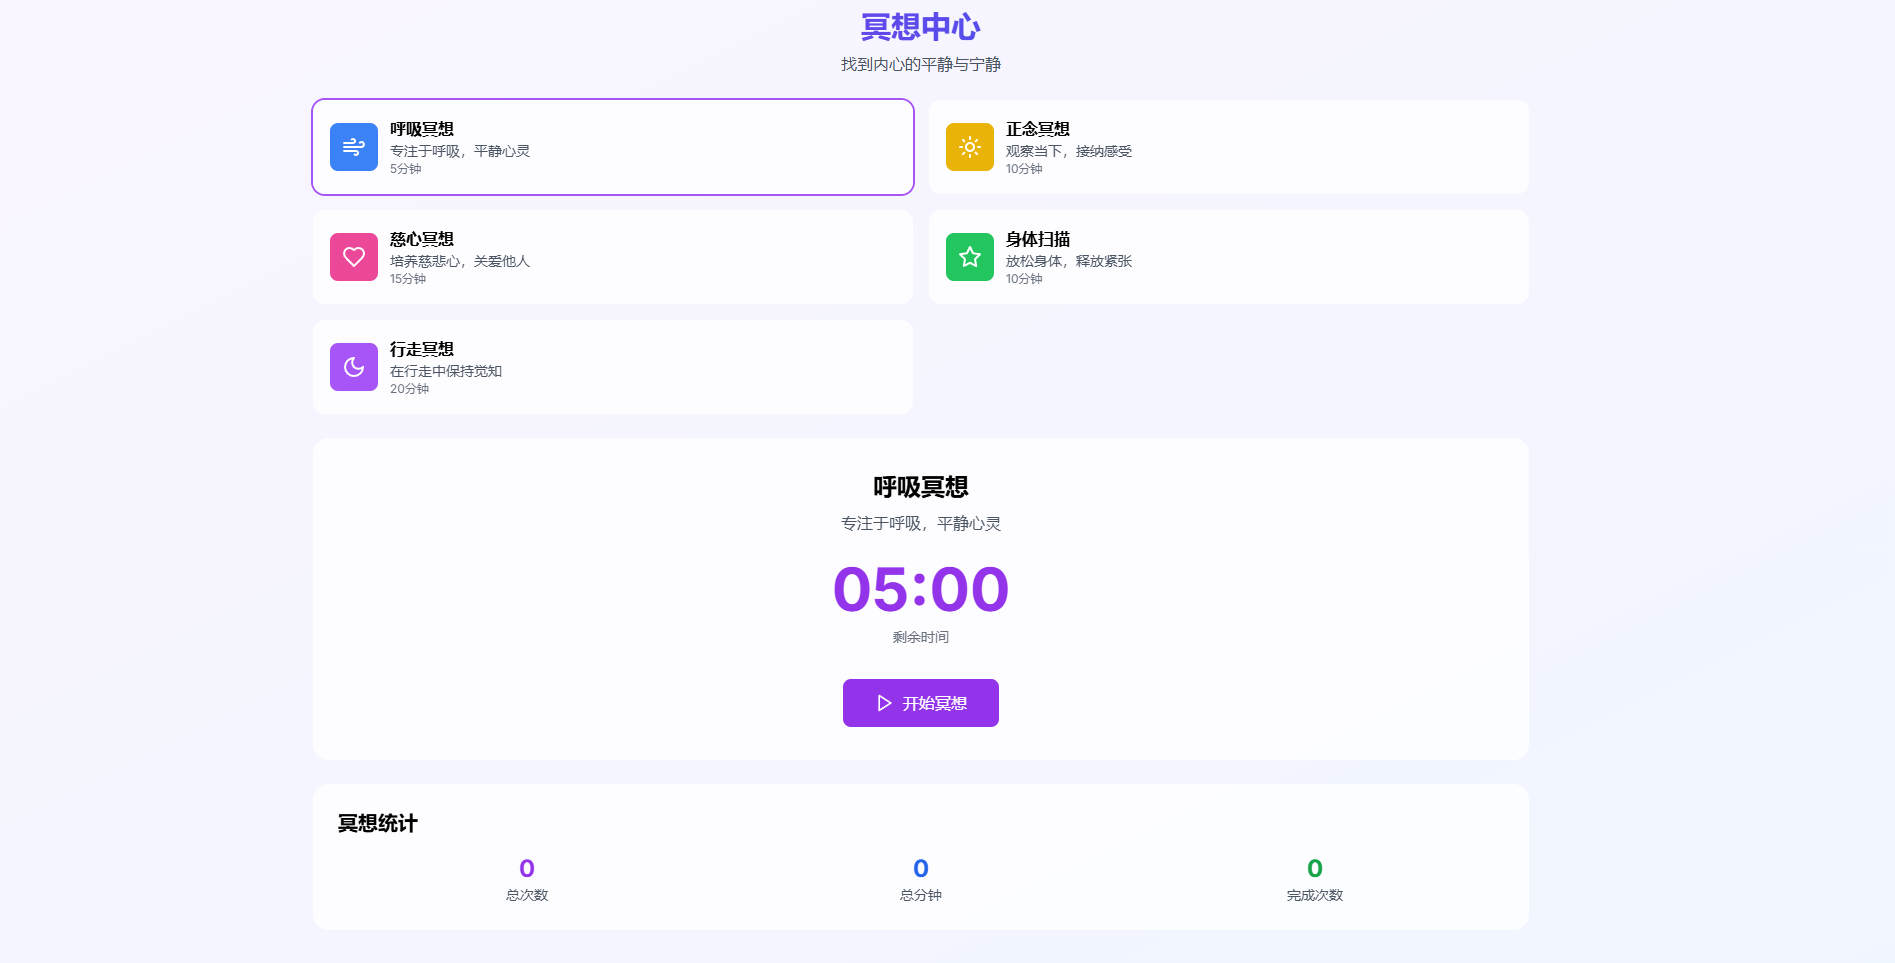
4. 冥想引导
- 定时冥想提醒
- 引导式冥想音频
- 冥想进度跟踪
技术亮点
- 现代化技术栈: 使用最新的React 18和TypeScript
- 响应式设计: 完美适配各种设备尺寸
- 状态管理: 使用Zustand实现轻量级状态管理
- 数据持久化: 本地存储确保数据安全
- 用户体验: 流畅的动画和交互效果
总结
通过这个项目,我们不仅学习了现代前端开发技术,更重要的是创建了一个有实际价值的情绪管理工具。这个项目展示了如何将技术知识与用户体验设计相结合,创造出真正有用的应用程序。
源码地址
项目完整源码已上传到GitHub:https://github.com/hhse/emotion-diary-platform
扩展阅读
- React 18新特性详解
- TypeScript最佳实践
- Tailwind CSS官方文档
- Zustand状态管理指南
如果这篇文章对你有帮助,请点赞、收藏、关注!