opencv圖片標注
功能
使用python + opencv, 將文字信息標注在圖片中
同一張圖片中涉及多次標注
文字大小為標注框的0.3倍
import cv2
import os
import numpy as npdef draw_annotations(image, annotations):"""在图片上绘制标注框和文本annotations: 标注列表,格式为[[x1,x2,y1,y2], text, color]"""# 创建图片副本,避免修改原始图片img_copy = image.copy()for annotation in annotations:coords, text, color = annotationx1, x2, y1, y2 = coordsbox_height = y2 - y1# 设置字体大小为框高度的0.3倍 # 确保字体大小至少为0.1,避免太小无法显示font_scale = max(0.3 * box_height / 40, 0.2)# 设置字体类型font = cv2.FONT_HERSHEY_SIMPLEXthickness = max(int(font_scale * 1.5), 4) # 根据字体大小调整线宽# 计算文本尺寸(text_width, text_height), baseline = cv2.getTextSize(text, font, font_scale, thickness)# 计算框内右上角位置(带5像素内边距)text_x = x2 - text_width - 5text_y = y1 + text_height + 5# 确保文本位置在框内if text_x < x1:text_x = x1 + 5if text_y > y2:text_y = y2 - 5# 绘制边界框cv2.rectangle(img_copy, (x1, y1), (x2, y2), color, thickness)# 绘制文本背景(提高可读性)cv2.rectangle(img_copy,(text_x - 2, text_y - text_height - 2),(text_x + text_width + 2, text_y + 2),color, -1) # -1表示填充矩形# 绘制文本(白色)cv2.putText(img_copy, text, (text_x, text_y),font, font_scale, (0,0,0), thickness)return img_copy# 主函数
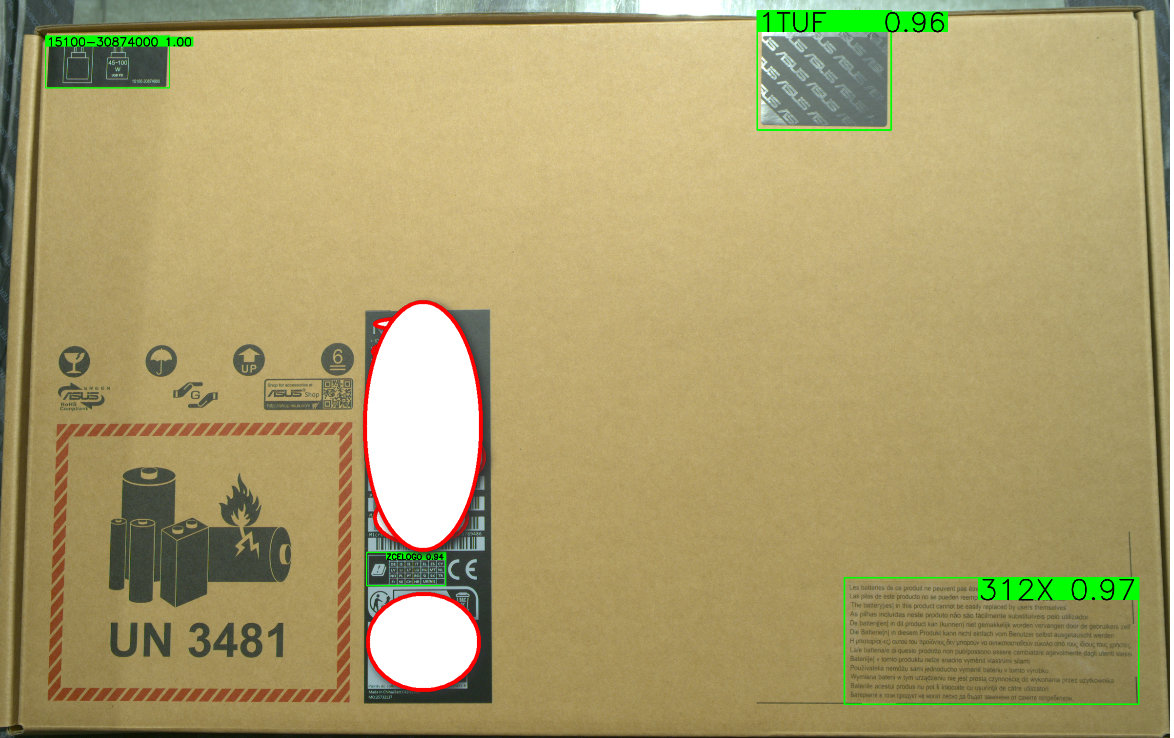
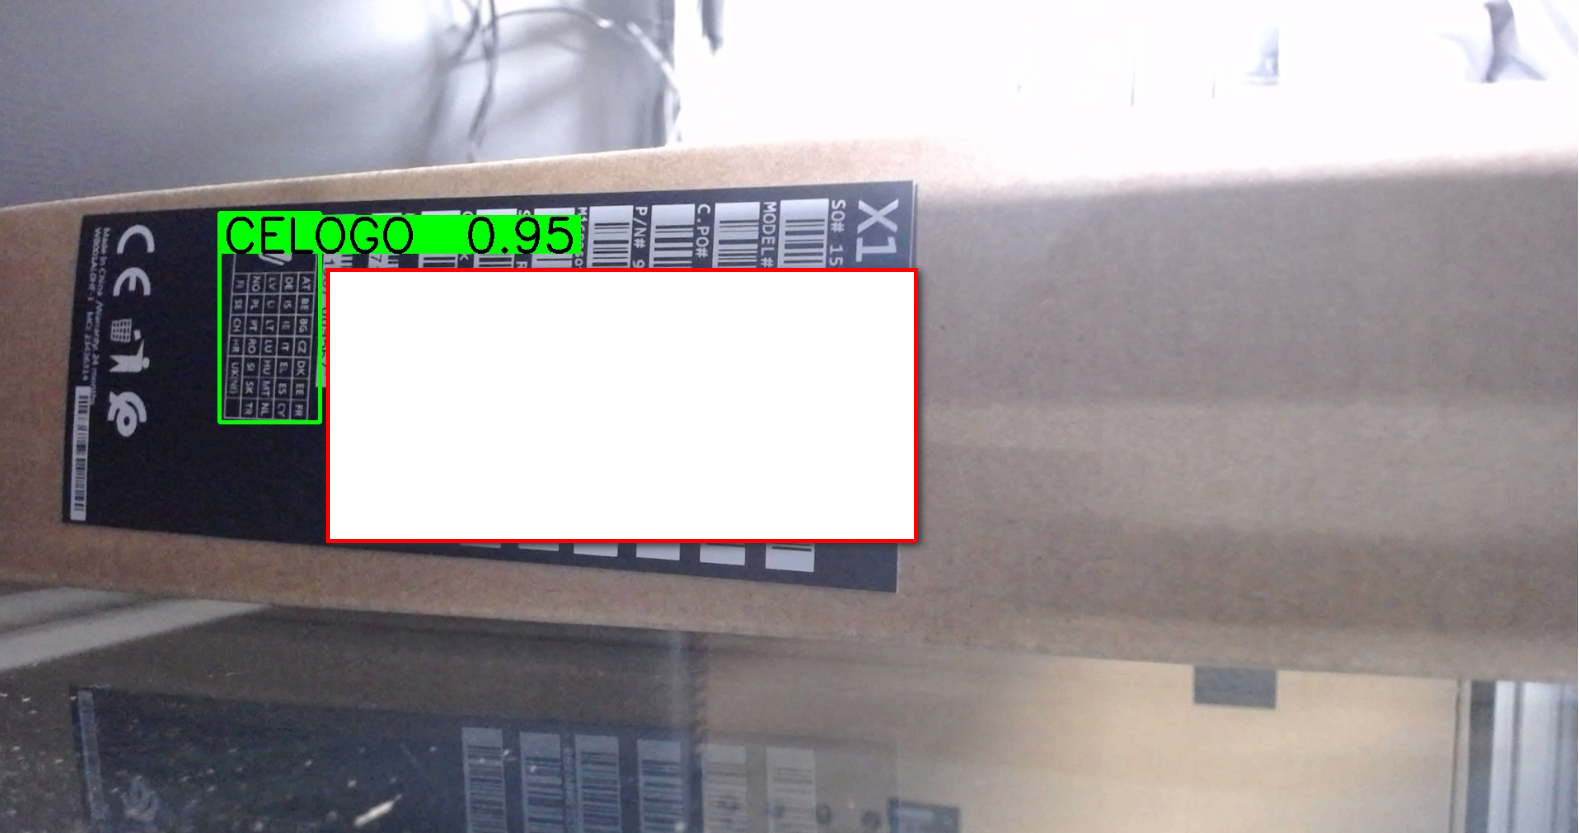
def main():# 示例数据tt = [{'filename': 'D:\\LABELAOI\\Test\\S_right_CAM2.jpg','info': [[(271, 393, 264, 518), 'CELOGO 0.95', (0, 255, 0)]]},{'filename': 'D:\\LABELAOI\\Test\\25732137Q0003-T3N0CV10J812126_20250320192533_L_main_CAM_basler.jpg','info': [[(3778, 4327, 212, 700), '1TUF 0.96', (0, 255, 0)],[(2176, 2501, 2431, 2568), 'ZCELOGO 0.94', (0, 255, 0)],[(4135, 5341, 2535, 3054), '312X 0.97', (0, 255, 0)],[(861, 1369, 315, 528), '15100-30874000 1.00', (0, 255, 0)]]}]for item in tt:# 读取图片image = cv2.imread(item['filename'])# 绘制标注annotated_image = draw_annotations(image, item['info'])# 创建输出文件名output_filename = item['filename'].replace('.jpg', '_annotated.jpg')# 保存结果cv2.imwrite(output_filename, annotated_image)print(f"标注图片已保存为: {output_filename}")if __name__ == "__main__":import datetimestarttime = datetime.datetime.now()main()endtime = datetime.datetime.now()print(f"the process run time:{endtime - starttime}")效果如下圖:
标注图片已保存为: D:\LABELAOI\Test\S_right_CAM2_annotated.jpg
标注图片已保存为: D:\LABELAOI\Test\25732137Q0003- T3N0CV10J812126_20250320192533_L_main_CAM_basler_annotated.jpg
the process run time:0:00:00.792136