本地安装部署Unstructured-api
本地安装Unstructured-api
- 1. 源码部署
- 创建环境并激活
- 安装依赖
- 启动项目
- 调试项目
- 2. Docker部署
- 1. 下载镜像
- 2. 启动容器
- 3. 结束
- 4.遇到问题(在更新......)
1. 源码部署
-
需要提前安装->uv
-
前往[Github地址](GitHub - Unstructured-IO/unstructured-api) 下载源码或者直接执行git clone命令
$ git clone https://github.com/Unstructured-IO/unstructured-api.git创建环境并激活
$ uv venv
$ source .venv/bin/activate
安装依赖
进入源码地址目录unstructured-api下执行以下命令
$ uv pip install -r requirements/base.in
启动项目
$ uvicorn prepline_general.api.app:app --host 0.0.0.0 --port 8888 --reload
调试项目
本文示例是在VS Code中调试,步骤如下:
-
打开VS Code,点击左侧面板中的菜单的Run And Debugger,点击创建launch.json文件
-
在弹开的Select debugger窗口中选择Python Debugger,再在弹开的Debug Configuration窗口中选择FastAPI
-
在自动创建的launch.json文件中贴上以下内容
{// Use IntelliSense to learn about possible attributes.// Hover to view descriptions of existing attributes.// For more information, visit: https://go.microsoft.com/fwlink/?linkid=830387"version": "0.2.0","configurations": [{"name": "FastAPI: Python Debugger","consoleName": "FastAPI","type": "debugpy","request": "launch","python": "${workspaceFolder}/.venv/bin/python","cwd": "${workspaceFolder}","module": "uvicorn","justMyCode": true,"args": ["prepline_general.api.app:app","--host","0.0.0.0","--port","8888","--reload"],"jinja": true}] } -
保存退出后即可在左侧的Run And Debug面板中点击绿色三角按钮启动。
2. Docker部署
1. 下载镜像
官方提供的docker镜像下载地址已经失效,目前找到了第三方基于源码的镜像编译,测试过能启动,能访问,但是其它具体的接口没有细测过:
$ docker pull robwilkes/unstructured-api:0.0.82
2. 启动容器
$ docker run -p 8888:8000 -d --rm --name unstructured-api robwilkes/unstructured-api:0.0.82
3. 结束
相关接口请查看官方介绍 -> https://github.com/Unstructured-IO/unstructured-api
4.遇到问题(在更新…)
Q1:在Apifox请求接口时出现了"There was an error parsing the body",特别是上传附件时便会报该错误。
A1:pydantic的版本有问题,可参考本示例中fastapi版本和pydantic版本:
fastapi:0.113.0
pydantic:2.11.7
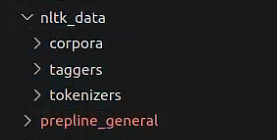
Q2:启动过程若是报错:punkt_tab找不到,提示你执行nltk下载依旧失败
A2:访问nltk_data官网拷贝下其packages目录代码放在跟preline_general统计目录下: