使用脚本以可读的 JSON 格式显示 curl 命令输出
在我们经常调试微服务或者使用 Elasticsearch API 时,经常会使用curl 来进行调试。但是有时我们的输出不尽如意。显示的不是一 pretty 格式进行输出的。我们有时还必须借助于其他的一些网站工具,比如 Best JSON Formatter and JSON Validator: Online JSON Formatter 或者 JSON Formatter & Validator 来帮我来验证。
在 Elasticsearch 的输出中经常我们会看到如下格式的命令:
curl -k -u elastic:gV4pgxNCTi5y*80GmoqN https://localhost:9200?pretty=true这里的 pretty 就是要求我们要以 JSON 的格式来进行显示。尽管我们上面的命令可以省去 pretty=true 这个选项,可以还是可以得到漂亮的输出:
curl -k -u elastic:gV4pgxNCTi5y*80GmoqN https://localhost:9200
{"name" : "liuxgm.local","cluster_name" : "elasticsearch","cluster_uuid" : "xz4jLE_USfmbvkSyvG138w","version" : {"number" : "8.6.1","build_flavor" : "default","build_type" : "tar","build_hash" : "180c9830da956993e59e2cd70eb32b5e383ea42c","build_date" : "2023-01-24T21:35:11.506992272Z","build_snapshot" : false,"lucene_version" : "9.4.2","minimum_wire_compatibility_version" : "7.17.0","minimum_index_compatibility_version" : "7.0.0"},"tagline" : "You Know, for Search"
}
我们可以看如下的命令的输出:
curl -k https://localhost:9200?pretty=truecurl -k https://localhost:9200?pretty=true
{"error" : {"root_cause" : [{"type" : "security_exception","reason" : "missing authentication credentials for REST request [/?pretty=true]","header" : {"WWW-Authenticate" : ["Basic realm=\"security\" charset=\"UTF-8\"","Bearer realm=\"security\"","ApiKey"]}}],"type" : "security_exception","reason" : "missing authentication credentials for REST request [/?pretty=true]","header" : {"WWW-Authenticate" : ["Basic realm=\"security\" charset=\"UTF-8\"","Bearer realm=\"security\"","ApiKey"]}},"status" : 401
}我们可以看到很漂亮的输出。一旦我们省去 pretty=true 这个选项,那么我们看看输出的结果是什么:
$ curl -k  https://localhost:9200
{"error":{"root_cause":[{"type":"security_exception","reason":"missing authentication credentials for REST request [/]","header":{"WWW-Authenticate":["Basic realm=\"security\" charset=\"UTF-8\"","Bearer realm=\"security\"","ApiKey"]}}],"type":"security_exception","reason":"missing authentication credentials for REST request [/]","header":{"WWW-Authenticate":["Basic realm=\"security\" charset=\"UTF-8\"","Bearer realm=\"security\"","ApiKey"]}},"status":401}$
很显然,我们的显示非常不漂亮,很难看懂它的意思。
在 Elasticsearch 中,我们的很多命令都可以使用 pretty=true 选项来变得更加美观。
但是在实际的用例中,有很多并不像 Elasticsearch 那样。它们的命令中并没有像 Elasticsearch 那样提供 pretty=true 这样的选项。那么我们该怎么办呢?
在下面,我来介绍几种方案:
使用 json_pp
我们尝试使用如下的命令:
echo '{"type":"Bar","id":"1","title":"Foo"}' | json_pp -json_opt pretty,canonical$ echo '{"type":"Bar","id":"1","title":"Foo"}' | json_pp -json_opt pretty,canonical
{"id" : "1","title" : "Foo","type" : "Bar"
}
很显然,它能帮我们把 JSON 的输出变得很漂亮。我们来尝试一下上面的 Elasticsearch 访问:
$ curl -k  https://localhost:9200 | json_pp -json_opt pretty,canonical% Total    % Received % Xferd  Average Speed   Time    Time     Time  CurrentDload  Upload   Total   Spent    Left  Speed
100   459  100   459    0     0  29436      0 --:--:-- --:--:-- --:--:-- 38250
{"error" : {"header" : {"WWW-Authenticate" : ["Basic realm=\"security\" charset=\"UTF-8\"","Bearer realm=\"security\"","ApiKey"]},"reason" : "missing authentication credentials for REST request [/]","root_cause" : [{"header" : {"WWW-Authenticate" : ["Basic realm=\"security\" charset=\"UTF-8\"","Bearer realm=\"security\"","ApiKey"]},"reason" : "missing authentication credentials for REST request [/]","type" : "security_exception"}],"type" : "security_exception"},"status" : 401
}
很显然,它也工作正常。
使用 jq
我们需要单独安装 jq。我们使用如下的命令来进行验证:
echo '{"type":"Bar","id":"1","title":"Foo"}' | jq '.'$ echo '{"type":"Bar","id":"1","title":"Foo"}' | jq '.'
{"type": "Bar","id": "1","title": "Foo"
}显然这种方法比上面的方法更为简洁。我们也可以使用它来试一下 Elasticsearch 的访问:
curl -k https://localhost:9200 | jq '.'
它还有彩色的输出。显得非常漂亮。
使用 python
我们使用如下的例子来进行展示:
echo '{"type":"Bar","id":"1","title":"Foo"}' | python -m json.tool$ echo '{"type":"Bar","id":"1","title":"Foo"}' | python -m json.tool
{"type": "Bar","id": "1","title": "Foo"
}尝试一下 Elasticsearch API:
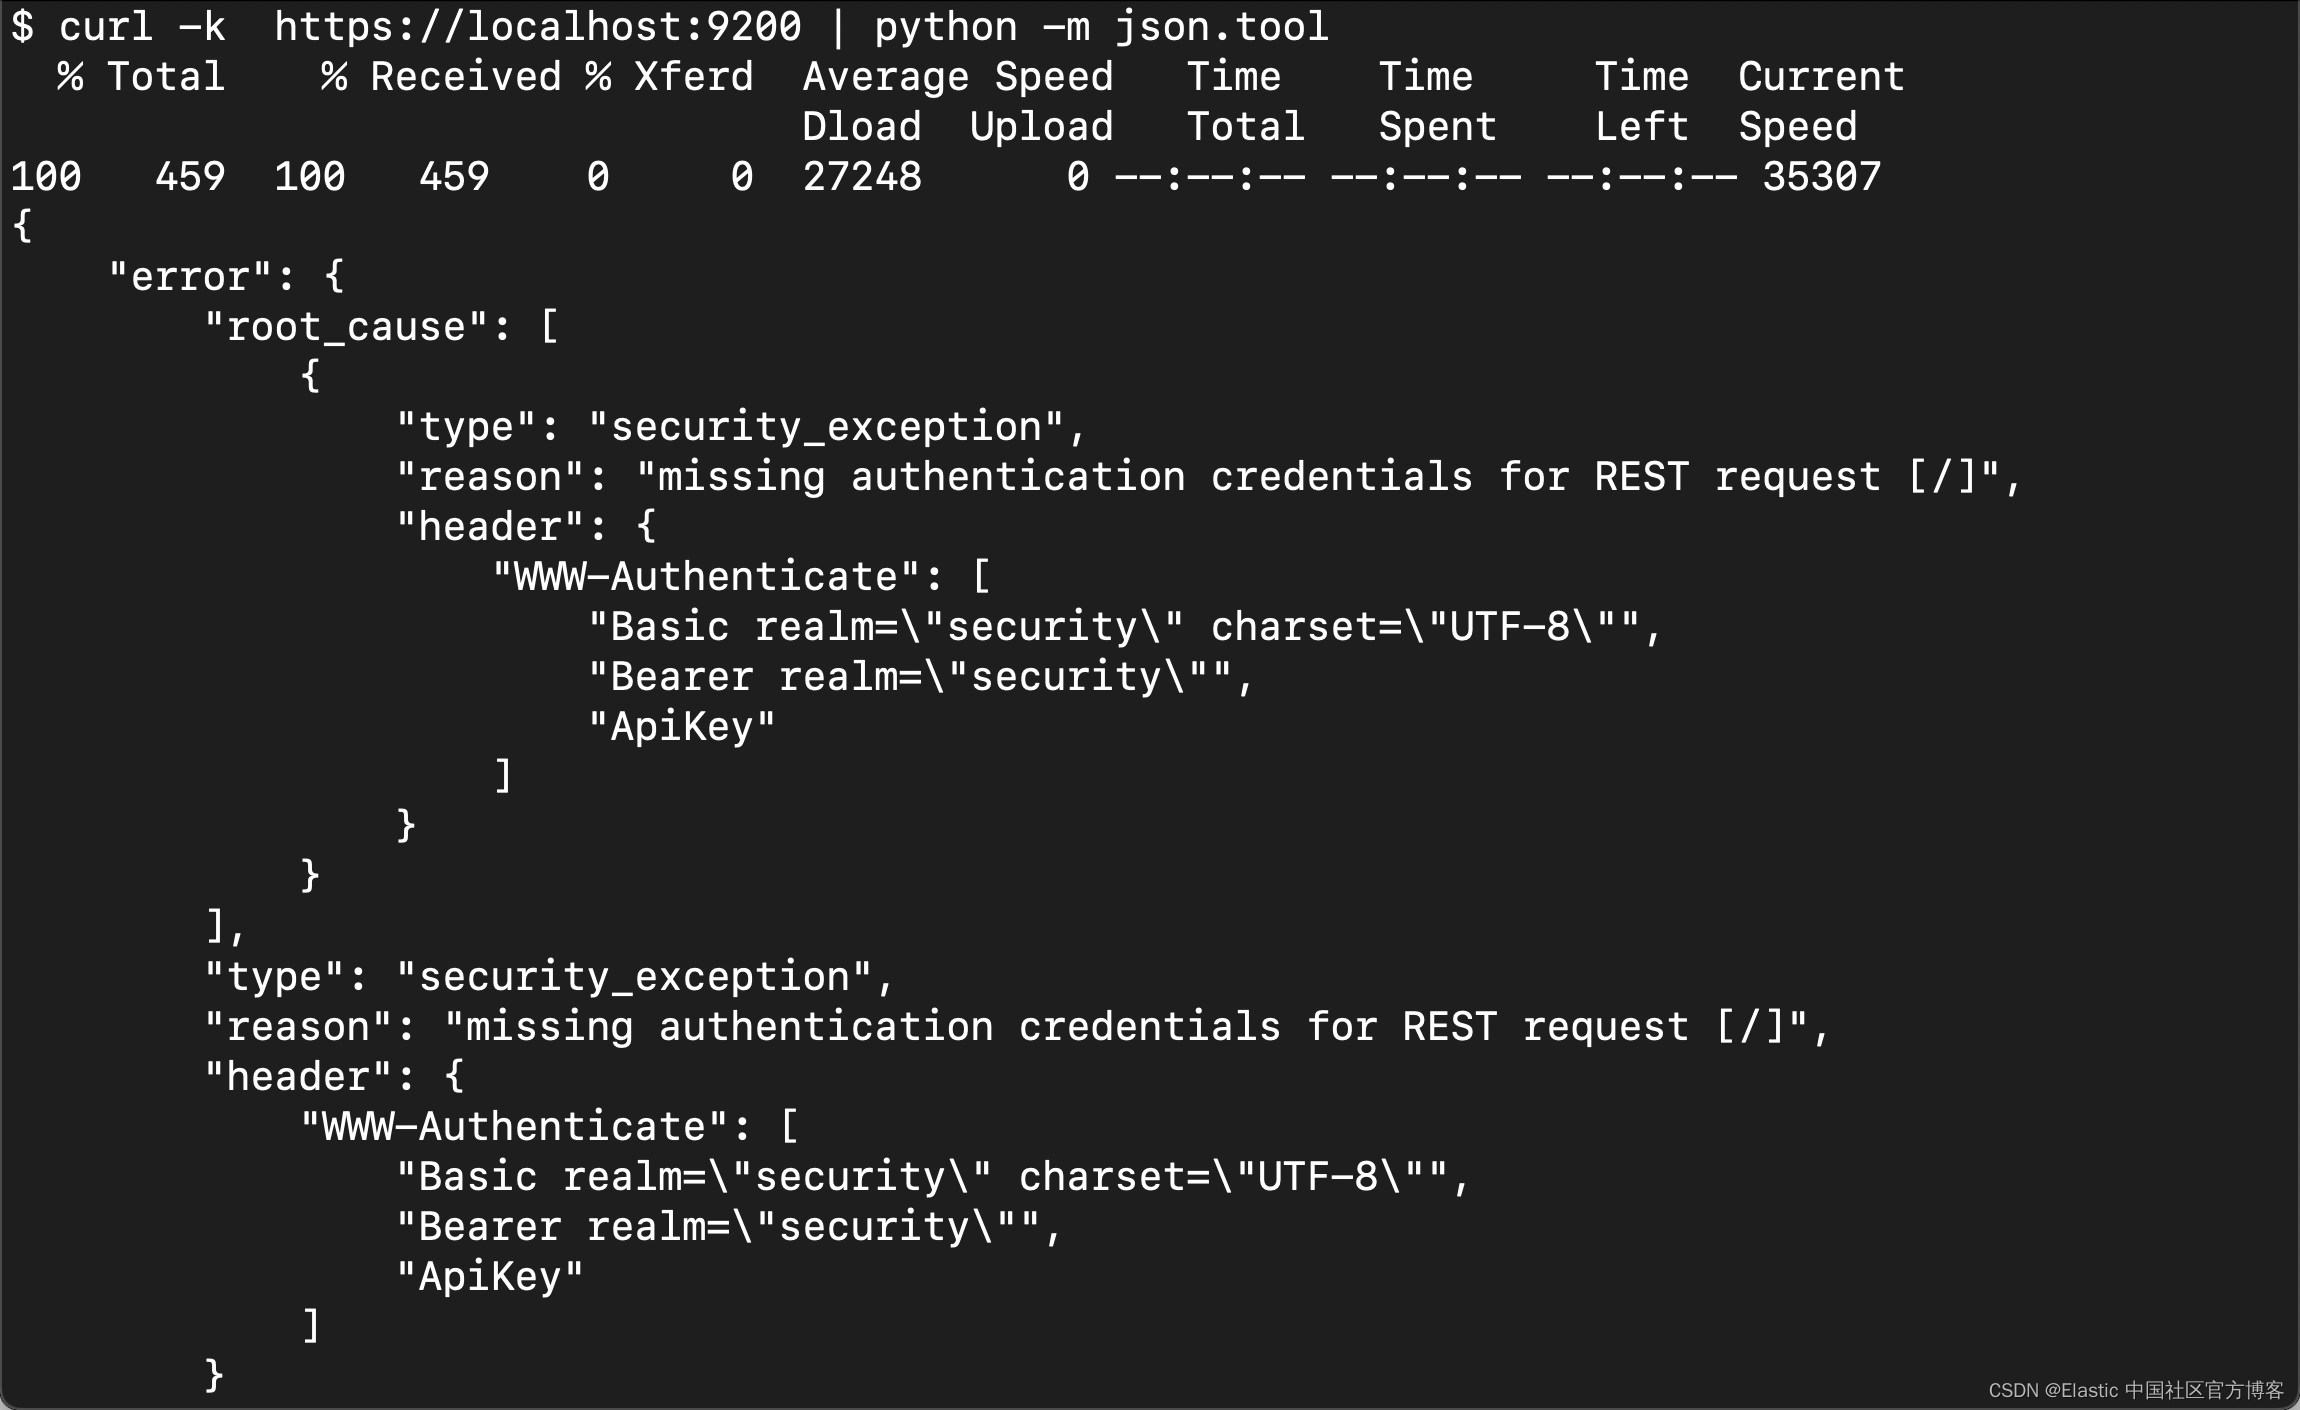
它和 jq 输出的结果很相似,除了没有彩色的显示。
我们还可以使用 curljson 命令:
pip install curljson curljson -k https://localhost:9200
{"error": {"header": {"WWW-Authenticate": ["Basic realm=\"security\" charset=\"UTF-8\"","Bearer realm=\"security\"","ApiKey"]},"reason": "missing authentication credentials for REST request [/]","root_cause": [{"header": {"WWW-Authenticate": ["Basic realm=\"security\" charset=\"UTF-8\"","Bearer realm=\"security\"","ApiKey"]},"reason": "missing authentication credentials for REST request [/]","type": "security_exception"}],"type": "security_exception"},"status": 401
}使用 Nodejs
echo '{"type":"Bar","id":"1","title":"Foo"}' | node -e "console.log( JSON.stringify( JSON.parse(require('fs').readFileSync(0) ), 0, 1 ))"$ echo '{"type":"Bar","id":"1","title":"Foo"}' | node -e "console.log( JSON.stringify( JSON.parse(require('fs').readFileSync(0) ), 0, 1 ))"
{"type": "Bar","id": "1","title": "Foo"
}很显然这种方法非常笨拙。你也可以采用如下的方法:
echo '{"foo": "lorem", "bar": "ipsum"}' | npx jsonecho '{"foo": "lorem", "bar": "ipsum"}' | npx json
{"foo": "lorem","bar": "ipsum"
}
使用 json_reformat
在 Linux 机器上安装 yajl-tools 安装包,然后使用如下的命令:
echo '{"foo": "lorem", "bar": "ipsum"}' | json_reformat
{"foo": "lorem","bar": "ipsum"
}