从WebM到MP3:利用Python和wxPython提取音乐的魔法
前言
有没有遇到过这样的问题:你有一个包含多首歌曲的WebM视频文件,但你只想提取其中的每一首歌曲,并将它们保存为单独的MP3文件?这听起来可能有些复杂,但借助Python和几个强大的库,这个任务变得异常简单。今天,我将带你一步步实现这个小工具,并且给它取个有趣的名字:“魔法音乐分离器”。
C:\pythoncode\new\splitsongfromwebmintomp3.py
准备工作
在开始之前,确保你已经安装了以下Python库:
- wxPython:用于创建GUI界面。
- moviepy:用于处理视频文件。
- pydub:用于音频转换。
你可以通过以下命令安装这些库:
pip install wxPython moviepy pydub
此外,还需要安装并配置ffmpeg,这可以通过以下命令在命令行中测试是否安装正确:
ffmpeg -version
如果看到版本信息,说明ffmpeg已经正确安装。
完整代码:
import wx
import os
import subprocessclass MyFrame(wx.Frame):def __init__(self):super().__init__(parent=None, title='Music Extractor')panel = wx.Panel(self)self.vbox = wx.BoxSizer(wx.VERTICAL)self.file_picker = wx.FilePickerCtrl(panel, message="Choose a webm file")self.vbox.Add(self.file_picker, 0, wx.ALL | wx.EXPAND, 5)self.dir_picker = wx.DirPickerCtrl(panel, message="Choose a save directory")self.vbox.Add(self.dir_picker, 0, wx.ALL | wx.EXPAND, 5)self.memo = wx.TextCtrl(panel, style=wx.TE_MULTILINE, size=(400, 300))self.vbox.Add(self.memo, 1, wx.ALL | wx.EXPAND, 5)self.extract_button = wx.Button(panel, label='Extract Music')self.extract_button.Bind(wx.EVT_BUTTON, self.on_extract)self.vbox.Add(self.extract_button, 0, wx.ALL | wx.CENTER, 5)panel.SetSizer(self.vbox)self.Show()def on_extract(self, event):webm_path = self.file_picker.GetPath()save_dir = self.dir_picker.GetPath()memo_content = self.memo.GetValue()if not webm_path or not save_dir or not memo_content:wx.MessageBox('Please select a webm file, a save directory, and provide memo content.', 'Error', wx.OK | wx.ICON_ERROR)returntimestamps = self.parse_memo_content(memo_content)def hms_to_seconds(hms):h, m, s = map(int, hms.split(':'))return h * 3600 + m * 60 + sfor i in range(len(timestamps)):start_time = hms_to_seconds(timestamps[i][0])end_time = hms_to_seconds(timestamps[i+1][0]) if i+1 < len(timestamps) else Nonesong_name = timestamps[i][1]output_path = os.path.join(save_dir, f"{song_name}.mp3")if end_time:duration = end_time - start_timeffmpeg_command = ['ffmpeg', '-i', webm_path, '-ss', str(start_time),'-t', str(duration), '-q:a', '0', '-map', 'a', output_path]else:ffmpeg_command = ['ffmpeg', '-i', webm_path, '-ss', str(start_time),'-q:a', '0', '-map', 'a', output_path]subprocess.run(ffmpeg_command)wx.MessageBox('Extraction completed successfully!', 'Info', wx.OK | wx.ICON_INFORMATION)def parse_memo_content(self, content):lines = content.strip().split('\n')timestamps = []for line in lines:if line:parts = line.split(' - ')time_str = parts[0].strip('[]')song_name = parts[1]timestamps.append((time_str, song_name))return timestampsif __name__ == '__main__':app = wx.App(False)frame = MyFrame()app.MainLoop()
代码详解
创建GUI界面
首先,我们使用wxPython创建一个简单的GUI界面,包含文件选择器、路径选择器以及一个文本区域(memo组件)用于输入时间戳和歌曲信息。
import wx
import os
import subprocessclass MyFrame(wx.Frame):def __init__(self):super().__init__(parent=None, title='魔法音乐分离器')panel = wx.Panel(self)self.vbox = wx.BoxSizer(wx.VERTICAL)self.file_picker = wx.FilePickerCtrl(panel, message="选择一个WebM文件")self.vbox.Add(self.file_picker, 0, wx.ALL | wx.EXPAND, 5)self.dir_picker = wx.DirPickerCtrl(panel, message="选择保存路径")self.vbox.Add(self.dir_picker, 0, wx.ALL | wx.EXPAND, 5)self.memo = wx.TextCtrl(panel, style=wx.TE_MULTILINE, size=(400, 300))self.vbox.Add(self.memo, 1, wx.ALL | wx.EXPAND, 5)self.extract_button = wx.Button(panel, label='提取音乐')self.extract_button.Bind(wx.EVT_BUTTON, self.on_extract)self.vbox.Add(self.extract_button, 0, wx.ALL | wx.CENTER, 5)panel.SetSizer(self.vbox)self.Show()
提取音乐的魔法
接下来,我们需要在点击“提取音乐”按钮后进行实际的音频提取和转换。这里我们使用ffmpeg命令行工具来处理音频,因为它非常强大且灵活。
def on_extract(self, event):webm_path = self.file_picker.GetPath()save_dir = self.dir_picker.GetPath()memo_content = self.memo.GetValue()if not webm_path or not save_dir or not memo_content:wx.MessageBox('请选择一个WebM文件、保存路径,并提供memo内容。', '错误', wx.OK | wx.ICON_ERROR)returntimestamps = self.parse_memo_content(memo_content)def hms_to_seconds(hms):h, m, s = map(int, hms.split(':'))return h * 3600 + m * 60 + sfor i in range(len(timestamps)):start_time = hms_to_seconds(timestamps[i][0])end_time = hms_to_seconds(timestamps[i+1][0]) if i+1 < len(timestamps) else Nonesong_name = timestamps[i][1]output_path = os.path.join(save_dir, f"{song_name}.mp3")if end_time:duration = end_time - start_timeffmpeg_command = ['ffmpeg', '-i', webm_path, '-ss', str(start_time),'-t', str(duration), '-q:a', '0', '-map', 'a', output_path]else:ffmpeg_command = ['ffmpeg', '-i', webm_path, '-ss', str(start_time),'-q:a', '0', '-map', 'a', output_path]subprocess.run(ffmpeg_command)wx.MessageBox('提取完成!', '信息', wx.OK | wx.ICON_INFORMATION)def parse_memo_content(self, content):lines = content.strip().split('\n')timestamps = []for line in lines:if line:parts = line.split(' - ')time_str = parts[0].strip('[]')song_name = parts[1]timestamps.append((time_str, song_name))return timestamps
解析memo内容
我们需要将memo中的内容解析成时间戳和歌曲信息的列表。这里我们定义了一个parse_memo_content方法来处理这个任务。
def parse_memo_content(self, content):lines = content.strip().split('\n')timestamps = []for line in lines:if line:parts = line.split(' - ')time_str = parts[0].strip('[]')song_name = parts[1]timestamps.append((time_str, song_name))return timestamps
主程序入口
最后,我们定义主程序入口,启动wxPython应用。
if __name__ == '__main__':app = wx.App(False)frame = MyFrame()app.MainLoop()
界面:
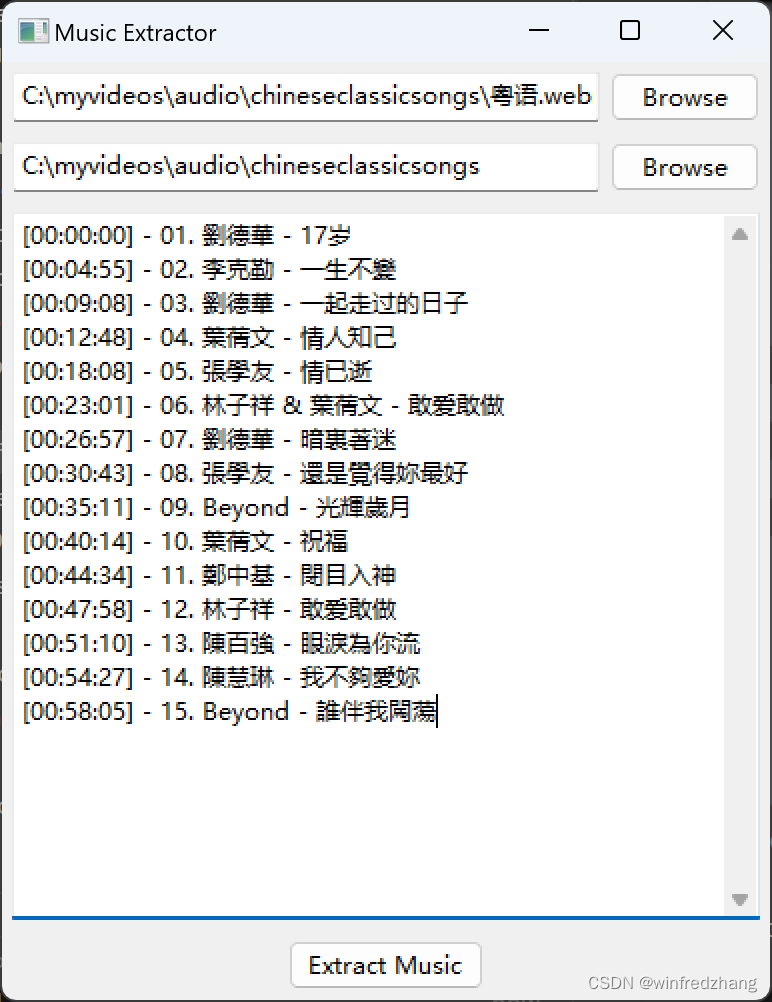
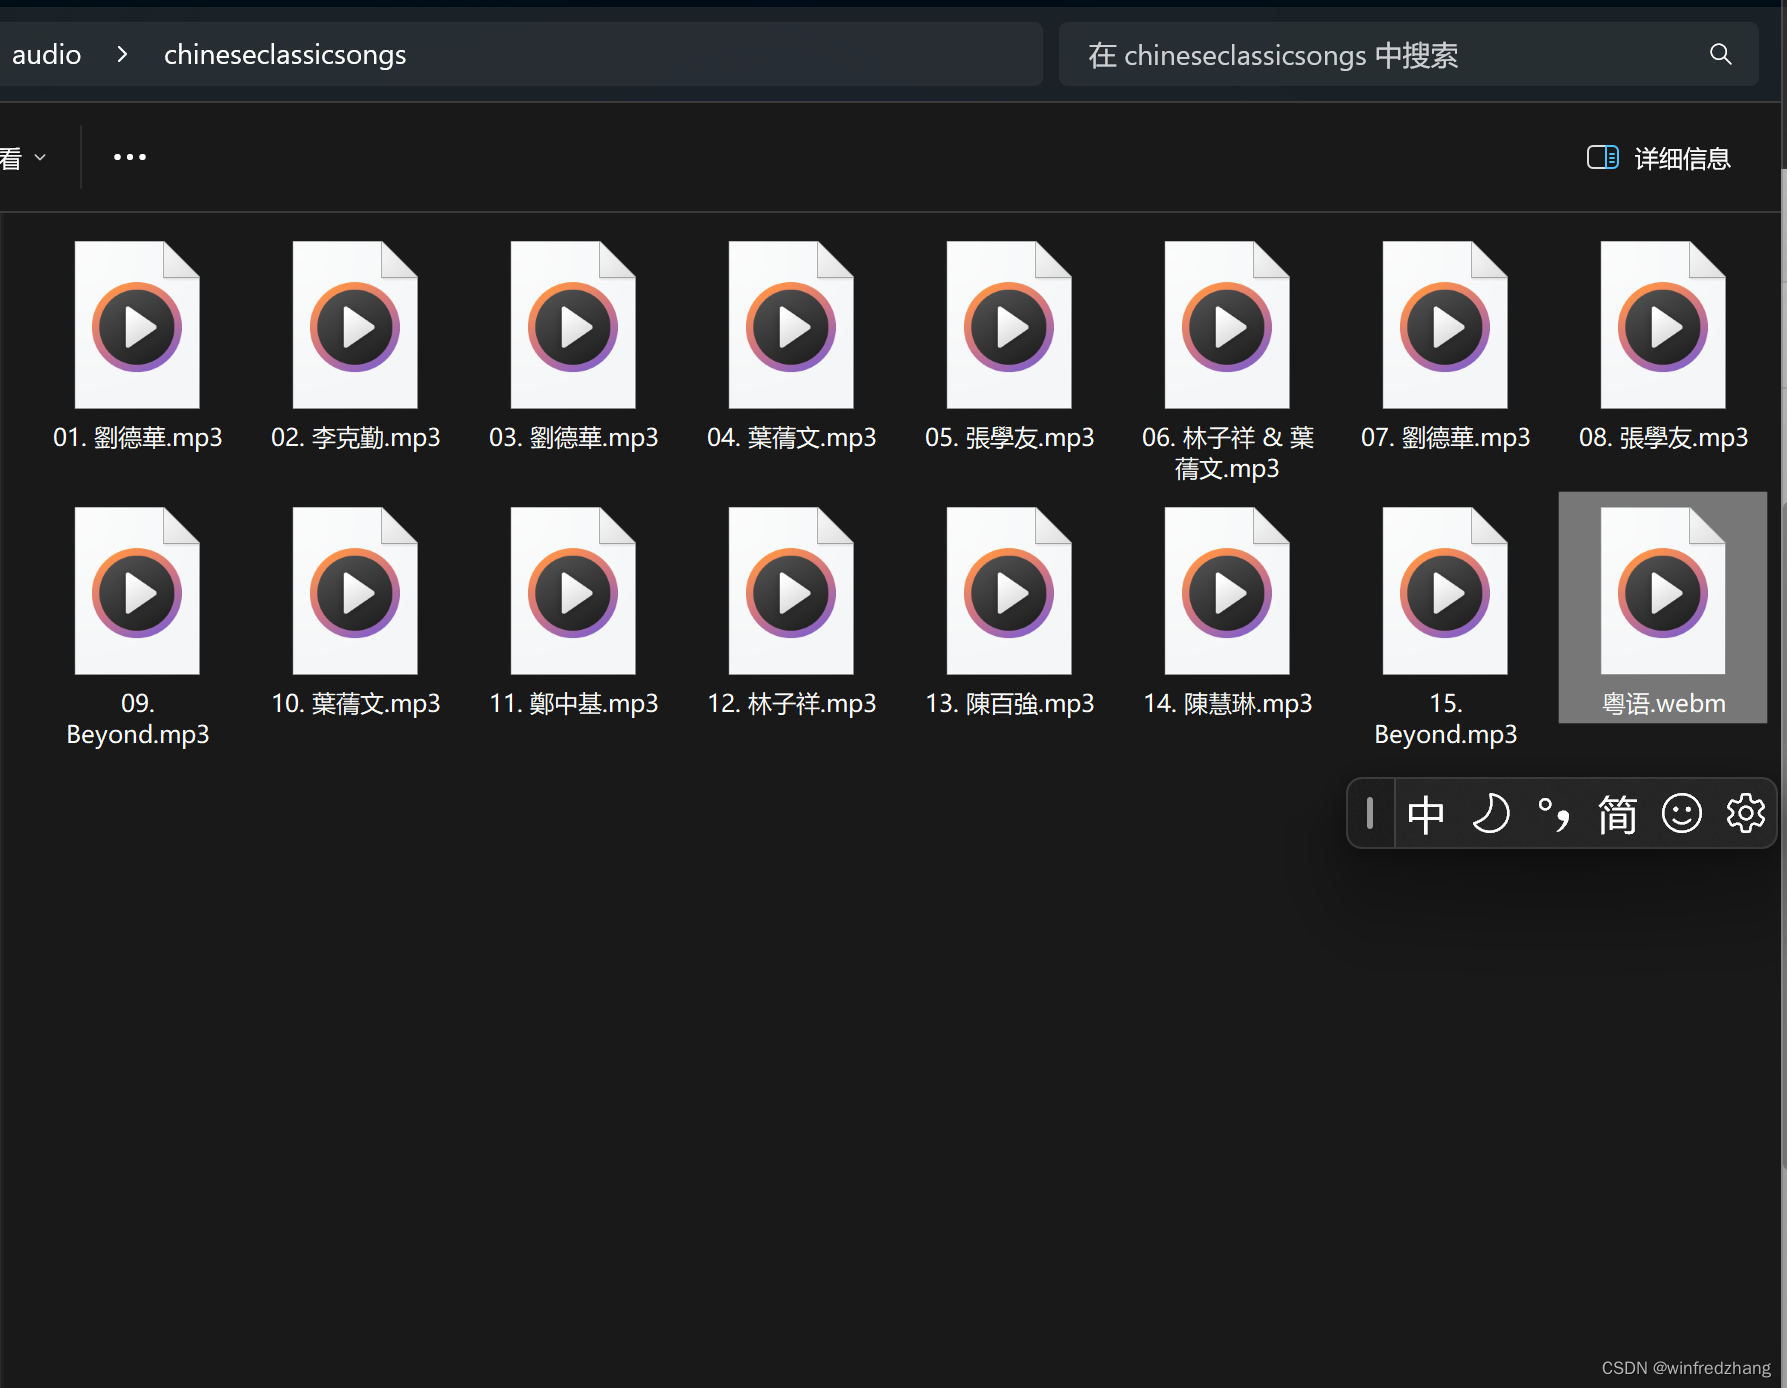
结果:
结语
至此,我们的“魔法音乐分离器”已经完成。你可以通过简单的图形界面选择一个包含多首歌曲的WebM文件,指定保存路径,并输入时间戳和歌曲信息,程序会自动提取每一首歌曲并保存为MP3文件。
希望这个小工具能为你的音乐提取工作带来便利。如果你有任何问题或建议,欢迎留言讨论!