linux上的通用拍照程序
最近因为工作需要,在ubuntu上开发了一个拍照程序。
为了找到合适的功能研究了好几种实现方式,在这里记录一下。
目录
太长不看版
探索过程
v4l2
QT
opencv4.2
打开摄像头
为什么不直接打开第一个视频节点
获取所有分辨率
切换摄像头
太长不看版
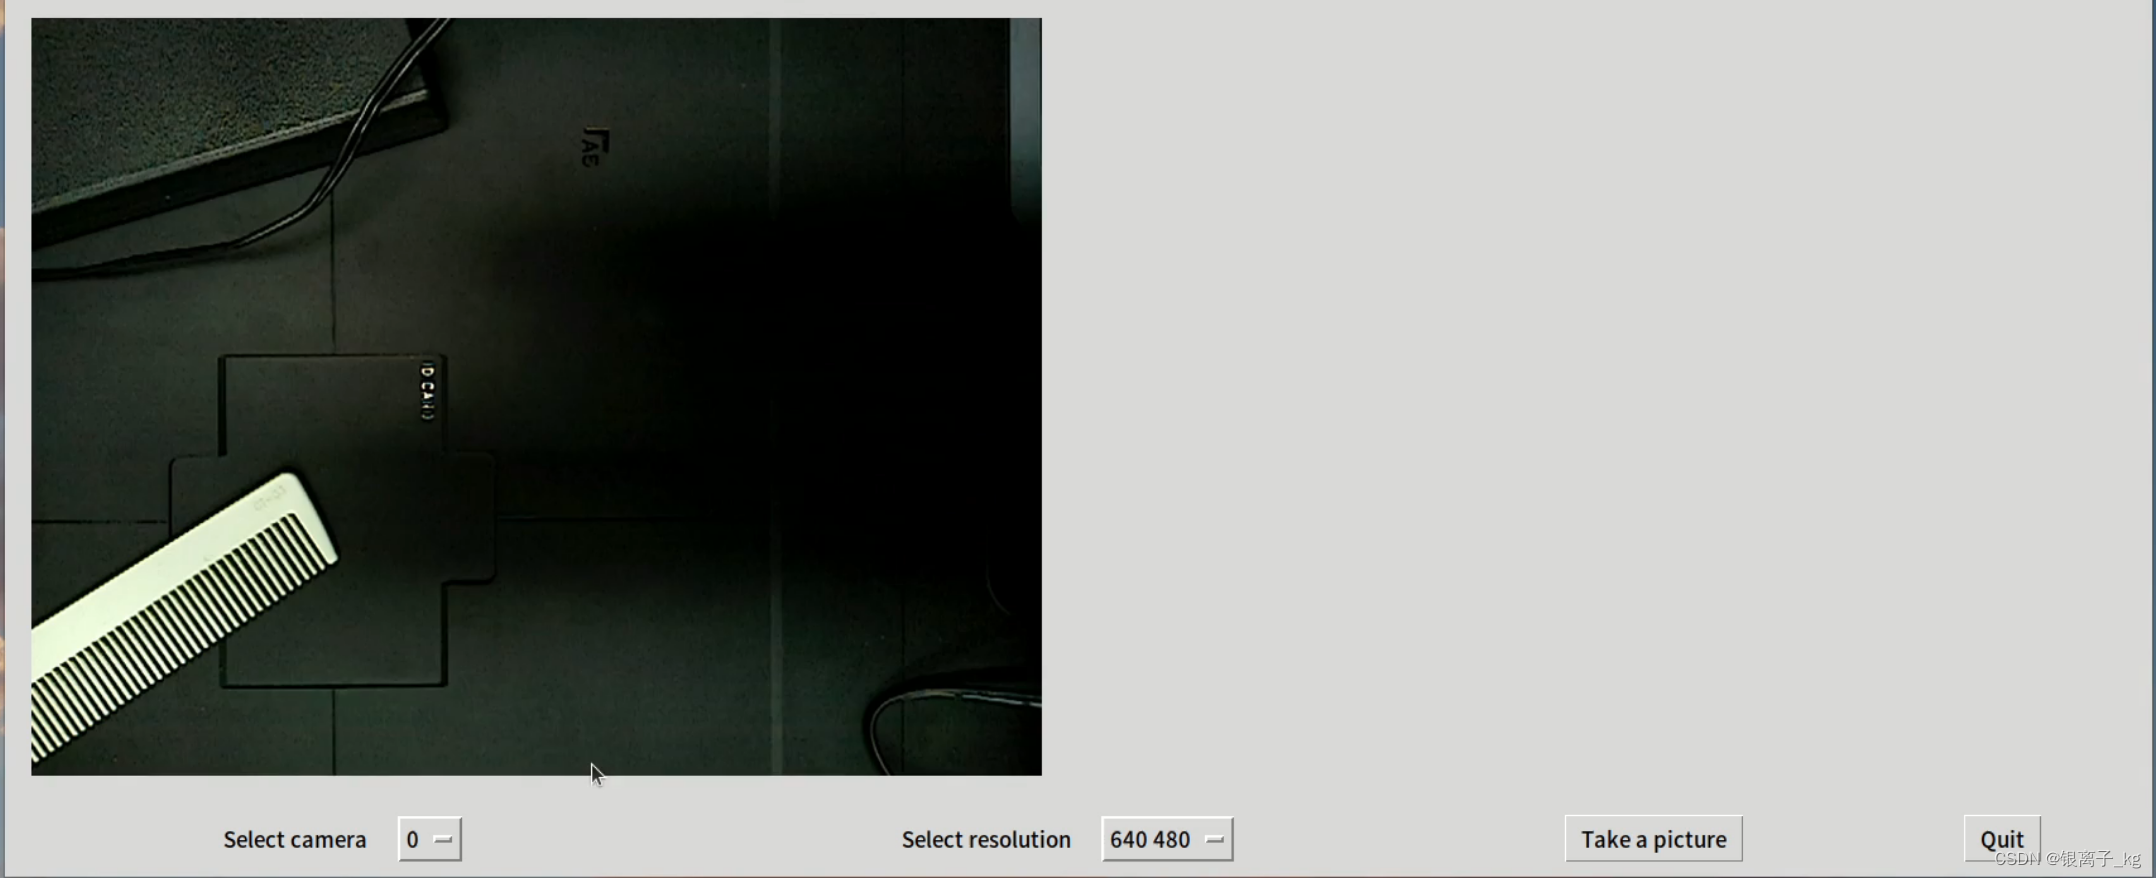
技术:python3.8+opencv4.2+tkinter
支持的功能如下:
- 预览
- 切换摄像头
- 切换分辨率
- 拍照(点击拍照之后,照片会显示在右边)
实现代码在这里:
import tkinter as tk
import cv2
from PIL import Image, ImageTk
import tkinter.messagebox as messagebox
import sys
import os# Initialize window
root = tk.Tk()
root.title("UVC Camera")
root.geometry("1700x700")# Detect available cameras
camera_indexes = []
for i in range(10):cap = cv2.VideoCapture(i)if not cap.isOpened():continuecamera_indexes.append(i)cap.release()print("Available cameras:", camera_indexes)# Show error message if no camera is available
if len(camera_indexes) == 0:messagebox.showerror("Error", "Can't find the camera")sys.exit(0)# Show error message if camera cannot be opened
try:camera = cv2.VideoCapture(camera_indexes[0])  # Open the first detected camera by defaultcamera.set(6, cv2.VideoWriter_fourcc('M', 'J', 'P', 'G'))
except:messagebox.showerror("Error", "The camera won't open, the equipment is damaged or the contact is bad.")sys.exit(0)# Detect available resolutions
res_options = []
width = int(camera.get(cv2.CAP_PROP_FRAME_WIDTH))
height = int(camera.get(cv2.CAP_PROP_FRAME_HEIGHT))
res_options.append([width, height])for j in range(30):old_width = int(camera.get(cv2.CAP_PROP_FRAME_WIDTH))old_height = int(camera.get(cv2.CAP_PROP_FRAME_HEIGHT))camera.set(cv2.CAP_PROP_FRAME_WIDTH, width+j*100)camera.set(cv2.CAP_PROP_FRAME_HEIGHT, height+j*100)new_width = int(camera.get(cv2.CAP_PROP_FRAME_WIDTH))new_height = int(camera.get(cv2.CAP_PROP_FRAME_HEIGHT))if new_width != old_width:res_options.append([new_width, new_height])print("Available resolutions:", res_options)# Set the lowest resolution as the default
camera.set(cv2.CAP_PROP_FRAME_WIDTH, res_options[0][0])
camera.set(cv2.CAP_PROP_FRAME_HEIGHT, res_options[0][1])# Button callback functionsdef on_capture():home_dir = os.path.expanduser('~')cv2.imwrite(home_dir + "/capture.png", img)# Resize the image while maintaining the aspect ratiocv2image = cv2.cvtColor(img, cv2.COLOR_BGR2RGBA)current_image = Image.fromarray(cv2image)w, h = current_image.sizeratio = min(850.0 / w, 638.0 / h)current_image = current_image.resize((int(ratio * w), int(ratio * h)), Image.ANTIALIAS)imgtk = ImageTk.PhotoImage(image=current_image)photo_panel.imgtk = imgtkphoto_panel.config(image=imgtk)messagebox.showinfo("Info", "Photo taken successfully")def on_switch_res(value):global cameracamera.set(cv2.CAP_PROP_FRAME_WIDTH, value[0])camera.set(cv2.CAP_PROP_FRAME_HEIGHT, value[1])def on_switch_cam(value):global camera# print("切换摄像头")# print("选择的值是: ", str(value))# 结束预览root.after_cancel(video_loop_id)camera.release()# 创建新的捕捉对象并打开摄像头camera = cv2.VideoCapture(value)camera.set(6, cv2.VideoWriter_fourcc('M', 'J', 'P', 'G')) if not camera.isOpened():messagebox.showerror("Error", "The camera cannot be turned on.")sys.exit()on_video_loop()def on_video_loop():global img,video_loop_idsuccess, img = camera.read() # 从摄像头读取照片if success:cv2.waitKey(10)cv2image = cv2.cvtColor(img, cv2.COLOR_BGR2RGBA) # 转换颜色从BGR到RGBAcurrent_image = Image.fromarray(cv2image)        # 将图像转换成Image对象# 等比缩放照片w,h = current_image.sizeratio = min(850.0/w, 600.0/h)current_image = current_image.resize((int(ratio * w), int(ratio * h)), Image.ANTIALIAS)imgtk = ImageTk.PhotoImage(image=current_image)video_panel.imgtk = imgtkvideo_panel.config(image=imgtk)video_loop_id = root.after(1, on_video_loop)video_panel = tk.Label(root)
photo_panel = tk.Label(root)video_panel.grid( # 左上居中对齐row=0, column=0, columnspan=4, padx=20, pady=20, sticky=tk.NW
)photo_panel.grid( # 右上居中对齐row=0, column=4, columnspan=2,sticky=tk.EW, padx=20, pady=20
)# 摄像头标签+下拉框
label3 = tk.Label(root, text="Select camera")
label3.grid(row=1, column=0, sticky="E", padx=10, pady=10)variable1 = tk.StringVar(root)
variable1.set(camera_indexes[0])
cam_dropdown = tk.OptionMenu(root, variable1, *camera_indexes, command=on_switch_cam)
cam_dropdown.grid(row=1, column=1, sticky="W", padx=10, pady=10)# 分辨率标签+下拉框
label4 = tk.Label(root, text="Select resolution")
label4.grid(row=1, column=2, sticky="E", padx=10, pady=10)variable2 = tk.StringVar(root)
variable2.set(res_options[0])
res_dropdown = tk.OptionMenu(root, variable2, *res_options, command=on_switch_res)
res_dropdown.grid(row=1, column=3, sticky="W", padx=10, pady=10)# 拍照和退出按钮
capture_button = tk.Button(root, text="Take a picture", command=on_capture)
capture_button.grid(row=1, column=4, padx=10, pady=10)exit_button = tk.Button(root, text="Quit", command=root.quit)
exit_button.grid(row=1, column=5, padx=10, pady=10)# 一些页面设置
root.grid_columnconfigure(0, weight=1)
root.grid_columnconfigure(1, weight=1)
root.grid_columnconfigure(2, weight=1)
root.grid_columnconfigure(3, weight=1)
root.grid_columnconfigure(4, weight=2)
root.grid_columnconfigure(5, weight=2)
root.grid_rowconfigure(0, weight=13)
root.grid_rowconfigure(1, weight=1)on_video_loop()
root.mainloop()
探索过程
v4l2
一开始在网上找到的其实是拍照程序是v4l2的,纯c接口。
不过这个相机需要预览,v4l2接口虽然拍照正常但是没法预览,所以放弃了这套方案。
相关内容记录在:V4L2 零基础入门(一)——打开摄像头和获取摄像头基本信息_v4l2摄像头采集-CSDN博客
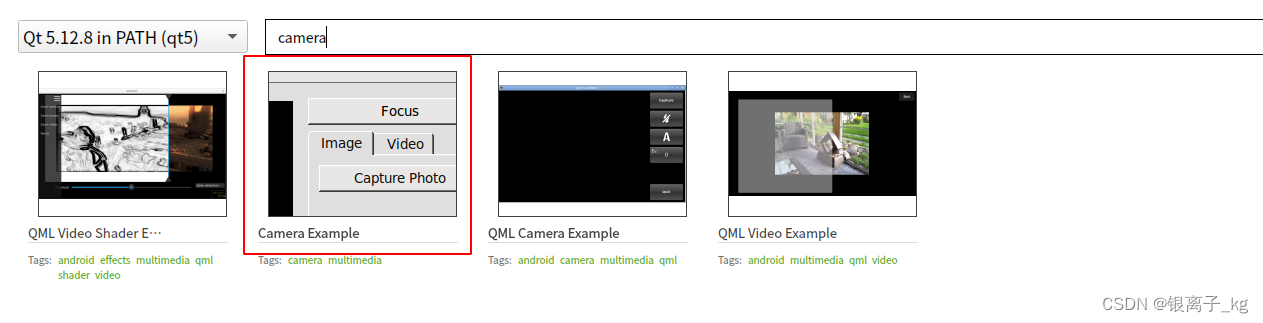
QT
查看资料发现QT有封装摄像头相关的接口,在qtcreator里可以直接找到。
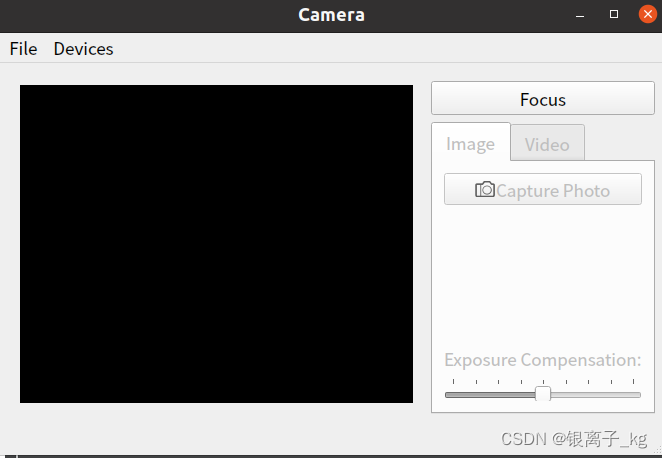
这个demo的功能很齐全,拍照,录像都有,不过有个致命问题,高分辨率的时候预览卡的太厉害,简直卡成ppt。
opencv4.2
为了解决预览卡顿的问题,开始查找其他的方案,最终找到了Python调用opencv接口。
这套方案在高分辨率下的预览也很流畅。
实现的代码我放在一开头啦,有问题欢迎评论区。
在这边解释一些实现的细节。
打开摄像头
我这里是先打开前10个视频节点,10是为了处理同时连接多个摄像头的情况(一个摄像头有1或者2个节点)。
10这个数是随便选的,可以改成其他的数
循环前10个节点,看哪个节点能被打开,把能打开的序号存储在数组里。
最后打开数组里存储的第一个节点,并设置照片格式为mjpg。
# Detect available cameras
camera_indexes = []
for i in range(10):cap = cv2.VideoCapture(i)if not cap.isOpened():continuecamera_indexes.append(i)cap.release()print("Available cameras:", camera_indexes)# Show error message if no camera is available
if len(camera_indexes) == 0:messagebox.showerror("Error", "Can't find the camera")sys.exit(0)# Show error message if camera cannot be opened
try:camera = cv2.VideoCapture(camera_indexes[0])  # Open the first detected camera by defaultcamera.set(6, cv2.VideoWriter_fourcc('M', 'J', 'P', 'G'))
except:messagebox.showerror("Error", "The camera won't open, the equipment is damaged or the contact is bad.")sys.exit(0)
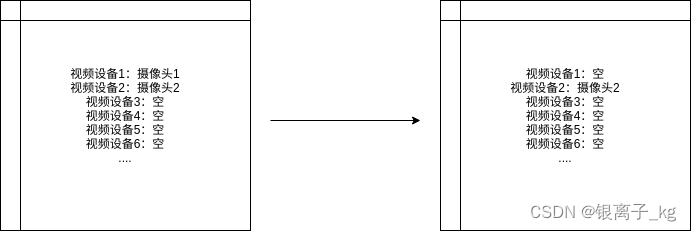
为什么不直接打开第一个视频节点
这里解释一下,为什么绕这么大弯,挨个找哪个节点能打开。
一般来说,直接打开第一个视频节点一般都不会有问题。
#直接打开第一个视频节点,代码会是这种形式
camera = cv2.VideoCapture(0)
但是可能出现这样一种情况,即先连接了两个摄像头,此时视频设备的节点编号分别为1和2。
如果取下了视频设备的节点编号为1摄像头,再打开拍照程序,如果直接打开第一个节点会出现错误。
简单画的示意图如下:
获取所有分辨率
获取分辨率的流程有点复杂,先是通过CAP_PROP_FRAME_WIDTH和CAP_PROP_FRAME_HEIGHT获取最小的分辨率。
然后循环将当前已知的最大的分辨率的x和y分别+100,尝试这个分辨率在摄像头上能否设置成功。
如果设置成功,则记录改分辨率,在这个分辨率的的x和y基础上分别+100,重复这个过程。
我这里设置了循环30次,这个也是随意设置的,大家算一下能循环到摄像头的最大分辨率即可。
# Detect available resolutions
res_options = []
width = int(camera.get(cv2.CAP_PROP_FRAME_WIDTH))
height = int(camera.get(cv2.CAP_PROP_FRAME_HEIGHT))
res_options.append([width, height])for j in range(30):# 前两行是获取当前分辨率old_width = int(camera.get(cv2.CAP_PROP_FRAME_WIDTH))old_height = int(camera.get(cv2.CAP_PROP_FRAME_HEIGHT))camera.set(cv2.CAP_PROP_FRAME_WIDTH, width+j*100)camera.set(cv2.CAP_PROP_FRAME_HEIGHT, height+j*100)new_width = int(camera.get(cv2.CAP_PROP_FRAME_WIDTH))new_height = int(camera.get(cv2.CAP_PROP_FRAME_HEIGHT))# 如果出现了新的可以设置成功的分辨率,保存下来if new_width != old_width:res_options.append([new_width, new_height])print("Available resolutions:", res_options)
这里可能会有个问题,如果x和y分别+100的所有分辨率都不是摄像头支持的怎么办呢?
其实摄像头设置分辨率是比较智能的,不需要完全匹配。
假如支持是分辨率是950*650,实际设置分辨率1000*700,这种差的不太远的,摄像头会自动识别成自己支持的分辨率950*650。(这只是个例子,实际差多少之内可以识别,没有详细测过)
切换摄像头
切换摄像头需要先把当前的预览停掉,释放当前的摄像头。
再重新打开摄像头,设置图片类型。
def on_switch_cam(value):global camera# print("切换摄像头")# print("选择的值是: ", str(value))# 结束预览root.after_cancel(video_loop_id)camera.release()# 创建新的捕捉对象并打开摄像头camera = cv2.VideoCapture(value)camera.set(6, cv2.VideoWriter_fourcc('M', 'J', 'P', 'G')) if not camera.isOpened():messagebox.showerror("Error", "The camera cannot be turned on.")sys.exit()on_video_loop()# 预览
def on_video_loop():global img,video_loop_idsuccess, img = camera.read() # 从摄像头读取照片if success:cv2.waitKey(10)cv2image = cv2.cvtColor(img, cv2.COLOR_BGR2RGBA) # 转换颜色从BGR到RGBAcurrent_image = Image.fromarray(cv2image)        # 将图像转换成Image对象# 等比缩放照片w,h = current_image.sizeratio = min(850.0/w, 600.0/h)current_image = current_image.resize((int(ratio * w), int(ratio * h)), Image.ANTIALIAS)imgtk = ImageTk.PhotoImage(image=current_image)video_panel.imgtk = imgtkvideo_panel.config(image=imgtk)video_loop_id = root.after(1, on_video_loop)