centos7实现负载均衡
目录
一、基于 CentOS 7 构建 LVS-DR 集群。
1.1 配置lvs负载均衡服务
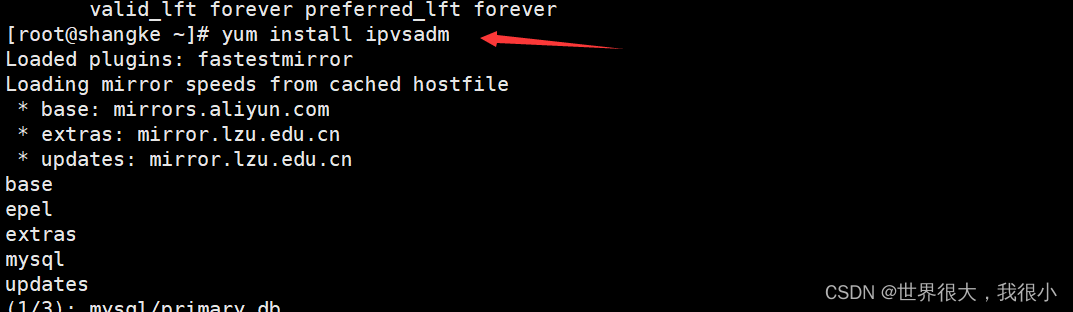
1.1.1 下载ipvsadm
1.1.2 增加vip
1.1.3 配置ipvsadm
1.2 配置rs1
1.2.1 编写测试页面
1.2.2 手工在RS端绑定VIP、添加路由
1.2.3 抑制arp响应
1.3 配置rs2
1.4 测试
二、配置nginx负载均衡。
2.1 配置好环境
2.2 web服务器上添加测试页面
2.3 配置负载均衡器
2.4 开启nginx服务和web服务
2.5 测试
一、基于 CentOS 7 构建 LVS-DR 集群。
环境:
| 作用 | 环境 | |
| windows | 测试 | |
| 192.168.33.158 | LVS负载均衡 | centos7 |
| 192.168.33.157 | web服务器1--rs1 | nginx:1.22,centos7 |
| 192.168.33.156 | web服务器2--rs2 | Apache:2.4 , redhat9 |
1.1 配置lvs负载均衡服务
1.1.1 下载ipvsadm
1.1.2 增加vip
ifconfig ens33:110 192.168.33.100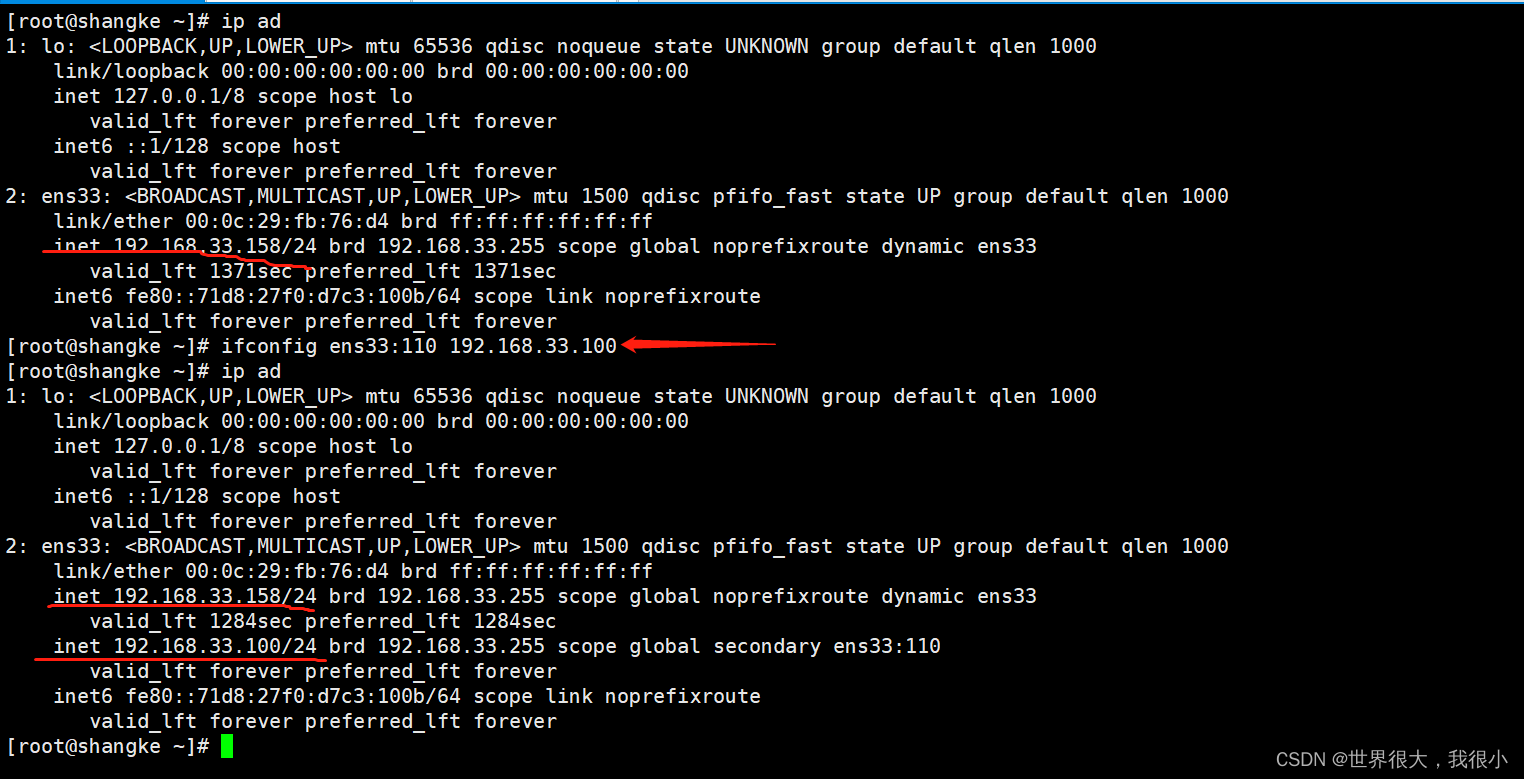
注意:增加的IP和本机的IP需要在同一个网段。
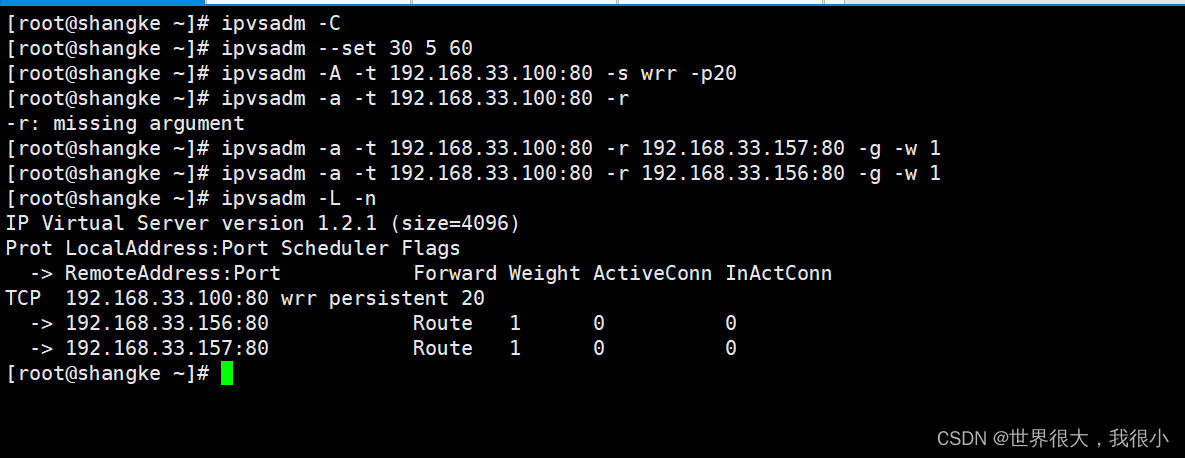
1.1.3 配置ipvsadm
1.2 配置rs1
1.2.1 编写测试页面

1.2.2 手工在RS端绑定VIP、添加路由

1.2.3 抑制arp响应

1.3 配置rs2
配置和rs1一样,省略。
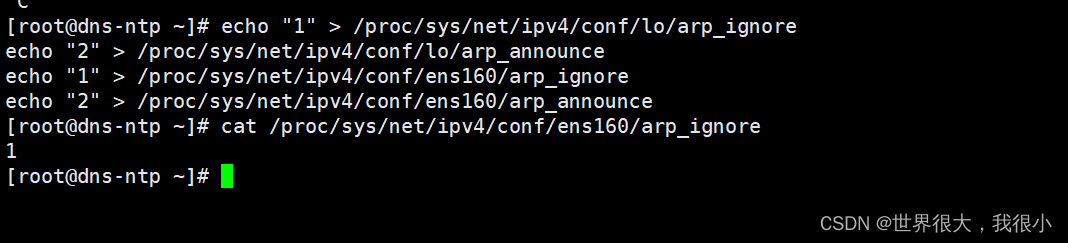
注意:调整内核参数,关闭arp响应的时候,redhat和centos的网络设备名称是不一样的。
1.4 测试


二、配置nginx负载均衡。
2.1 配置好环境
| 作用 | 环境 | |
| windows | 测试 | |
| 192.168.33.158 | nginx负载均衡 | nginx:1.22,centos7 |
| 192.168.33.157 | web服务器1--web1 | nginx:1.22,centos7 |
| 192.168.33.156 | web服务器2--web2 | Apache:2.4 , redhat9 |
确保所有的防火墙和selinx都是关闭的。
2.2 web服务器上添加测试页面
web1:

web2:

2.3 配置负载均衡器
主配置文件:/usr/local/nginx/conf/nginx.conf
user nginx;
worker_processes  1;#error_log  logs/error.log;
#error_log  logs/error.log  notice;
#error_log  logs/error.log  info;#pid        logs/nginx.pid;events {worker_connections  1024;
}http {include       mime.types;default_type  application/octet-stream;#log_format  main  '$remote_addr - $remote_user [$time_local] "$request" '#                  '$status $body_bytes_sent "$http_referer" '#                  '"$http_user_agent" "$http_x_forwarded_for"';#access_log  logs/access.log  main;sendfile        on;#tcp_nopush     on;#keepalive_timeout  0;keepalive_timeout  65;#gzip  on;include /etc/nginx/conf.d/*.conf;server {listen       80;server_name  localhost;#charset koi8-r;#access_log  logs/host.access.log  main;location / {root   html;index  index.html index.htm;}#location / {#   root /data/web2;#   index index.html index.htm;#   auth_basic "Restricted";#   auth_basic_user_file /data/web2/webpass;#}location ~ \.php$ {root html;fastcgi_pass 127.0.0.1:9000;fastcgi_index index.php;fastcgi_param SCRIPT_FILENAME $document_root$fastcgi_script_name;include	fastcgi_params;}#error_page  404              /404.html;# redirect server error pages to the static page /50x.html#error_page   500 502 503 504  /50x.html;location = /50x.html {root   html;}# proxy the PHP scripts to Apache listening on 127.0.0.1:80##location ~ \.php$ {#    proxy_pass   http://127.0.0.1;#}# pass the PHP scripts to FastCGI server listening on 127.0.0.1:9000##location ~ \.php$ {#    root           html;#    fastcgi_pass   127.0.0.1:9000;#    fastcgi_index  index.php;#    fastcgi_param  SCRIPT_FILENAME  /scripts$fastcgi_script_name;#    include        fastcgi_params;#}# deny access to .htaccess files, if Apache's document root# concurs with nginx's one##location ~ /\.ht {#    deny  all;#}}# another virtual host using mix of IP-, name-, and port-based configuration##server {#    listen       8000;#    listen       somename:8080;#    server_name  somename  alias  another.alias;#    location / {#        root   html;#        index  index.html index.htm;#    }#}# HTTPS server##server {#    listen       443 ssl;#    server_name  localhost;#    ssl_certificate      cert.pem;#    ssl_certificate_key  cert.key;#    ssl_session_cache    shared:SSL:1m;#    ssl_session_timeout  5m;#    ssl_ciphers  HIGH:!aNULL:!MD5;#    ssl_prefer_server_ciphers  on;#    location / {#        root   html;#        index  index.html index.htm;#    }#}}
子配置文件:/etc/nginx/conf.d/vhost.conf
server {listen 80;server_name test.ng.test;location / {proxy_pass http://web_server;}}upstream web_server {server 192.168.33.157;server 192.168.33.156;
}
2.4 开启nginx服务和web服务
systemctl start nginx
systemctl start httpd
2.5 测试
用windows测试的时候,需要修改本地的hosts文件。路径:C:\Windows\System32\drivers\etc

windows 浏览器的测试


因为是一般轮询负载均衡,所以不断刷新页面,页面会在192.168.33.157和192.168.33.156之间交替出现。