RabbitMQ入门(五) —— vhost
在RabbitMQ中有一个vhost的概念,vhost就相当于一个个MINI版的RabbitMQ服务器,在一个RabbitMQ服务器上可以创建多个vhost,他们有自己的权限控制机制,我们可以让不同的用户拥有访问不同vhost的权限。更简单的说就好像一个操作系统上运行的多个虚拟机。
我们可以用rabbitmqctl list_vhosts来查看当前RabbitMQ服务器上已有的vhost。当前我们的服务器上只有一个名叫“/”的vhost,这个也是RabbitMQ默认的vhost。

接下来我们用rabbitmqctl add_vhost来添加一个vhost。

添加新的vhost后,我们还无法访问这个vhost,需要用rabbitmqctl set_permissions给用户访问该vhost的权限。

然后我们就可以访问这个新创建的vhost了,我们把以前的代码稍微修改下:
package com.jaeger.vhost;import java.io.IOException;
import java.util.concurrent.TimeoutException;import org.junit.Test;import com.rabbitmq.client.AMQP;
import com.rabbitmq.client.Channel;
import com.rabbitmq.client.Connection;
import com.rabbitmq.client.ConnectionFactory;
import com.rabbitmq.client.Consumer;
import com.rabbitmq.client.DefaultConsumer;
import com.rabbitmq.client.Envelope;public class Producer {private static final String MY_EXCHANGE_NAME = "MyExchange";private static final String MY_ROUTING_KEY = "MyRoutingKey";private static final String MY_QUEUE_NAME = "MyQueue";private static final String DIRECT = "direct";private static final String HOST = "172.19.64.28";private static final String USER = "jaeger";private static final String PASSWORD = "root";private static final String VHOST = "jaeger_vhost";private static final int PORT = 5672;@Testpublic void createExchangeAndQueue() throws IOException, TimeoutException {ConnectionFactory connectionFactory = new ConnectionFactory();connectionFactory.setHost(HOST);connectionFactory.setUsername(USER);connectionFactory.setPassword(PASSWORD);connectionFactory.setPort(PORT);// 指定需要访问的vhost名称connectionFactory.setVirtualHost(VHOST);Connection connection = connectionFactory.newConnection();Channel channel = connection.createChannel();channel.exchangeDeclare(MY_EXCHANGE_NAME, DIRECT);channel.queueDeclare(MY_QUEUE_NAME, false, false, false, null);channel.queueBind(MY_QUEUE_NAME, MY_EXCHANGE_NAME, MY_ROUTING_KEY);channel.close();connection.close();}@Testpublic void produce() throws IOException, TimeoutException {ConnectionFactory connectionFactory = new ConnectionFactory();connectionFactory.setHost(HOST);connectionFactory.setUsername(USER);connectionFactory.setPassword(PASSWORD);connectionFactory.setPort(PORT);// 指定需要访问的vhost名称connectionFactory.setVirtualHost(VHOST);Connection connection = connectionFactory.newConnection();Channel channel = connection.createChannel();String message = "Hello 世界!";channel.basicPublish(MY_EXCHANGE_NAME, MY_ROUTING_KEY, null, message.getBytes("utf-8"));System.out.println("Sent '" + message + "'");channel.close();connection.close();}@Testpublic void consume() throws IOException, TimeoutException, InterruptedException {ConnectionFactory connectionFactory = new ConnectionFactory();connectionFactory.setHost(HOST);connectionFactory.setUsername(USER);connectionFactory.setPassword(PASSWORD);connectionFactory.setPort(PORT);// 指定需要访问的vhost名称connectionFactory.setVirtualHost(VHOST);Connection connection = connectionFactory.newConnection();Channel channel = connection.createChannel();Consumer consumer = new DefaultConsumer(channel) {@Overridepublic void handleDelivery(String consumerTag, Envelope envelope, AMQP.BasicProperties properties,byte[] body) throws IOException {String message = new String(body, "UTF-8");System.out.println("Received '" + message + "'");}};channel.basicConsume(MY_QUEUE_NAME, true, consumer);Thread.sleep(1000);}
}
首先运行createExchangeAndQueue方法,在jaeger_vhost下创建新的exchange和queue:
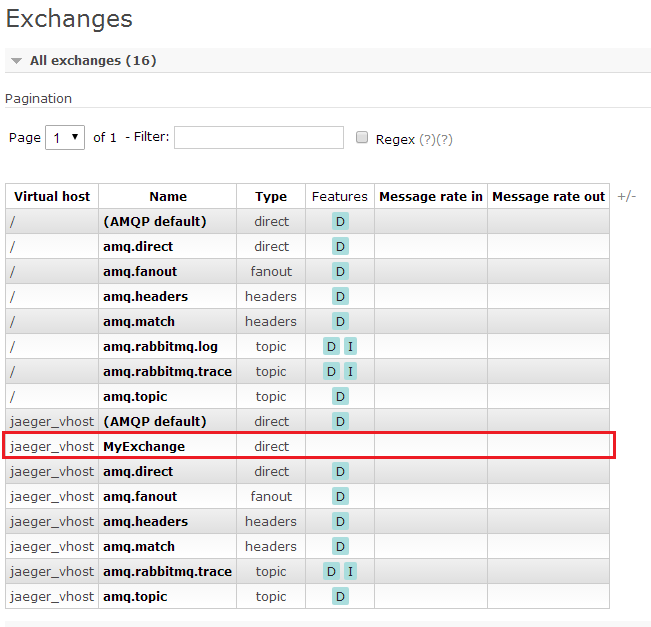
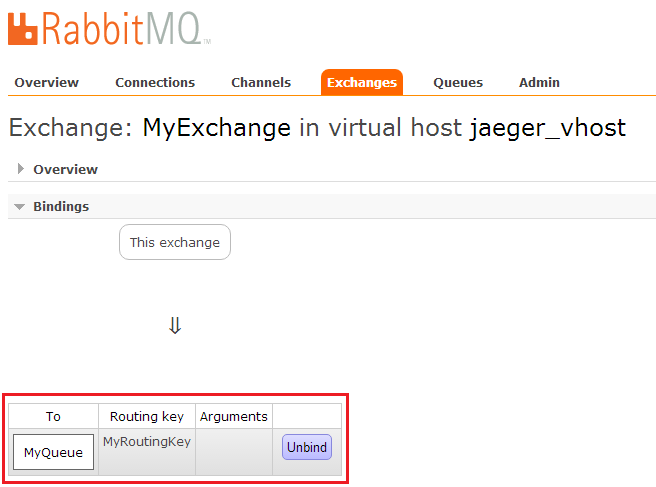
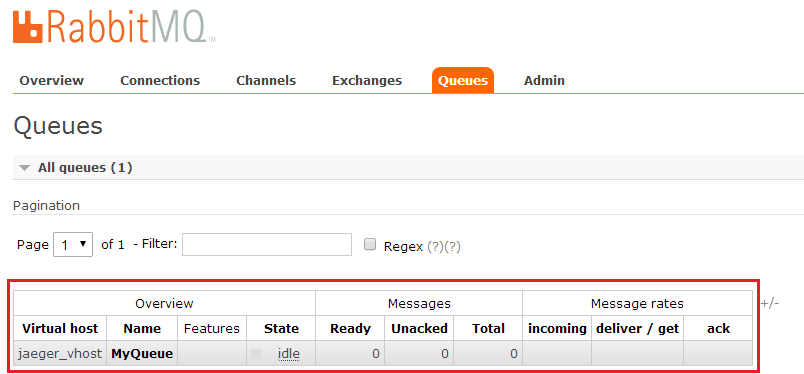
再运行produce方法向jaeger_vhost的queue里添加一条数据:
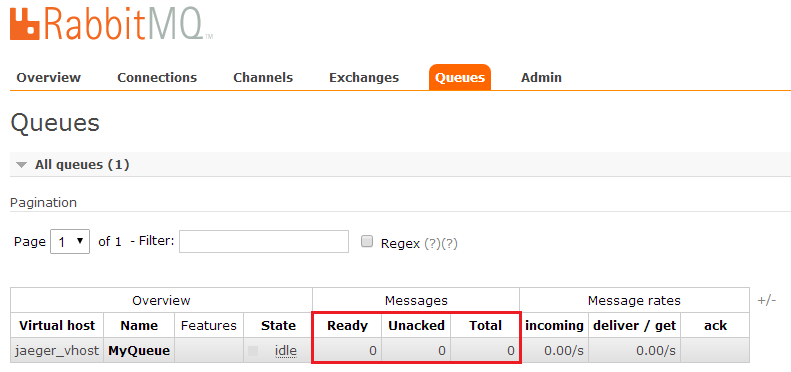
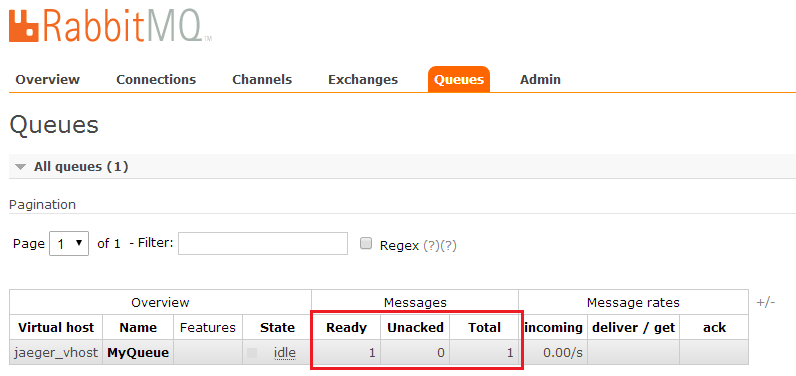 最后运行consume来消费queue里的消息:
转载于:https://blog.51cto.com/jaeger/1763455
