spring太强了!两万多字干货 超详细讲解
1.1 spring简介
-
spring:春天,给软件行业带来春天!
-
spring理念:使现有的技术更加易用,是一个粘合剂,整合了现有的技术框架
-
spring是一个轻量级的开源免费框架
-
核心:控制反转(IOC),面向切面编程(AOP)
-
支持对事务的支持,支持整合其他框架
Spring是一个轻量级的控制反转(IOC)和面向切面编程(AOP)的框架。
spring官方文档:https://spring.io/projects/spring-framework#learn
maven官网:https://mvnrepository.com/
1.2 环境配置
软件版本
-
jdk 11.0.6
-
maven 3.6.2 阿里云
-
idea 2019.3
idea新建项目配置
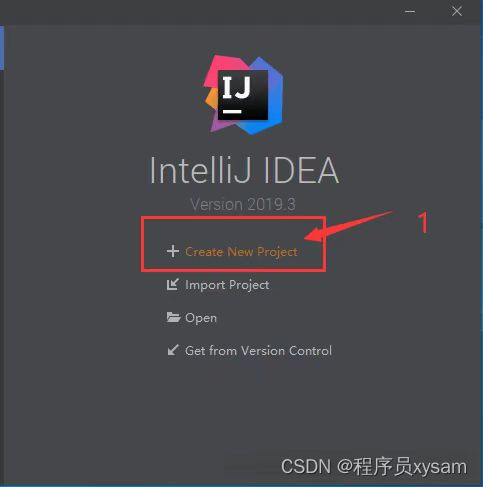
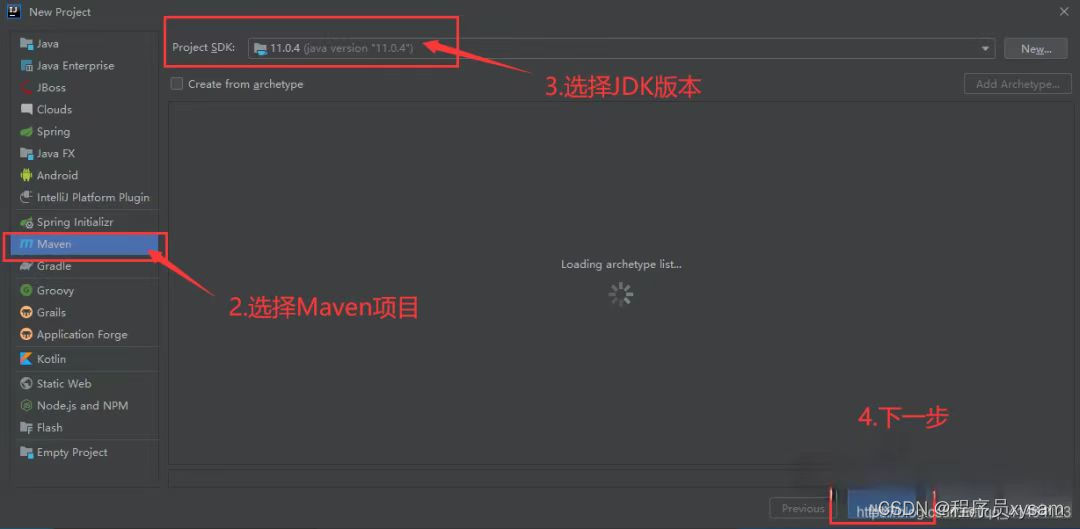
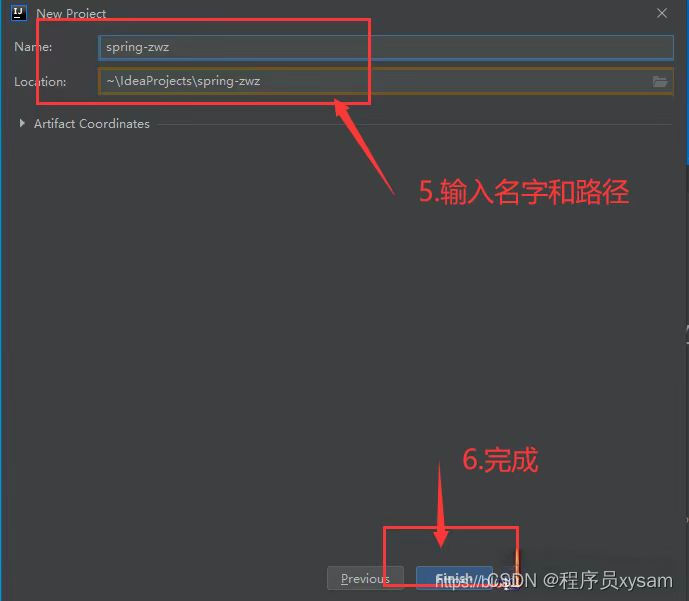
需要注意以下几点:
-
选择创建maven新项目,删除src目录,创建子module
-
在 File | Settings | Build, Execution, Deployment | Build Tools | Maven 中,配置maven
-
在 File | Settings | Build, Execution, Deployment | Compiler | Java Compiler 中,设置发行版本为 11
-
File | Settings | Editor | File Encodings,编码改为UTF-8
-
在File | Project Setting | Modules 中,将版本设置为11
所需依赖
<dependencies><dependency><groupId>org.springframework</groupId><artifactId>spring-webmvc</artifactId><version>5.2.8.RELEASE</version></dependency><dependency><groupId>org.springframework</groupId><artifactId>spring-jdbc</artifactId><version>5.2.8.RELEASE</version></dependency><dependency><groupId>junit</groupId><artifactId>junit</artifactId><version>4.12</version></dependency><dependency><groupId>org.aspectj</groupId><artifactId>aspectjweaver</artifactId><version>1.9.4</version></dependency><dependency><groupId>org.projectlombok</groupId><artifactId>lombok</artifactId><version>1.18.0</version></dependency><dependency><groupId>mysql</groupId><artifactId>mysql-connector-java</artifactId><version>5.1.47</version></dependency><dependency><groupId>org.mybatis</groupId><artifactId>mybatis</artifactId><version>3.5.2</version></dependency><dependency><groupId>org.mybatis</groupId><artifactId>mybatis-spring</artifactId><version>2.0.2</version></dependency>
</dependencies>
jdk发型版本配置
如果不配置,运行测试方法时,可能会报“不支持发行版本5”错误
<properties><maven.compiler.source>11</maven.compiler.source><maven.compiler.target>11</maven.compiler.target>
</properties>
所需过滤器
过滤器的作用,是在程序编译时,将xml、properties等静态配置文件也加入 target 包中,否则程序无法读取到xml文件
<build><resources><resource><directory>src/main/resources</directory><includes><include>**/*.properties</include><include>**/*.xml</include></includes><filtering>true</filtering></resource><resource><directory>src/main/java</directory><includes><include>**/*.properties</include><include>**/*.xml</include></includes><filtering>true</filtering></resource></resources>
</build>
1.3 编写实体类
User类有两个变量,分别是姓名name和年龄age
类上方的三个注解均在lombok包中
@Data 是用来自动生成set和get方法
@AllArgsConstructor是用来自动生成全部参数的构造方法
@NoArgsConstructor是用来自动生成无参构造方法
@Data
@AllArgsConstructor
@NoArgsConstructor
public class User {private String name;private int age;
}
1.4 编写配置文件
<?xml version="1.0" encoding="UTF-8"?>
<beans xmlns="http://www.springframework.org/schema/beans"xmlns:xsi="http://www.w3.org/2001/XMLSchema-instance"xmlns:context="http://www.springframework.org/schema/context"xmlns:c="http://www.springframework.org/schema/c"xmlns:p="http://www.springframework.org/schema/p"xmlns:tx="http://www.springframework.org/schema/tx"xmlns:aop="http://www.springframework.org/schema/aop"xsi:schemaLocation="http://www.springframework.org/schema/beanshttp://www.springframework.org/schema/beans/spring-beans.xsdhttp://www.springframework.org/schema/txhttp://www.springframework.org/schema/tx/spring-tx.xsdhttp://www.springframework.org/schema/aophttp://www.springframework.org/schema/aop/spring-aop.xsdhttp://www.springframework.org/schema/contexthttp://www.springframework.org/schema/context/spring-context.xsd"><bean id="user" class="zwz.pojo.User"><!-- property相当于给某个变量设置一个值--><property name="name" value="ZWZ"/><property name="age" value="18"/></bean>
</beans>
1.5 测试
先是用传统的方法new一个对象
@Test
public void testtTradition(){User user = new User("ZWZ",18);System.out.println(user);
}
接着用spring的方式从容器获取一个对象
@Test
public void testSpring(){// ApplicationContext Spring上下文对象 | ClassPathXmlApplicationContext 从配置文件中去取ApplicationContext context = new ClassPathXmlApplicationContext("applicationContext.xml");// 从容器中取出user对象User user = (User) context.getBean("user");System.out.println(user);
}
都可以得到相同的运行结果
User(name=ZWZ, age=18)Process finished with exit code 0二、IOC 控制反转
2.1传统开发
我们就以**张三想找一个女朋友谈恋爱**为例,结合Java代码,说明spring控制反转和传统开发的区别
web开发后端的层次,从上到下可以分为:Controller(控制器层)、Service(业务逻辑层)、Dao(数据持久层)
谈恋爱接口(Dao层)
这是一个Dao层的接口,描述谈恋爱这一个抽象性行为
public interface LoveDao {// 谈恋爱的mapper层接口void talkLove();
}
女朋友一号(Dao层实现1)
这是接口的第一个实现,是活灵活现的女朋友
public class LoveDaoImpl1 implements LoveDao {@Overridepublic void talkLove() {System.out.println("女朋友1号和你谈恋爱了!");}
}
女朋友二号(Dao层实现2)
这是接口的第二个实现,是活灵活现的女朋友
public class LoveDaoImpl2 implements LoveDao{@Overridepublic void talkLove() {System.out.println("女朋友2号和你谈恋爱了!");}
}
女朋友三号(Dao层实现3)
这是接口的第三个实现,是活灵活现的女朋友
public class LoveDaoImpl3 implements LoveDao{@Overridepublic void talkLove() {System.out.println("女朋友3号和你谈恋爱了!");}
}
谈恋爱接口(Service层)
这是业务逻辑层的接口,和Dao层一样,是一个抽象性接口
public interface LoveService {// 谈恋爱的Service层接口void talkLove();
}
谈恋爱实现(Service层)
业务逻辑层调用Dao层的方法,完善业务逻辑层接口的具体实现
如果你选择和女朋友一号谈恋爱,那么…
public class LoveServiceImpl implements LoveService {private LoveDao loveDao = new LoveDaoImpl1();@Overridepublic void talkLove() {loveDao.talkLove();}
}
测试
@Test
public void testTradition(){LoveService loveService = new LoveServiceImpl();loveService.talkLove();
}
女朋友1号和你谈恋爱了!Process finished with exit code 0
如果张三的**需求改变了**,他只想和女朋友二号谈恋爱
那么,我们就**必须修改service层的实现类**
private LoveDao loveDao = new LoveDaoImpl2();女朋友2号和你谈恋爱了!Process finished with exit code 0-
该程序适应不了需求的变更,需求变了要更改源代码,这是万万不行的!
-
如何解决?如何让程序不动,让客户端去改变?这就需要控制反转
2.2 IOC控制反转实现
首先,Dao层的接口、Dao层的实现类、Service层的接口不改动,我们只改service实现类和测试方法
谈恋爱实现(Service层)
原有代码直接new出一个Dao层实现,现在我们使用构造器,将Dao层实现类的选择权交给用户,从而实现了控制反转
public class LoveServiceImpl implements LoveService {// 传统开发代码// private LoveDao loveDao = new LoveDaoImpl1();// IOC控制反转    LoveDao的选择,放权给用户private LoveDao loveDao;public LoveServiceImpl(LoveDao loveDao) {this.loveDao = loveDao;}@Overridepublic void talkLove() {loveDao.talkLove();}
}
1234567891011121314151617
测试
-
张三如果想和一号女朋友谈恋爱
@Test
public void testIoc(){// 用户需求发生改变,没有改动内部代码LoveServiceImpl loveService = new LoveServiceImpl(new LoveDaoImpl1());loveService.talkLove();
}
输出
女朋友1号和你谈恋爱了!Process finished with exit code 0-
如果他跟女朋友二号谈恋爱,只需要更改测试方法
@Test
public void testIoc(){// 用户需求发生改变,没有改动内部代码LoveServiceImpl loveService = new LoveServiceImpl(new LoveDaoImpl2());loveService.talkLove();
}
输出
女朋友2号和你谈恋爱了!Process finished with exit code 0
通过 UserServiceImpl 的构造器,对UserDao进行动态注入,用户可以自己选择需要使用的UserDao的实现类,从而灵活变动
-
在传统开发中,需求变更需要修改源代码,如果系统代码量大,修改会非常麻烦,牵一发而动全身!
-
在传统开发中,对象创建在程序中实现;控制反转之后,程序变成了被动接受对象!
-
控制反转是一种设计思想,让第三方去管理对象的创建和获取。在spring中实现控制反转是IOC容器,实现方法是依赖注入DI
三、DI 依赖注入
3.1 概念
在第一个Spring程序中已经体验了,传统赋值和依赖注入的区别
传统赋值
User user = new User("ZWZ",18);依赖注入
在容器中配置bean,并注入值
<bean id="user" class="zwz.pojo.User"><!-- property相当于给某个变量设置一个值--><property name="name" value="ZWZ"/><property name="age" value="18"/>
</bean>
在容器中取出对象
// ApplicationContext Spring上下文对象 | ClassPathXmlApplicationContext 从配置文件中去取
ApplicationContext context = new ClassPathXmlApplicationContext("applicationContext.xml");
// 从容器中取出user对象
User user = (User) context.getBean("user");
两种方式,都可以得到相同的运行结果
User(name=ZWZ, age=18)Process finished with exit code 0
3.2 根据属性名注入(推荐)
实体类User
该实体类有各种各样的类型,我们尝试对这些复杂数据类型进行注入
@Data
@AllArgsConstructor
@NoArgsConstructor
public class User {private String name;private Address address;private String[] books;private List<String> hobbys;private Map<String,String> card;private Set<String> games;private Properties info;private String girlFriend;
}
XML注入
一共八种数据类型,分别加以注入
<!--propertyNameAddress  根据属性名注入的address-->
<!--singleton 单例模式 prototype原型模式-->
<bean id="address" class="zwz.pojo.Address" scope="singleton"><property name="address" value="浙江宁波"/>
</bean>
<bean id="user" class="zwz.pojo.User"><!--        第一种 普通值注入--><property name="name" value="ZWZ"></property><!--        第二种 Bean注入--><property name="address" ref="address"></property><!--        第三种 数组--><property name="books"><array><value>Java程序设计</value><value>JavaScript程序设计</value><value>Python程序设计</value></array></property><!--        第四种 List--><property name="hobbys"><list><value>敲代码</value><value>听歌</value><value>看小说</value></list></property><!--        第五种 Map--><property name="card"><map><entry key="card01" value="卡片1"></entry><entry key="card02" value="卡片2"></entry><entry key="card03" value="卡片3"></entry></map></property><!--        第六种 Set--><property name="games"><set><value>QQ飞车手游</value><value>DNF</value><value>敲代码</value></set></property><!--        第七种 空值--><property name="girlFriend"><null></null></property><!--        第八种 配置--><property name="info"><props><prop key="id">0413170337</prop><prop key="tel">17857054388</prop></props></property>
</bean>
测试
@Test
public void testPropertyName() {ApplicationContext context = new ClassPathXmlApplicationContext("applicationContext.xml");User user = (User) context.getBean("user");System.out.println(user);
}
可以看出,八种数据类型,都已经成功注入到对象中
Student{
name='ZWZ'
, address=Address(address=浙江宁波)
, books=[Java程序设计, JavaScript程序设计, Python程序设计]
, hobbys=[敲代码, 听歌, 看小说]
, card={card01=卡片1, card02=卡片2, card03=卡片3}
, games=[QQ飞车手游, DNF, 敲代码]
, info={tel=17857054388, id=0413170337}
, girlFriend='null'}Process finished with exit code 0
3.3 根据构造器下标注入
@AllArgsConstructor 注解在之间提到过,是生成全部参数的构造方法
我们可以通过构造器的参数,实现值注入
比如对于构造器0号下标的bookName,注入Java程序设计…
实体类Book
@Data
@AllArgsConstructor
@NoArgsConstructor
public class Book {private String bookName;private int pageNum;
}
XML注入
<bean id="bookIndex" class="zwz.pojo.Book"><constructor-arg index="0" value="Java程序设计"/><constructor-arg index="1" value="66"/>
</bean>
测试
@Testpublic void testConstructorIndex() {ApplicationContext context = new ClassPathXmlApplicationContext("applicationContext.xml");Book book = (Book) context.getBean("bookIndex");System.out.println(book);}Book(bookName=Java程序设计, pageNum=66)Process finished with exit code 03.4 根据构造器数据类型注入
@AllArgsConstructor 注解在之间提到过,是生成全部参数的构造方法
我们可以通过构造器的参数类型,实现值注入
比如对于构造器的String类型变量bookName,注入Java程序设计…
当然构造器**不同参数的数据类型必须不一致,否则会出错**,所以这个注入方式说实话没什么用…
### 实体类Book
@Data
@AllArgsConstructor
@NoArgsConstructor
public class Book {private String bookName;private int pageNum;
}
XML注入
<bean id="bookType" class="zwz.pojo.Book"><constructor-arg type="java.lang.String" value="Java程序设计"/><constructor-arg type="int" value="66"/>
</bean>
测试
@Test
public void testConstructorType() {ApplicationContext context = new ClassPathXmlApplicationContext("applicationContext.xml");Book book = (Book) context.getBean("bookType");System.out.println(book);
}
Book(bookName=Java程序设计, pageNum=66)Process finished with exit code 03.5 C / P 命名空间注入
c命名空间注入或者p命名空间注入,分别利用变量名称和构造器下标进行值注入,和之前的没有本质性的区别
XML属性名注入、Java注解最为常用,而C/P命名空间注入一般不会去使用…
实体类Book
@Data
@AllArgsConstructor
@NoArgsConstructor
public class Book {private String bookName;private int pageNum;
}
XML注入
<bean id="cBook" class="zwz.pojo.Book" c:_0="Java程序设计" c:_1="66"/><bean id="pBook" class="zwz.pojo.Book" p:bookName="Java程序设计" p:pageNum="66"/>测试
@Test
public void testC() {ApplicationContext context = new ClassPathXmlApplicationContext("applicationContext.xml");Book book = (Book) context.getBean("cBook");System.out.println(book);
}@Test
public void testP() {ApplicationContext context = new ClassPathXmlApplicationContext("applicationContext.xml");Book book = (Book) context.getBean("pBook");System.out.println(book);
}
输出相同
Book(bookName=Java程序设计, pageNum=66)Process finished with exit code 03.6 单例/原型模式
XML配置
singleton 为单例模式,从容器中多次获取bean,bean相同
prototype为原型模式,从容器中多次获取bean,bean不同
<bean id="singletonBook" class="zwz.pojo.Book" scope="singleton"><property name="bookName" value="Java程序设计"/><property name="pageNum" value="66"/>
</bean><bean id="prototypeBook" class="zwz.pojo.Book" scope="prototype"><property name="bookName" value="Java程序设计"/><property name="pageNum" value="66"/>
</bean>
测试
@Test
public void testScope(){ApplicationContext context = new ClassPathXmlApplicationContext("applicationContext.xml");Book book1 = (Book) context.getBean("singletonBook");Book book2 = (Book) context.getBean("singletonBook");System.out.println("singletonBook: " + (book1 == book2));Book book3 = (Book) context.getBean("prototypeBook");Book book4 = (Book) context.getBean("prototypeBook");System.out.println("prototypeBook: " + (book3 == book4));
}
``` singletonBook: true prototypeBook: false ```
3.7 自动装配
自动装配的意思是,假设有两个实体Bean A、B
如果A中包含B,且B已经配置在容器中,那么A可以通过自动装配,将B自动装配注入
当然自动装配只对引用变量生效,对于int、String不支持
实体类BookUser
定义一个包含Book的实体类BookUser
@Data
@AllArgsConstructor
@NoArgsConstructor
public class BookUser {Book book;
}
### XML配置
<bean id="book" class="zwz.pojo.Book"><property name="bookName" value="自动装配的BookName"/><property name="pageNum" value="66"/>
</bean><!--
- byName 要求所有的bean 的 id 唯一,并且set方法要规范
- byType 要求所有的bean 的 class 唯一,并且set方法要规范
-->
<bean id="bookUser" class="zwz.pojo.BookUser" autowire="byName"/>
12345678910
测试
@Test
public void testAutowire(){ApplicationContext context = new ClassPathXmlApplicationContext("applicationContext.xml");BookUser bookUser = (BookUser) context.getBean("bookUser");System.out.println(bookUser);
}
BookUser(book=Book(bookName=自动装配的BookName, pageNum=66))Process finished with exit code 03.8 Java注解开发(推荐)
实体类House
@Data
@AllArgsConstructor
@NoArgsConstructor
public class House {@Value("幸福之家")private String houseName;@Value("99")private String houseSize;
}
XML配置
<!--使用注解必须开启注解支持-->
<context:annotation-config/><bean id="house" class="zwz.pojo.House"/>
测试
@Test
public void testJava(){ApplicationContext context = new ClassPathXmlApplicationContext("applicationContext.xml");House house= (House) context.getBean("house");System.out.println(house);
}
House(houseName=幸福之家, houseSize=99)Process finished with exit code 03.9 spring常用注解
-
@Autowired 直接在变量上使用,也可以在set方法上使用,需要符合名字byName原则 【 最常用!!!】
-
@Nullable 直接在变量上使用,表示这个变量允许为空
-
@Qualifier(value=“xxx”) 直接在变量上使用,指定bean的id
-
@Resource 或者 @Resource(value=“xxx”) ,同 @Autowired 和 @Qualifier(value=“xxx”)
-
@Value(“xxx”),在实体类的某个变量注入值,也可放在set方法上
-
@Component,在spring中注册装配bean,通用
-
@Repository,在spring中注册装配bean,一般放在Dao层上
-
@Service,在spring中注册装配bean,一般放在Service层上
-
@Controller,在spring中注册装配bean,一般放在Controller层上
-
@Scope(“prototype/singleton”),配置实体类的单例/原型模式
-
@Configuration,Java配置类的注解
四、 AOP 面向切面编程
4.1 静态代理
-
抽象角色:接口/抽象类,代表某种需求【租房】
-
真实角色:被代理的角色【房东】
-
代理角色:代理真实角色【租房中介】
-
客户:访问代理对象【租房的人】
假设场景:XX通信公司在高校内售卖校园卡
【抽象角色】就是卖卡这个需求
// 卖校园卡
public interface SellingCard {void sellingCard();
}
【真实角色】要卖卡的公司
public class Company implements SellingCard{@Overridepublic void sellingCard() {System.out.println("XX公司要卖校园卡!");}
}
【代理角色】高校内的各级代理,卖卡之余,还提供各种服务
@Data
@AllArgsConstructor
@NoArgsConstructor
public class Proxy implements SellingCard{private Company company;@Overridepublic void sellingCard() {learnCard();company.sellingCard();contract();collectMoney();}// 了解校园卡功能public void learnCard(){System.out.println("校园卡代理带你了解校园卡费用");}// 收取卖卡推销费用public void collectMoney(){System.out.println("收取卖卡推销费用");}// 代理指导你签电子合同public void contract(){System.out.println("代理指导你签电子合同");}
}
【客户】买卡的学生,访问代理角色,buyCard()为直接找公司购卡,buyCardProxy()为找代理购卡
public class Student {@Testpublic void buyCardProxy(){// XX校园卡公司,要卖校园卡Company company = new Company();//代理中介,帮公司卖卡,收取一定费用Proxy proxy = new Proxy(company);// 客户不用面对公司,直接找代理买卡即可proxy.sellingCard();}@Testpublic void buyCard(){Company company = new Company();company.sellingCard();}
}
校园卡代理带你了解校园卡费用
XX公司要卖校园卡!
代理指导你签电子合同
收取卖卡推销费用Process finished with exit code 0
代理模式的优点:
-
让真实角色的需求【房东卖房】更加简单,不用去关注一些其他手续【客户看房,签合同等】
-
其他手续交给了代理,实现业务分工
-
其他手续需求扩展时,方便集中管理
代理模式的缺点:
-
一个真实角色【房东】,就会产生一个代理角色【租房中介】,使得代码量会翻倍
4.2 动态代理
和静态代理一样,也是卖卡这个场景
【需求】卖卡(同静态代理一致)
// 卖校园卡
public interface SellingCard {void sellingCard();
}
【真实角色】要卖卡的公司(同静态代理一致)
public class Company implements SellingCard {@Overridepublic void sellingCard() {System.out.println("XX公司要卖校园卡!");}
}
【代理角色】动态代理
@Data
@AllArgsConstructor
@NoArgsConstructor
public class ProxyAction implements InvocationHandler {// 被代理的接口private SellingCard sellingCard;public Object getProxy(){return  Proxy.newProxyInstance(this.getClass().getClassLoader(),sellingCard.getClass().getInterfaces(),this);}// 处理代理实例,并返回结果@Overridepublic Object invoke(Object proxy, Method method, Object[] args) throws Throwable {learnCard();// 动态代理  反射机制实现Object result = method.invoke(sellingCard, args);collectMoney();contract();return result;}// 了解校园卡功能public void learnCard(){System.out.println("校园卡代理带你了解校园卡费用");}// 收取卖卡推销费用public void collectMoney(){System.out.println("收取卖卡推销费用");}// 代理指导你签电子合同public void contract(){System.out.println("代理指导你签电子合同");}
}
【客户】买卡的学生
public class Student {@Testpublic void testProxyAction(){// 真实角色Company company = new Company();// 代理角色ProxyAction pa = new ProxyAction();// 通过调用程序处理调用的接口对象 | 就是让代理实现 SellingCard 卖卡的接口pa.setSellingCard(company);// 获得代理类 | proxy 就是动态生成的SellingCard proxy = (SellingCard) pa.getProxy();proxy.sellingCard();}
}
4.3 Spring API接口实现
-
Aop是什么?一般情况下,在程序执行时,是从上到下执行的
-
如果要在执行的某个点,插入一个功能,如何实现?
-
比如一个系统,我需要加入逻辑删除,我需要增加日志功能,难道我去修改原有代码?
-
这就需要我们使用Aop来实现横向切入,增加功能!
我们以增加日志功能为例,介绍Aop的实现流程之一 —— 基于Spring API接口实现
编写一个Service
public interface BookService {void add();void delete();void update();void select();
}
编写Service的实现类
public class BookServiceImpl implements BookService {public void add() {System.out.println("增加了一本书");}public void delete() {System.out.println("删除了一本书");}public void update() {System.out.println("修改了一本书");}public void select() {System.out.println("查询了一本书");}
}
编写方法前日志
public class BeforeLog implements MethodBeforeAdvice {/*** method要执行的目标对象的方法* args 参数* target 目标对象*/public void before(Method method, Object[] args, Object target) throws Throwable {System.out.println(target.getClass().getName() + " 的 "+method.getName() + " 被执行了!");}
}
编写方法后日志
public class AfterLog implements AfterReturningAdvice {/*** returnValue  返回对象* method要执行的目标对象的方法* args 参数* target 目标对象*/public void afterReturning(Object returnValue, Method method, Object[] args, Object target) throws Throwable {System.out.println("执行了 " +method.getName() + " 方法, 返回结果为" + returnValue);}
}
配置文件配置切面、切入点
<?xml version="1.0" encoding="UTF-8"?>
<beans xmlns="http://www.springframework.org/schema/beans"xmlns:xsi="http://www.w3.org/2001/XMLSchema-instance"xmlns:context="http://www.springframework.org/schema/context"xmlns:c="http://www.springframework.org/schema/c"xmlns:p="http://www.springframework.org/schema/p"xmlns:aop="http://www.springframework.org/schema/aop"xsi:schemaLocation="http://www.springframework.org/schema/beanshttp://www.springframework.org/schema/beans/spring-beans.xsdhttp://www.springframework.org/schema/contexthttp://www.springframework.org/schema/context/spring-context.xsdhttp://www.springframework.org/schema/aophttp://www.springframework.org/schema/aop/spring-aop.xsd"><bean id="bookService" class="zwz.demo1.service.BookServiceImpl"/><bean id="beforeLog" class="zwz.demo1.log.BeforeLog"/><bean id="afterLog" class="zwz.demo1.log.AfterLog"/><!--配置AOP--><aop:config><!-- 切入点--><aop:pointcut id="pointcut" expression="execution(* zwz.demo1.service.BookServiceImpl.*(..))"/><!--执行环绕增加 ,将beforeLog切入到pointcut中 --><aop:advisor advice-ref="beforeLog" pointcut-ref="pointcut"/><aop:advisor advice-ref="afterLog" pointcut-ref="pointcut"/></aop:config>
</beans>
测试
@Test
public void testAop1(){ApplicationContext context = new ClassPathXmlApplicationContext("applicationContext.xml");BookService bookService = (BookService) context.getBean("bookService");bookService.add();
}
这样,我们就实现了在执行某个方法的时候,输出日志的功能了
输出结果
zwz.demo1.service.BookServiceImpl 的 add 被执行了!
增加了一本书
执行了 add 方法, 返回结果为nullProcess finished with exit code 0
4.4 自定义类实现
接下来是基于自定义类接口实现,和spring的API实现一样,先写业务的实现接口和实现类
public interface BookService2 {void add();void delete();void update();void select();
}
public class BookServiceImpl2 implements BookService2 {public void add() {System.out.println("增加了一本书");}public void delete() {System.out.println("删除了一本书");}public void update() {System.out.println("修改了一本书");}public void select() {System.out.println("查询了一本书");}
}和spring API方法一致,编写两个切入日志类
public class BeforeLog implements MethodBeforeAdvice {/*** method要执行的目标对象的方法* args 参数* target 目标对象*/public void before(Method method, Object[] args, Object target) throws Throwable {System.out.println(target.getClass().getName() + " 的 "+method.getName() + " 被执行了!");}
}
public class AfterLog implements AfterReturningAdvice {/*** returnValue 返回对象* method要执行的目标对象的方法* args 参数* target 目标对象*/public void afterReturning(Object returnValue, Method method, Object[] args, Object target) throws Throwable {System.out.println("执行了 " +method.getName() + " 方法, 返回结果为" + returnValue);}
}编写自定义切入类
public class DiyPointCut {public void before(){System.out.println("==============方法执行前==============");}public void after(){System.out.println("==============方法执行后==============");}
}
配置文件
<bean id="bookService2" class="zwz.demo2.service.BookServiceImpl2"/><!--方式二:采用自定义类 配置AOP-->
<bean id="diy" class="zwz.demo2.diy.DiyPointCut"/>
<aop:config><!-- 自定义切面  ref要引用的类--><aop:aspect ref="diy"><!-- 切入点--><aop:pointcut id="point" expression="execution(* zwz.demo2.service.BookServiceImpl2.*(..))"/><!-- 通知--><aop:before method="before" pointcut-ref="point"/><aop:after method="after" pointcut-ref="point"/></aop:aspect>
</aop:config>
测试
@Testpublic void testAop2(){ApplicationContext context = new ClassPathXmlApplicationContext("applicationContext.xml");BookService2 bookService2 = (BookService2) context.getBean("bookService2");bookService2.add();}==============方法执行前==============
增加了一本书
==============方法执行后==============4.5 Java注解实现
和之前两个方法一样,先写Service服务层的接口和实现类
public interface BookService3 {void add();void delete();void update();void select();
}public class BookServiceImpl3 implements BookService3 {public void add() {System.out.println("增加了一本书");}public void delete() {System.out.println("删除了一本书");}public void update() {System.out.println("修改了一本书");}public void select() {System.out.println("查询了一本书");}
}
切面类
@Aspect //标注这个类是一个切面
public class PointCut {@Before("execution(* zwz.demo3.service.BookServiceImpl3.*(..))")public void before(){System.out.println("==============方法执行前==============");}@After("execution(* zwz.demo3.service.BookServiceImpl3.*(..))")public void after(){System.out.println("==============方法执行后==============");}
}配置文件
<!--方式三:采用注解 配置AOP-->
<bean id="bookService3" class="zwz.demo3.service.BookServiceImpl3"/>
<bean id="pointCut" class="zwz.demo3.cut.PointCut"/>
<!--开启注解支持 默认JDK实现(proxy-target-class="false")|| 也有cglib-->
<aop:aspectj-autoproxy/>测试类
@Test
public void testAop3(){ApplicationContext context = new ClassPathXmlApplicationContext("applicationContext.xml");BookService3 bookService3 = (BookService3) context.getBean("bookService3");bookService3.add();
}输出结果
==============方法执行前==============
增加了一本书
==============方法执行后==============五、总结
5.1 总结&附录
spring是一个粘合剂,可以整合其他优秀的框架,大大简化了软件开发的复杂度
我认为spring的核心内容:
-
IOC控制反转
-
AOP面向切面编程
其他内容比如整合mybatis、声明式事务,在后续再写。
5.2 模板文件
applicationContext.xml
<?xml version="1.0" encoding="UTF-8"?>
<beans xmlns="http://www.springframework.org/schema/beans"xmlns:xsi="http://www.w3.org/2001/XMLSchema-instance"xmlns:context="http://www.springframework.org/schema/context"xmlns:c="http://www.springframework.org/schema/c"xmlns:p="http://www.springframework.org/schema/p"xmlns:tx="http://www.springframework.org/schema/tx"xmlns:aop="http://www.springframework.org/schema/aop"xsi:schemaLocation="http://www.springframework.org/schema/beanshttp://www.springframework.org/schema/beans/spring-beans.xsdhttp://www.springframework.org/schema/txhttp://www.springframework.org/schema/tx/spring-tx.xsdhttp://www.springframework.org/schema/aophttp://www.springframework.org/schema/aop/spring-aop.xsdhttp://www.springframework.org/schema/contexthttp://www.springframework.org/schema/context/spring-context.xsd">
</beans>
mybatis-config.xml
<?xml version="1.0" encoding="UTF-8"?>
<!DOCTYPE configurationPUBLIC "-//mybatis.org//DTD Config 3.0//EN""http://mybatis.org/dtd/mybatis-3-config.dtd">
<configuration><typeAliases><package name="zwz.pojo"/></typeAliases><environments default="zwz"><environment id="zwz"><transactionManager type="JDBC"></transactionManager><dataSource type="POOLED"><property name="driver" value="com.mysql.jdbc.Driver"/><property name="url" value="jdbc:mysql://127.0.0.1:3306/test?useUnicode=true&characterEncoding=utf-8&useSSL=false"/><property name="username" value="root"/><property name="password" value="123456"/></dataSource></environment></environments><mappers><mapper class="zwz.mapper.UserMybatisMapper"></mapper></mappers>
</configuration>
5.3 spring配置标签
bean
bean用来注册实体类,可以注入相应的变量值
<bean id="user" class="zwz.pojo.User"><property name="name" value="ZWZ"/><property name="age" value="18"/>
</bean>
alias
设置别名,设置后原名和别名都可以使用
bean 中的 name 属性也可以做别名,而且功能更加强大
<bean id="user" class="zwz.pojo.User"><property name="name" value="ZWZ"/><property name="age" value="18"/>
</bean><alias name="user" alias="userZwz"/>
可以在测试类中这样调用别名bean
// ApplicationContext Spring上下文对象 | ClassPathXmlApplicationContext 从配置文件中去取
ApplicationContext context = new ClassPathXmlApplicationContext("applicationContext.xml");
// 从容器中取出user对象
User user = (User) context.getBean("userZwz");
import
在团队开发中,每个人都需要拥有自己的配置文件,可以通过import标签将多个配置文件整合成一个
如张三的配置文件 —— bean1.xml
<?xml version="1.0" encoding="UTF-8"?>
<beans xmlns="http://www.springframework.org/schema/beans"xmlns:xsi="http://www.w3.org/2001/XMLSchema-instance"xsi:schemaLocation="http://www.springframework.org/schema/beanshttp://www.springframework.org/schema/beans/spring-beans.xsd"><bean id="user" class="zwz.pojo.User"><!-- property相当于给某个变量设置一个值--><property name="name" value="ZWZ"/><property name="age" value="18"/></bean><alias name="user" alias="userZwz"/>
</beans>
团队整体的配置文件 —— applicationContext.xml,可以将所有人的配置文件合并成一个总的
<?xml version="1.0" encoding="UTF-8"?>
<beans xmlns="http://www.springframework.org/schema/beans"xmlns:xsi="http://www.w3.org/2001/XMLSchema-instance"xsi:schemaLocation="http://www.springframework.org/schema/beanshttp://www.springframework.org/schema/beans/spring-beans.xsd"><import resource="bean1.xml"/>
</beans>
context
自动装配bean
<context:annotation-config/>扫描指定包的组件
<!--指定要扫描的包 这个包下的注解就会生效-->
<context:component-scan base-package="zwz"/>