vue3从入门到精通(基础+进阶+案例)
Vue是什么?
渐进式JavaScript框架,易学易用,性能出色,适用场景丰富的Web前端框架
为什么要学习Vue
-
Vue是目前前端最火的框架之一
-
Vue是目前企业技术栈中要求的知识点
-
Vue可以提升开发体验
-
。。。
Vue简介

Vue(发音为/vju/,类似view)是一款用于构建用户界面的JavaScript框架,它基于标准 HTML,CSS和JavaScript构建,并提供了一套声明式的,组件化的编程模型,帮助你高效地开发用户界面,无论是简单还是复杂的界面,Vue都可以胜任。
渐进式框架
Vue是一个框架,也是一个生态。其功能覆盖了大部分前端开发常见的需求。但Web世界是十分多样化的,不同的开发者在Web上构建的东西可能在形式和规模上会有很大的不同。考虑到这一点,Vue的设计非常注重灵活性和"可以被逐步集成"这个特点。根据你的需求场景,你可以用不同的方式使用Vue:
-
无需构建步骤,渐进式增强静态的HTML
-
在任何页面中作为 Web Components嵌入
-
单页应用(SPA)
-
全栈/服务端渲染(SSR)
-
Jamstack/静态站点生成(SSG)
-
开发桌面端,移动端,WebGL,甚至是命令行终端的界面
Vue版本
目前,在开发中,Vue有两大版本可以选择Vue2和Vue3,老项目一般都是Vue2的,而新项目一般都选择Vue3开发,我们奔逃课程讲解版本为Vue3,因为Vue3涵盖了Vue2的知识体系,当然Vue3也增加了很多新特性。
Vue官方文档地址
中文:https://cn.vuejs.org/
英文:https://vuejs.org/
Vue API 风格

Vue的字节可以按两种不同的风格写:选项式API (Vue2) 和组合式API (Vue3)
大部分的核心概念在这两种风格之间都是通用的。熟悉了一种风格以后,你也能够很快递理解另一种风格
选项式 API (Options API)
使用选项式 API,我们可以用包含多个选项的对象来描述组件的逻辑,例如 data,method 和 mounted.选项所定义的属性都会暴露在函数内部的 this 上,它会指向当前的组件实例
下面案例实现:点击按钮实现累加功能
<script>
export default {data() {return {count: 0}},methods: {increment() {this.count++}},mounted() {console.log(`The initial count is ${this.count},`)}
}
</script><template><button @click="increment">Count is: {{ count }} </button>
</template>
组合式API(Composition API)
通过组合式API,我们可以使用导入的API函数来描述组件逻辑。
下面案例实现:点击按钮实现累加功能
<script setup>
import { ref, onMounted } from 'vue'
const count = ref(0)
function increment() {count.value++
}
onMounted(() => {console/log(`The initial count is ${count.value}.`)
})
</script>
<template><button @click="increment">Count is: {{ count }} </button>
</template>
该选哪一个?
两种API风格都能够覆盖大部分的应用场景。他们只是同一个底层系统所提供的两套不同的接口。实际上,选项是API是在组合式API的基础上实现的!关于Vue的基础概念和知识在他们之间都是通用的。
在生产项目中
-
当你不需要使用构建工具,或者打算注意在低复杂度的场景中使用Vue,例如渐进增强的应用场景,推荐采用选项式API
-
当你打算用Vue构建完整的单页应用,推荐采用组合式API+单文件组件
Vue开发前的准备

构建工具让我们能使用Vue单文件组件(SFC).Vue官方的构建流程是基于Vite的,一个现代,轻量,极速的构建工具
前提条件
熟悉命令行
已安装15.0或更高版本的Node.js
安装项目全局脚手架 命令:npm install -g @vue/cli
G:\longchi.xyz\vue>npm install -g @vue/cli
npm WARN deprecated inflight@1.0.6: This module is not supported, and leaks memory. Do not use it. Check out lru-cache if you want a good and tested way to coalesce async requests by a key value, which is much more comprehensive and powerful.
npm WARN deprecated @babel/plugin-proposal-nullish-coalescing-operator@7.18.6: This proposal has been merged to the ECMAScript standard and thus this plugin is no longer maintained. Please use @babel/plugin-transform-nullish-coalescing-operator instead.
npm WARN deprecated @babel/plugin-proposal-class-properties@7.18.6: This proposal has been merged to the ECMAScript standard and thus this plugin is no longer maintained. Please use @babel/plugin-transform-class-properties instead.
npm WARN deprecated source-map-url@0.4.1: See https://github.com/lydell/source-map-url#deprecated
npm WARN deprecated rimraf@2.6.3: Rimraf versions prior to v4 are no longer supported
npm WARN deprecated @babel/plugin-proposal-optional-chaining@7.21.0: This proposal has been merged to the ECMAScript standard and thus this plugin is no longer maintained. Please use @babel/plugin-transform-optional-chaining instead.
npm WARN deprecated urix@0.1.0: Please see https://github.com/lydell/urix#deprecated
npm WARN deprecated rimraf@3.0.2: Rimraf versions prior to v4 are no longer supported
npm WARN deprecated glob@7.2.3: Glob versions prior to v9 are no longer supported
npm WARN deprecated apollo-datasource@3.3.2: The `apollo-datasource` package is part of Apollo Server v2 and v3, which are now end-of-life (as of October 22nd 2023 and October 22nd 2024, respectively). See https://www.apollographql.com/docs/apollo-server/previous-versions/ for more details.
npm WARN deprecated apollo-server-errors@3.3.1: The `apollo-server-errors` package is part of Apollo Server v2 and v3, which are now end-of-life (as of October 22nd 2023 and October 22nd 2024, respectively). This package's functionality is now found in the `@apollo/server` package. See https://www.apollographql.com/docs/apollo-server/previous-versions/ for more details.
npm WARN deprecated source-map-resolve@0.5.3: See https://github.com/lydell/source-map-resolve#deprecated
npm WARN deprecated apollo-server-plugin-base@3.7.2: The `apollo-server-plugin-base` package is part of Apollo Server v2 and v3, which are now end-of-life (as of October 22nd 2023 and October 22nd 2024, respectively). This package's functionality is now found in the `@apollo/server` package. See https://www.apollographql.com/docs/apollo-server/previous-versions/ for more details.
npm WARN deprecated apollo-server-types@3.8.0: The `apollo-server-types` package is part of Apollo Server v2 and v3, which are now end-of-life (as of October 22nd 2023 and October 22nd 2024, respectively). This package's functionality is now found in the `@apollo/server` package. See https://www.apollographql.com/docs/apollo-server/previous-versions/ for more details.
npm WARN deprecated resolve-url@0.2.1: https://github.com/lydell/resolve-url#deprecated
npm WARN deprecated apollo-server-express@3.13.0: The `apollo-server-express` package is part of Apollo Server v2 and v3, which are now end-of-life (as of October 22nd 2023 and October 22nd 2024, respectively). This package's functionality is now found in the `@apollo/server` package. See https://www.apollographql.com/docs/apollo-server/previous-versions/ for more details.
npm WARN deprecated apollo-reporting-protobuf@3.4.0: The `apollo-reporting-protobuf` package is part of Apollo Server v2 and v3, which are now end-of-life (as of October 22nd 2023 and October 22nd 2024, respectively). This package's functionality is now found in the `@apollo/usage-reporting-protobuf` package. See https://www.apollographql.com/docs/apollo-server/previous-versions/ for more details.
npm WARN deprecated apollo-server-env@4.2.1: The `apollo-server-env` package is part of Apollo Server v2 and v3, which are now end-of-life (as of October 22nd 2023 and October 22nd 2024, respectively). This package's functionality is now found in the `@apollo/utils.fetcher` package. See https://www.apollographql.com/docs/apollo-server/previous-versions/ for more details.
npm WARN deprecated subscriptions-transport-ws@0.11.0: The `subscriptions-transport-ws` package is no longer maintained. We recommend you use `graphql-ws` instead. For help migrating Apollo software to `graphql-ws`, see https://www.apollographql.com/docs/apollo-server/data/subscriptions/#switching-from-subscriptions-transport-ws    For general help using `graphql-ws`, see https://github.com/enisdenjo/graphql-ws/blob/master/README.md
npm WARN deprecated apollo-server-core@3.13.0: The `apollo-server-core` package is part of Apollo Server v2 and v3, which are now end-of-life (as of October 22nd 2023 and October 22nd 2024, respectively). This package's functionality is now found in the `@apollo/server` package. See https://www.apollographql.com/docs/apollo-server/previous-versions/ for more details.
npm WARN deprecated vue@2.7.16: Vue 2 has reached EOL and is no longer actively maintained. See https://v2.vuejs.org/eol/ for more details.changed 830 packages in 3m76 packages are looking for fundingrun `npm fund` for details
创建Vue项目 有两种方式创建Vue项目
方式二:npm create vue@latest
npm create vue-demo
$ cd vue-demo
$ npm run serve
App running at:- Local:   http://localhost:8080/- Network: http://192.168.31.96:8080/Note that the development build is not optimized.To create a production build, run npm run build.方式一:npm init vue@latest项目初始化完成,可执行以下命令:cd vue-basenpm installnpm run formatnpm run dev| 可选:使用以下命令在项目目录中初始化 Git:git init && git add -A && git commit -m "initial commit"D:\longchi.xyz\vue\vue-base>npm run dev> vue-base@0.0.0 dev
> viteVITE v6.3.4  ready in 889 ms➜  Local:   http://localhost:5173/➜  Network: use --host to expose➜  Vue DevTools: Open http://localhost:5173/__devtools__/ as a separate window➜  Vue DevTools: Press Alt(⌥)+Shift(⇧)+D in App to toggle the Vue DevTools➜  press h + enter to show help
'npm init vue@latest'这一指令将会按照并执行 create-vue,它是Vue官方的项目脚手架工具。你将会看到一些诸如TypeScript和测试支持之类的可选功能提示 如图所示:
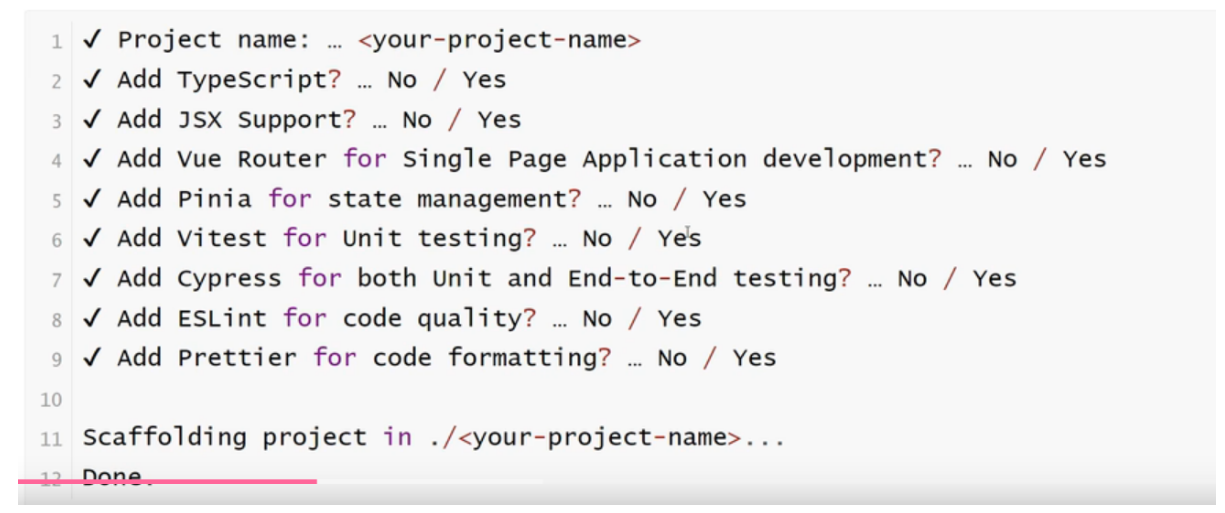
实践 1 使用 方式一:npm init vue@latest
如果不确定是否要开启某个功能,你可以直接按下回车键选择NO,在项目被创建后,通过一些步骤安装依赖并启动开发服务器
cd <your-project-name>
npm install
npm run dev
实践 1
G:\longchi.xyz\vue>npm init vue@latest
T  Vue.js - The Progressive JavaScript Framework
|
o  请输入项目名称:
|  vue-base
|
o  请选择要包含的功能: (↑/↓ 切换,空格选择,a 全选,回车确认)
|  TypeScript, Router(单页面应用开发), Pinia(状态管理), Vitest(单元测试), 端到端测试, ESLint(错误预防),
Prettier(代码格式化)
|
o  选择一个端到端测试框架: (↑/↓ 切换,回车确认)
|  Nightwatch
|
o  是否引入 Oxlint 以加快检测?(试验阶段)
|  No正在初始化项目 D:\longchi.xyz\vue\vue-base...
|
—  项目初始化完成,可执行以下命令:cd vue-basenpm installnpm run formatnpm run dev| 可选:使用以下命令在项目目录中初始化 Git:git init && git add -A && git commit -m "initial commit"G:\longchi.xyz\vue>cd vue-baseG:\longchi.xyz\vue\vue-base>npm install
npm WARN EBADENGINE Unsupported engine {
npm WARN EBADENGINE   package: '@wdio/logger@9.4.4',
npm WARN EBADENGINE   required: { node: '>=18.20.0' },
npm WARN EBADENGINE   current: { node: 'v18.19.0', npm: '10.2.3' }
npm WARN EBADENGINE }
npm WARN deprecated inflight@1.0.6: This module is not supported, and leaks memory. Do not use it. Check out lru-cache if you want a good and tested way to coalesce async requests by a key value, which is much more comprehensive and powerful.
npm WARN deprecated lodash.get@4.4.2: This package is deprecated. Use the optional chaining (?.) operator instead.
npm WARN deprecated glob@7.2.3: Glob versions prior to v9 are no longer supported
npm WARN deprecated glob@7.2.3: Glob versions prior to v9 are no longer supported
npm WARN deprecated glob@8.1.0: Glob versions prior to v9 are no longer supported
npm WARN deprecated glob@7.2.3: Glob versions prior to v9 are no longer supported
npm WARN deprecated node-domexception@1.0.0: Use your platform's native DOMException insteadadded 796 packages, and audited 797 packages in 5m197 packages are looking for fundingrun `npm fund` for details9 moderate severity vulnerabilitiesTo address issues that do not require attention, run:npm audit fixTo address all issues possible (including breaking changes), run:npm audit fix --forceSome issues need review, and may require choosing
a different dependency.Run `npm audit` for details.src/App.vue 142ms (unchanged)pm run format
src/assets/base.css 13ms (unchanged)
src/assets/main.css 7ms (unchanged)
src/components/__tests__/HelloWorld.spec.ts 17ms (unchanged)
src/components/HelloWorld.vue 48ms (unchanged)
src/components/icons/IconCommunity.vue 6ms (unchanged)
src/components/icons/IconDocumentation.vue 4ms (unchanged)
src/components/icons/IconEcosystem.vue 6ms (unchanged)
src/components/icons/IconSupport.vue 2ms (unchanged)
src/components/icons/IconTooling.vue 3ms (unchanged)
src/components/TheWelcome.vue 20ms
src/components/WelcomeItem.vue 12ms (unchanged)
src/main.ts 6ms (unchanged)
src/router/index.ts 13ms (unchanged)
src/stores/counter.ts 13ms (unchanged)
src/views/AboutView.vue 3ms (unchanged)
src/views/HomeView.vue 3ms (unchanged)初始化git  可选:使用以下命令在项目目录中初始化 Git:
G:\longchi.xyz\vue\vue-base>git init && git add -A && git commit -m "initial commit"
'git' 不是内部或外部命令,也不是可运行的程序
或批处理文件。G:\longchi.xyz\vue\vue-base>npm run dev> vue-base@0.0.0 dev
> viteVITE v6.3.4  ready in 889 ms➜  Local:   http://localhost:5173/➜  Network: use --host to expose➜  Vue DevTools: Open http://localhost:5173/__devtools__/ as a separate window➜  Vue DevTools: Press Alt(⌥)+Shift(⇧)+D in App to toggle the Vue DevTools➜  press h + enter to show help
看到如下图表示项目已经启动成功

实践2:npm create vue@latest
使用 方式二:vue create vue-demo
G:\longchi.xyz\vue>vue create vue-demo
?  Your connection to the default npm registry seems to be slow.Use https://registry.npmmirror.com for faster installation? YesVue CLI v5.0.8
? Please pick a preset: Manually select features
? Check the features needed for your project: Babel, Linter
? Choose a version of Vue.js that you want to start the project with 3.x
? Pick a linter / formatter config: Basic
? Pick additional lint features: Lint on save
? Where do you prefer placing config for Babel, ESLint, etc.? In dedicated config files
? Save this as a preset for future projects? Yes
? Save preset as: vue-demo🎉  Preset vue-demo saved in C:\Users\Administrator\.vuercVue CLI v5.0.8
✨  Creating project in D:\longchi.xyz\vue\vue-demo.
⚙️  Installing CLI plugins. This might take a while...added 830 packages in 44s105 packages are looking for fundingrun `npm fund` for details
🚀  Invoking generators...
📦  Installing additional dependencies...added 88 packages in 8s117 packages are looking for fundingrun `npm fund` for details
⚓  Running completion hooks...📄  Generating README.md...🎉  Successfully created project vue-demo.
👉  Get started with the following commands:$ cd vue-demo$ npm run serveG:\longchi.xyz\vue>cd vue-demoG:\longchi.xyz\vue\vue-demo>npm run serve> vue-demo@0.1.0 serve
> vue-cli-service serveINFO  Starting development server...DONE  Compiled successfully in 6267ms                                                                          10:23:43App running at:- Local:   http://localhost:8080/- Network: http://192.168.31.96:8080/Note that the development build is not optimized.To create a production build, run npm run build.
看到如图所示,表示项目创建成功

开发环境
Vetur 插件
功能:Vetur是VSCode中最受欢迎的Vue插件之一,它提供了语法高亮、智能感知、Emmet、linting/错误检查、格式化、自动补全、调试等功能。其linting功能可以帮助检查代码中的错误和不良实践,而自动补全功能则可以大大提高编写Vue代码的速度。
安装与配置:通过VS Code的扩展商店搜索并安装Vetur插件。对于需要额外配置的插件,如ESLint或Prettier,你可能需要创建或修改项目中的配置文件,或者调整VS Code的工作区或全局设置。
虽然能正常运行,但页面却报红了,这个情况怎么处理呢?
组件报错提示信息
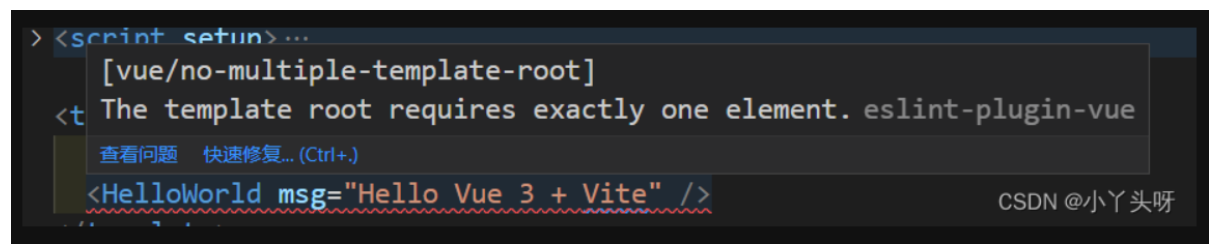
原因: 首先我们解决要明白原由,在vue2的组件中,每一个组件<template>下只有能一个根节点,所以插入第二个元素就会报错。
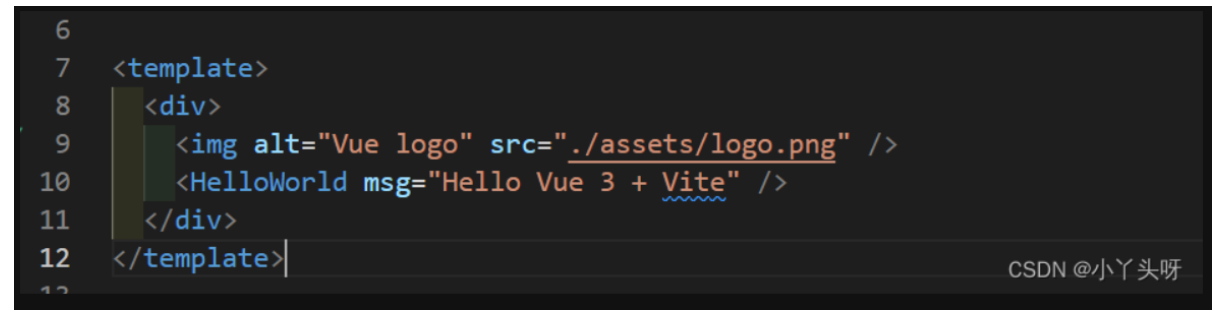
所以Vue2 经常处理的方法是使用一个div 包裹着,多个元素分别存在div中,这个避免了报错的问题。如下
但Vue3 已经支持每一个组件<template> 中可以有多个根节点。那为什么还报错呢?
1.是我们安装的vetur扩展插件导致的,因为它有验证规则,提示开发者注意规范。但这个规范只适用vue2,所以插件是固定,还没有兼容vue3写法,但框架可能随时在更新。 2. 修改扩展插件验证规则,添加vue3支持。
1.修改vs code vetur扩展配置,打开搜索,输入vetur ,然后把下面的选项的去掉。
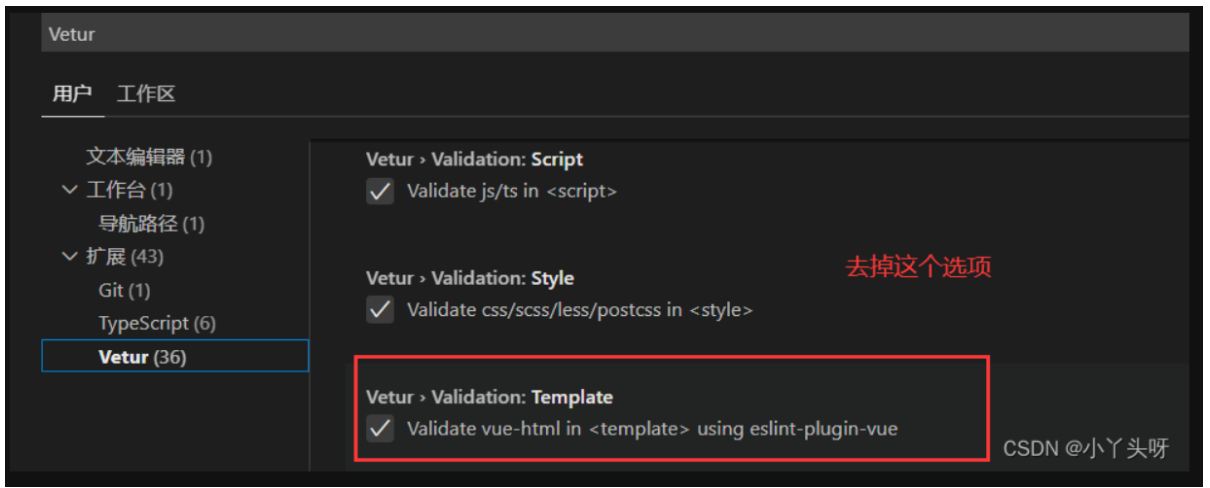
修改完成,重启一下vs code,就好了
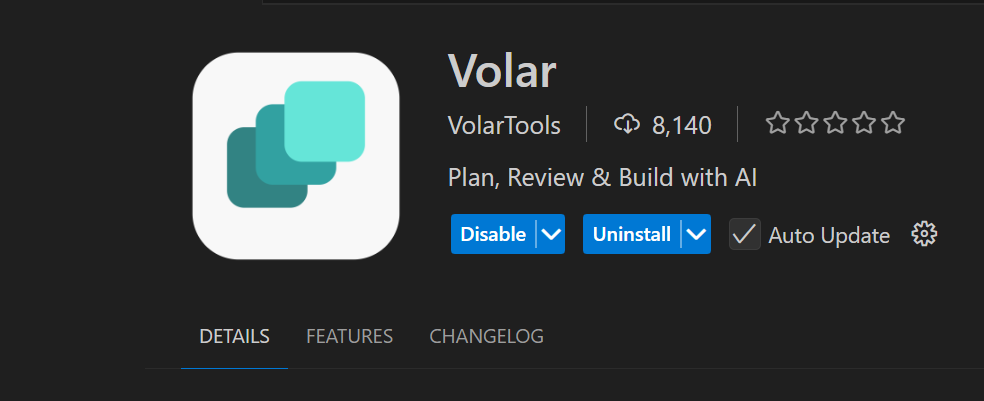
推荐的IDE配置是 Visual Stuudio Code + Volar 或者使用 vetur插件 扩展 实时效果反馈
vue3 推荐使用建议用Volar来替换vetur!!!
直接解决页面报红问题了
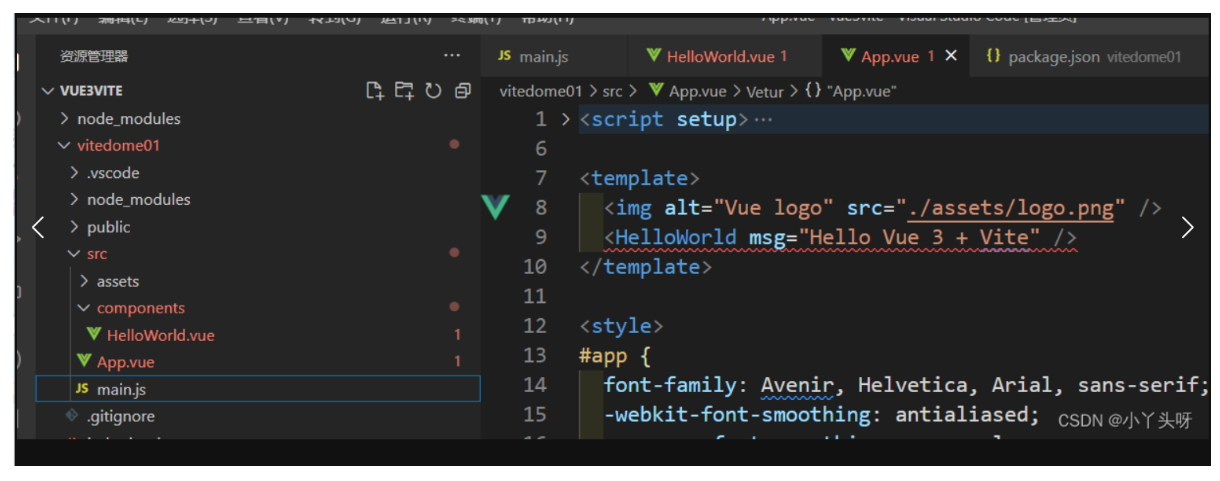
Vue项目目录结构

我们通过Vue命令行工具 npm init vue@latest 创建项目,会出现很多文件及文件夹
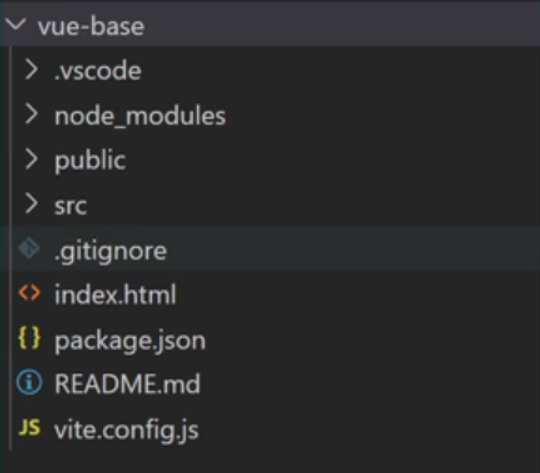
目录结构
*.vscode	--VSCode工具配置文件
node_modules	--Vue项目的运行依赖文件夹
public		-- 资源文件夹(浏览器图标)
src			-- 源码文件夹
.gitignore  -- git忽略文件
index.html	-- 入口的HTML文件
package.json  --信息描述文件
README.md	--注释文件
Vite.config.js	-- Vue配置文件
模板语法:

Vue使用一种基于HTML的模板语法。使我们能够声明式地将其组件实例的数据绑定都呈现的DOM上。所有的Vue模板都是语法层面合法的HTML,可以被符合规范的浏览器和HTML解析器解析。
文本插值
最基本的数据绑定形式是文本插值,他使用的是 "Mustache" 语法(即双大括号):
<template><p> {{ msg }} </p>
</template><script>
export default {data() {return{msg: "神奇的魔法"}}
}
</script>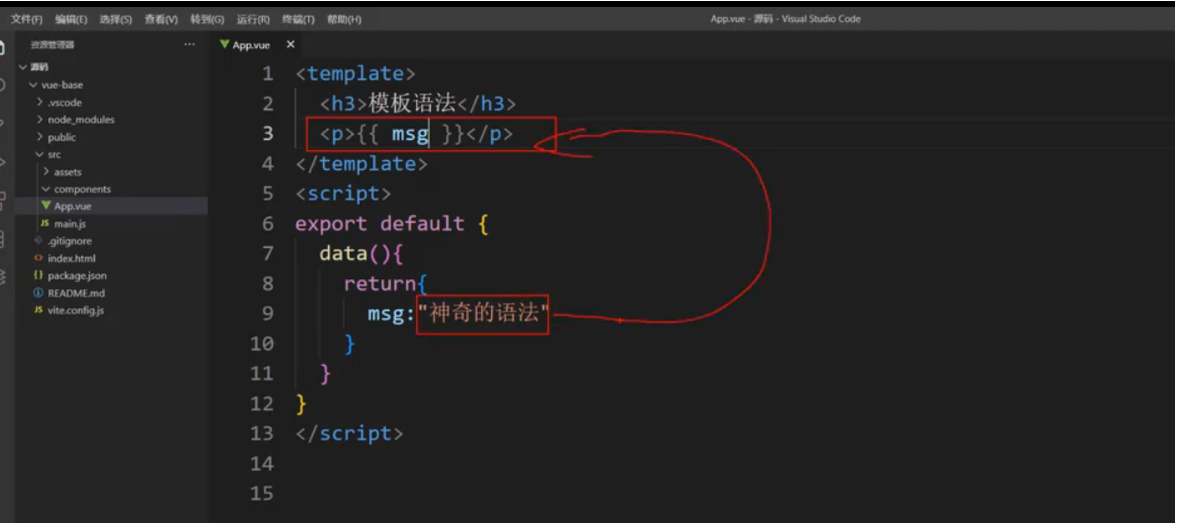
总结:如上图所示
template标签里面的内容是:呈现的HTML内容 {{}}可以取script标签里面对象键值对 -> 值的内容,以后可以在script标签里面通过动态去赋值(Key-Value)
使用 JavaScript 表达式
JavaScript是基于对象和事件驱动的客户端脚本语言
每个绑定仅支持单一表达式,也就是一段能够被求值的 JavaScript代码。一个简单的判断方法是 是否可以合法的写在 return 后面
解释:一段能被求值的 JavaScript 代码允许放在 template 里面的,他的值可以合法地放在return里面
<template><p>{{ number + 1 }}</p><p>{{ ok ? 'YES' : 'NO' }}</p><P>{{ message.split(''.reverse().join('')) }}</P>
</template><script>
export default {data() {return{number: 10,ok: true,message: "大家好"}}
}
</script>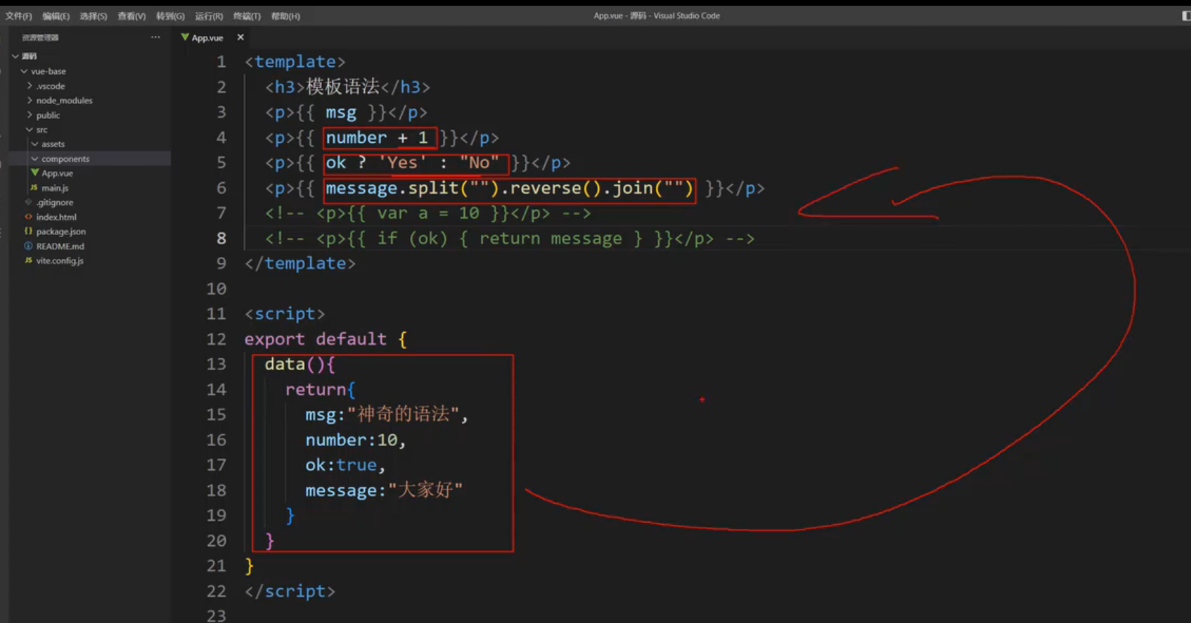
App.vue
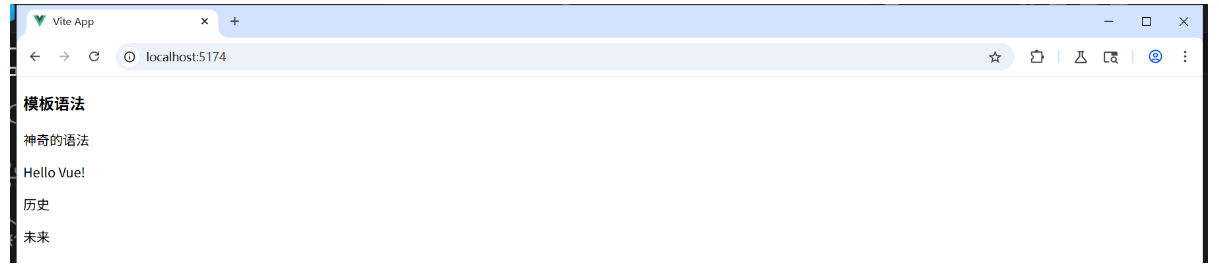
<template><h3>模板语法</h3> <p> {{ msg }} </p><p> {{ hello }} </p><p> {{ history }} </p><p> {{ future }} </p><p> {{ number + 100 }} </p><p> {{ ok ? 'YES' : 'NO' }} </p><p> {{ message.split('').reverse().join('') }} </p><!-- <p>{{ var a = 1 }}</p> --><!-- <p>{{ if (ok) { return message } }}</p> -->
</template><script>
export default {data() {return {msg: '神奇的语法',hello: 'Hello Vue!',history: '历史',future: '未来',number: 10,ok: true,message: '大家好'}}
}
</script>
总结:
我们建议大家以后尽量不要在模板语法中做任何逻辑操作,再js中去做逻辑操作,然后将结果放在模板里面显示。就可以有效地避免报错问题
模板语法里可以是求值的,也可以是三元运算等 YES,NO,还可以是有返回值结果的,没有返回值结果,或者是非单一表达式就不可以
总结:
文本的绑定通过 {{}} 去绑定
原始 HTML
双大括号将会 将数据插值为纯文本,而不是 HTML,若想插入 HTML,你需要使用 v-html 指令
<template><p>纯文本: {{ rawHtml }}</p><p>属性: <span v-html="rawHtml"></span></p>
</template><script>
export default {data() {return{rawHtml:"<a href='https://itbaizhan.com'>百战程序员</a>"}}
}
</script>
App.vue
<!-- <template><p>纯文本: {{ rawHtml }}</p><p>属性: <span v-html="rawHtml"></span></p>
</template><script>
export default {data() {return{rawHtml:"<a href='https://itbaizhan.com'>百战程序员</a>"}}
}
</script> --><template><h3>模板语法</h3> <p> {{ msg }} </p><p> {{ hello }} </p><p> {{ history }} </p><p> {{ future }} </p><p> {{ number + 100 }} </p><p> {{ ok ? 'YES' : 'NO' }} </p><p> {{ message.split('').reverse().join('') }} </p><!-- <p>{{ var a = 1 }}</p> <p>{{ if (ok) { return message } }}</p> --><p>{{ rawHtml }}</p><p v-html="rawHtml"></p>
</template><script>
export default {data() {return {msg: '神奇的语法',hello: 'Hello Vue!',history: '历史',future: '未来',number: 10,ok: true,message: '大家好',rawHtml: "<a href='https://itbaizhan.com'>百战程序员</a>"}}
}
</script>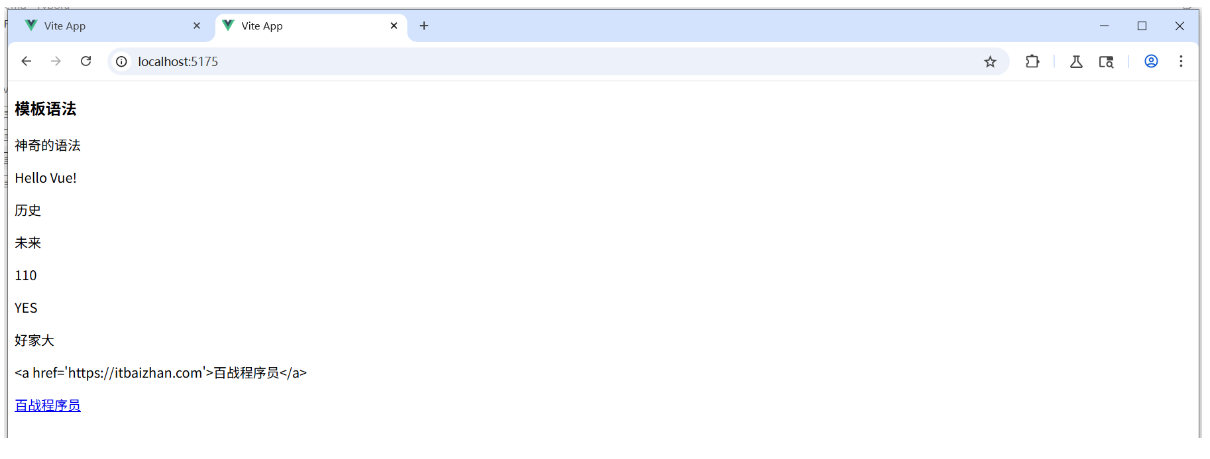
指令集合
1, 纯文本的绑定通过 {{}} 去绑定 双大括号将会 将数据插值为纯文本,原生文本绑定通过  v-html  而不是 HTML,若想插入 HTML,你需要使用 v-html 指令
2, 属性绑定	v-bind
3,v-cloak
4,v-else
5, v-else-if
6, v-for
7, v-if
8, v-model
9, v-on
10, v-once
11, v-pre
12, v-show
13, v-text
属性绑定

双大括号不能在 HTML attributes 中使用。想要响应式地绑定一个 attribute,应该使用 v-bind 指令
<template><div v-bind: id="dynamicId" v-bind:class="dynamicClass">AppID</div>
</template>
<script>
export default {data() {return{dynamicId:"appid",dynamicClass:"appclass"}}
}
</script>
HelloWorld.vue
<template><div v-bind:id="dynamicId" v-bind:class="dynamicClass">测试</div>
</template><script>
export default {data() {return {dynamicClass: 'appclass',dynamicId: 'appid'   }}
}
</script><style>
.appclass {color: red;font-size: 30px;
}
</style>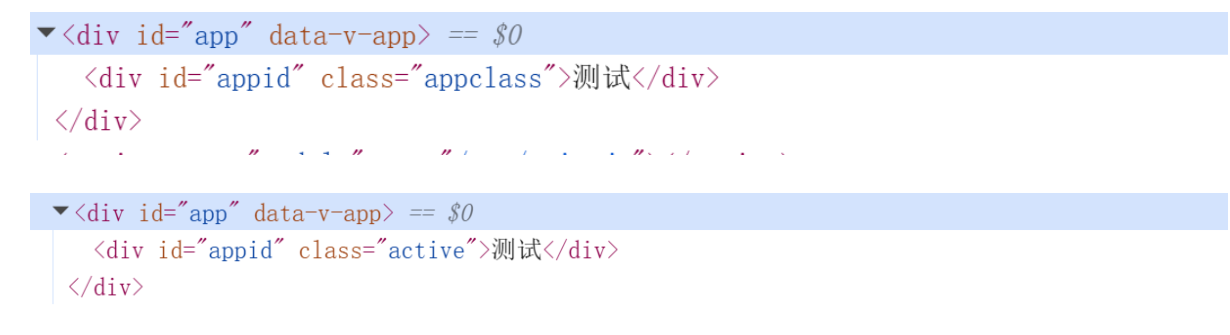
总结:
属性的绑定是通过 v-bind + ':' + '具体的属性名'

v-bind 指令指示 Vue 将元素的 id attribute与组件的 dynamicId 属性保持一致,如果绑定是 null 或者 undefined,那么该 attribute将会从渲染的元素上移除
简写
因为 v-bind 非常常用,我们提供了特定的简写语法
<div :id="dynamicId" :class="dynamicClass"></div><div v-bind:id="dynamicId" v-bind:class="dynamicClass">测试</div> <template><div v-bind:id="dynamicId" v-bind:class="dynamicClass" v-bind:title="dynamicTitle">测试</div>
</template><script>
export default {data() {return {dynamicClass: 'appclass',dynamicId: 'appid' ,dynamicTitle: '我是标题',}}
}
</script><style>
.appclass {color: red;font-size: 30px;
}
</style>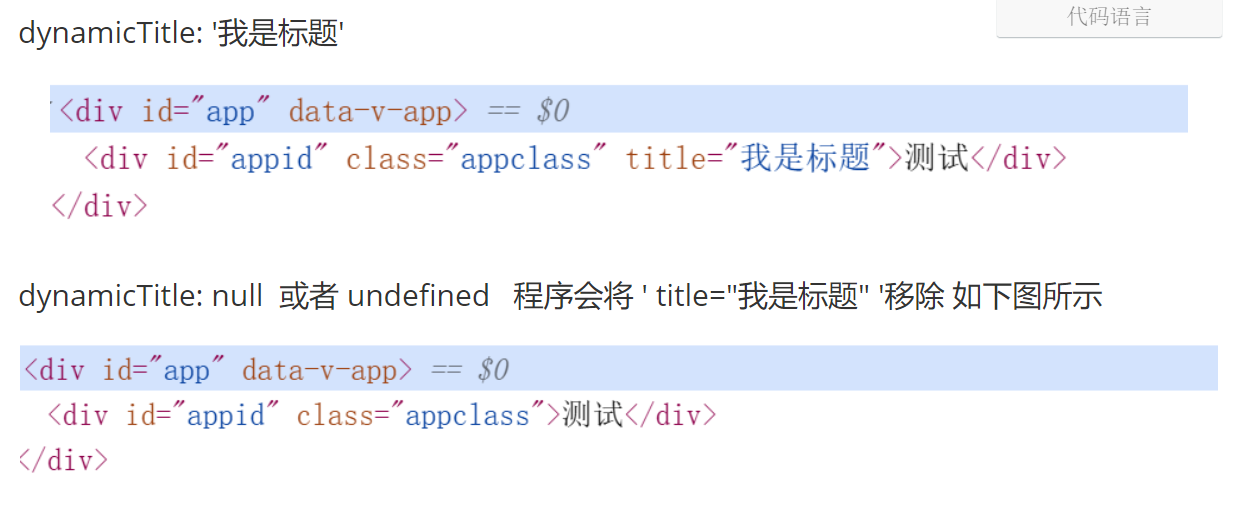
布尔型 Attribute
布尔型 attribute 依据 true/false 值来决定 attribute 是否应该存在于该元素上, disabled 就是最常见的例子之一
<template><button :disabled="isButtonDisabled">Button</button>
</template>
<script>
export default {data() {return{isButtonDisabled:true  // 按钮不可点}}
}
</script>
按钮不可点
<template><button :disabled="isButtonDisabled">Button</button>
</template>
<script>
export default {data() {return{isButtonDisabled:false  // 按钮可点}}
}
</script>
按钮可点
动态绑定多个值
如果你有像这样的一个包含多个 attribute 的 JavaScript 对象
<template><div v-bind="objectofAttrs">百战程序员</div>
</template><script>
export default {data() {return{objectofAttrs: {id: 'container',class: 'wrapper'}}}
}
</script>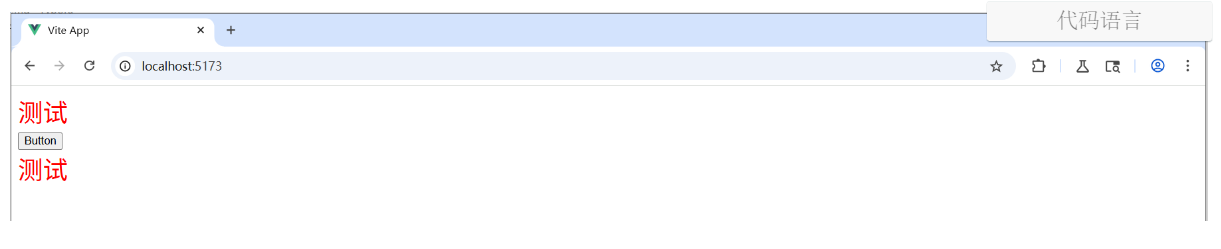
条件渲染

在 Vue 中,提供; 条件渲染,这类似于 JavaScript 中的条件语句
-
v-if
-
v-else
-
v-else-if
-
show
v-if 根据值显示不同的内容
v-if 指令用于条件性地渲染一块内容。这块内容只会在指令的表达式返回真值时才被渲染
flag: true 页面显示'你能看见我么'
<template><h3>条件渲染</h3><div v-if="flag">你能看见我么</div>
</template><script>
export default {data() {return {flag: true}}
}
</script>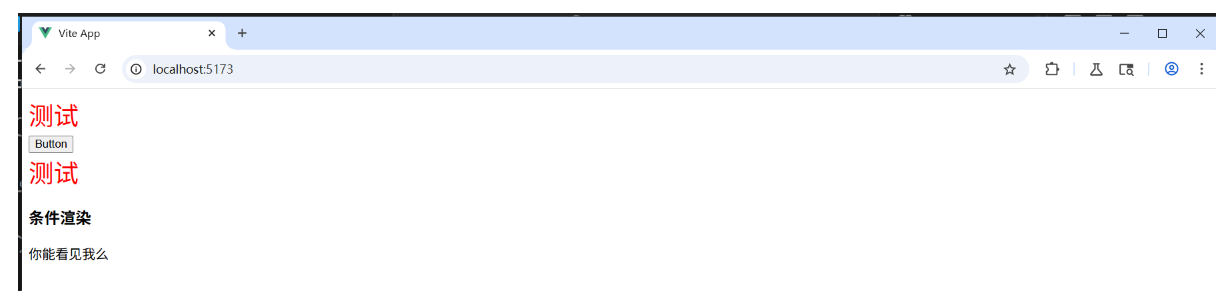
flag: false 页面不显示'你能看见我么'
<template><h3>条件渲染</h3><div v-if="flag">你能看见我么</div>
</template><script>
export default {data() {return {flag: false}}
}
</script>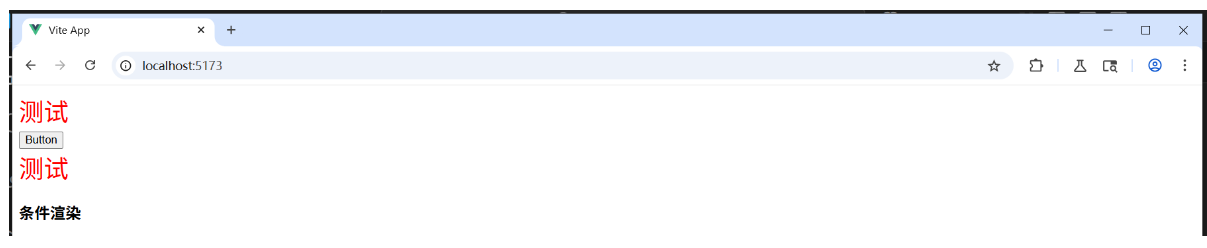
v-else 根据值显示不同的内容块
你也可以使用 v-else为v-if添加一个 "else区块"
如果条件为flase,则显示 '那你还是看看我吧' 下面如图所示
<template><h3>条件渲染</h3><div v-if="flag">你能看见我么</div><div v-else>那你还是看看我吧</div>
</template><script>
export default {data() {return {flag: false}}
}
</script>
如果条件为true,则显示 '你能看见我么' 下面如图所示
如果条件为true,则显示 '你能看见我么' 下面如图所示<template><h3>条件渲染</h3><div v-if="flag">你能看见我么</div><div v-else>那你还是看看我吧</div>
</template><script>
export default {data() {return {flag: true}}
}
</script>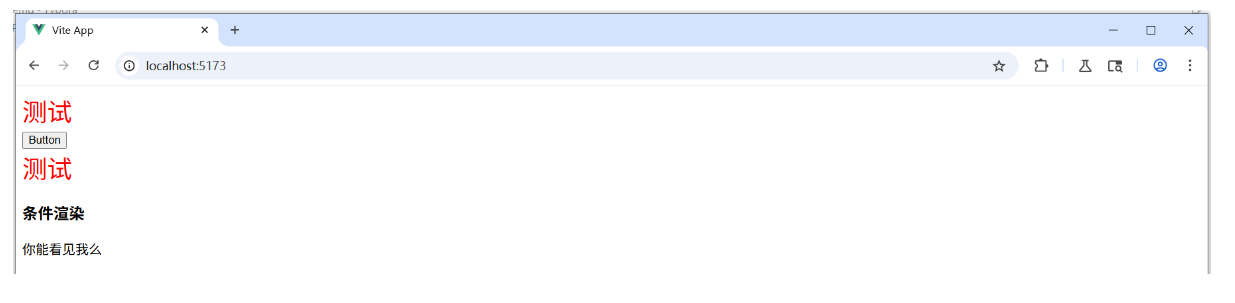
v-else-if
顾名思义,v-else-if提供的是相应于 v-if 的 "else if 区块"。他可以连续多次重复使用
<template><div v-if="type === 'A'">A</div><div v-else-if="type === 'B'">B</div><div v-else-if="type === 'C'">C</div><div v-else>Not A/B/C</div>
</template><script>
export default {data() {return{type: "D"}}
}
</script>
<template><h3>条件渲染</h3><div v-if="flag">你能看见我么</div><div v-else>那你还是看看我吧</div><div v-if="type === 'A'">A</div><div v-else-if="type === 'B'">B</div><div v-else-if="type === 'C'">C</div><div v-else>Not A/B/C</div>
</template><script>
export default {data() {return {flag: true,type: "D"}}
}
</script><template><h3>条件渲染</h3><div v-if="flag">你能看见我么</div><div v-else>那你还是看看我吧</div><div v-if="type === 'A'">A</div><div v-else-if="type === 'B'">B</div><div v-else-if="type === 'C'">C</div><div v-else>Not A/B/C</div>
</template><script>
export default {data() {return {flag: true,type: "B"}}
}
</script>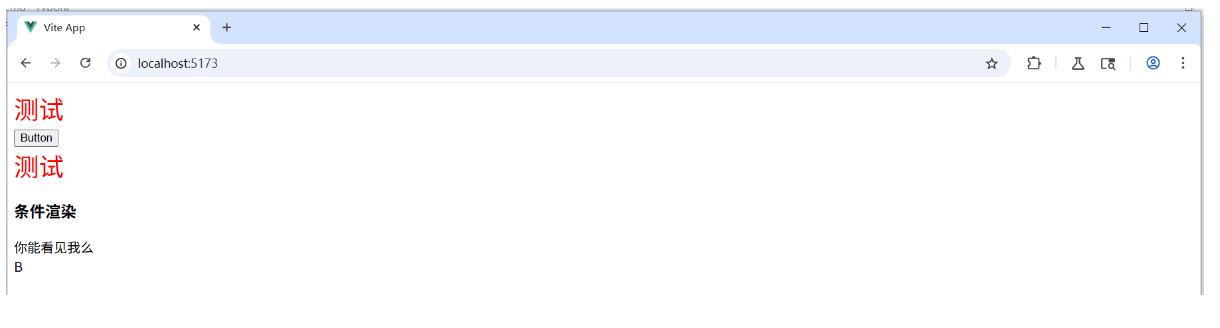
<template><div v-show="flag">你能看见我么</div>
<template>
<script>
export default {data() {return{flag: true}}
}
</script>
flag: true 显示'我好想你们啊'
<template><h3>条件渲染</h3><div v-if="flag">你能看见我么</div><div v-else>那你还是看看我吧</div><div v-if="type === 'A'">A</div><div v-else-if="type === 'B'">B</div><div v-else-if="type === 'C'">C</div><div v-else>Not A/B/C</div><div v-show="flag">我好想你们啊</div>
</template><script>
export default {data() {return {flag: true,type: "B"}}
}
</script>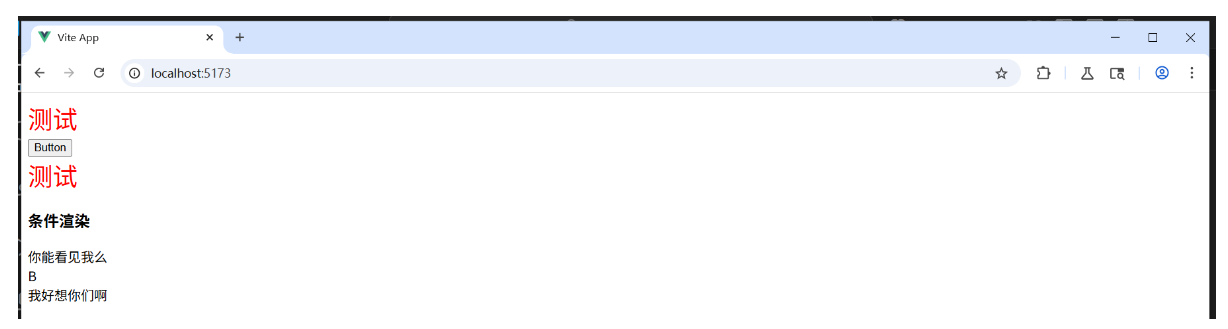
flag: false 不显示'我好想你们啊'
<template><h3>条件渲染</h3><div v-if="flag">你能看见我么</div><div v-else>那你还是看看我吧</div><div v-if="type === 'A'">A</div><div v-else-if="type === 'B'">B</div><div v-else-if="type === 'C'">C</div><div v-else>Not A/B/C</div><div v-show="flag">我好想你们啊</div>
</template><script>
export default {data() {return {flag: false,type: "B"}}
}
</script>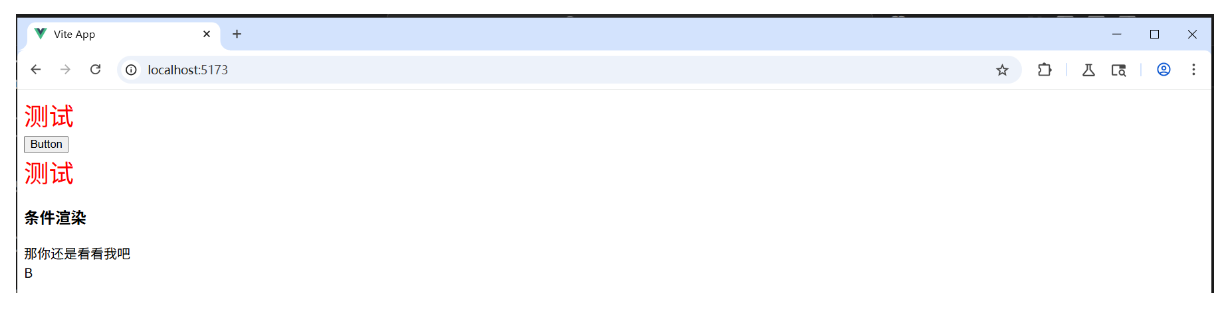
v-if VS v-show
v-if 是"真实的" 按条件渲染,因为它确保了在切换时,条件区块内的事件监听器和子组件都会被销毁于重建。
v-if 也是惰性的: 如果在初次渲染时条件为 false,则不会做任何事。条件区块只有当条件首次为true时才被渲染。
相比之下,v-show简单许多,元素无论除始条件如何,始终会被渲染,只有 CSS display属性会被切换。
总的来说,v-if 有更高的切换开销,而 v-show 有更高的初始渲染开销。因此需要频繁切换的,则使用v-show较好;如果在运行时绑定条件很少改变,则 v-if 会更合适。
列表渲染

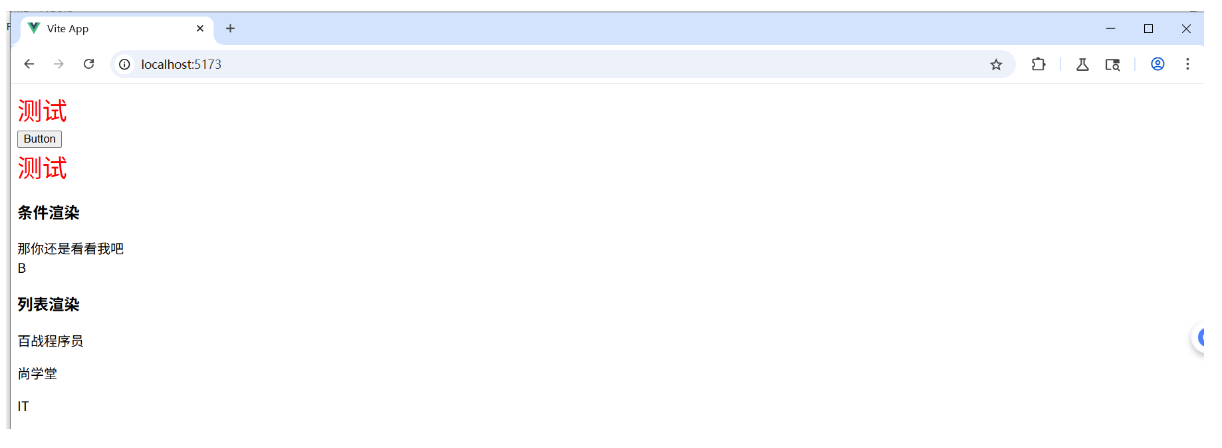
我们可以使用 v-for 指令基于一个数组来渲染一个列表。v-for 指令的值需要使用 item in items 形式的特殊语法,其中 items 是源数据的数组,而 items 是迭代项的别名
<template><div><p v-for="item in items">{{ item }}</p></div>
</template>
<script>
export default {data() {return {names:["百战程序员","尚学堂","IT"]}}
}
</script>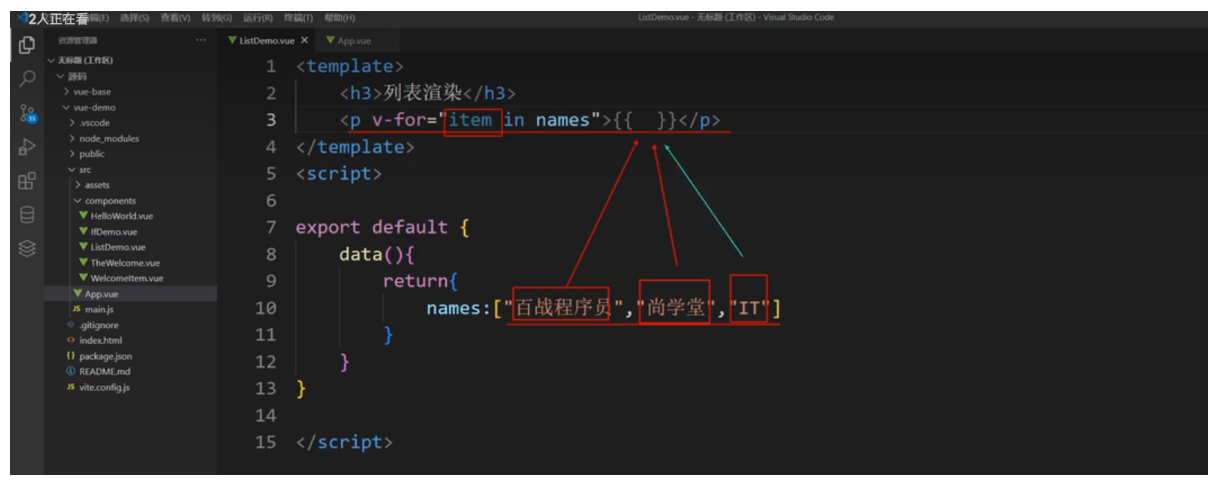
复杂数据
大多数情况,我们渲染的数据源来源于网络请求,也就是 JSON 格式
<template><div v-for="item in result"><p>{{ item.title }}</p><img :src="item.avator" alt=""></div>
</template><script>
export default {data() {return {result: [{"id": 2261677,"title": "鄂尔多斯|感受一座城市的璀璨夜景,感受一座城市,除了白日里的车水马龙,喧嚣繁华之","avator": "https://pic.qyer.com/avator/002/25/77/30/200?v=1560226451",				},{"id": 2261566,"title": "成都这家洞穴暗黑风咖啡厅酷毙了!!早C晚A走起,成都天气这么热。咖啡人必","avator": "https://pic.qyer.com/avator/011/07/08/69/200?v=1572185180",},{"id": 2261662,"title": "【川西新龙-措卡湖】措卡湖,意为“乱石丛中的黑色海水”,神秘小众,原汁原味,深","avator": "https://pic.qyer.com/avator/009/88/48/58/200?v=1507386782",},]}}
}
</script>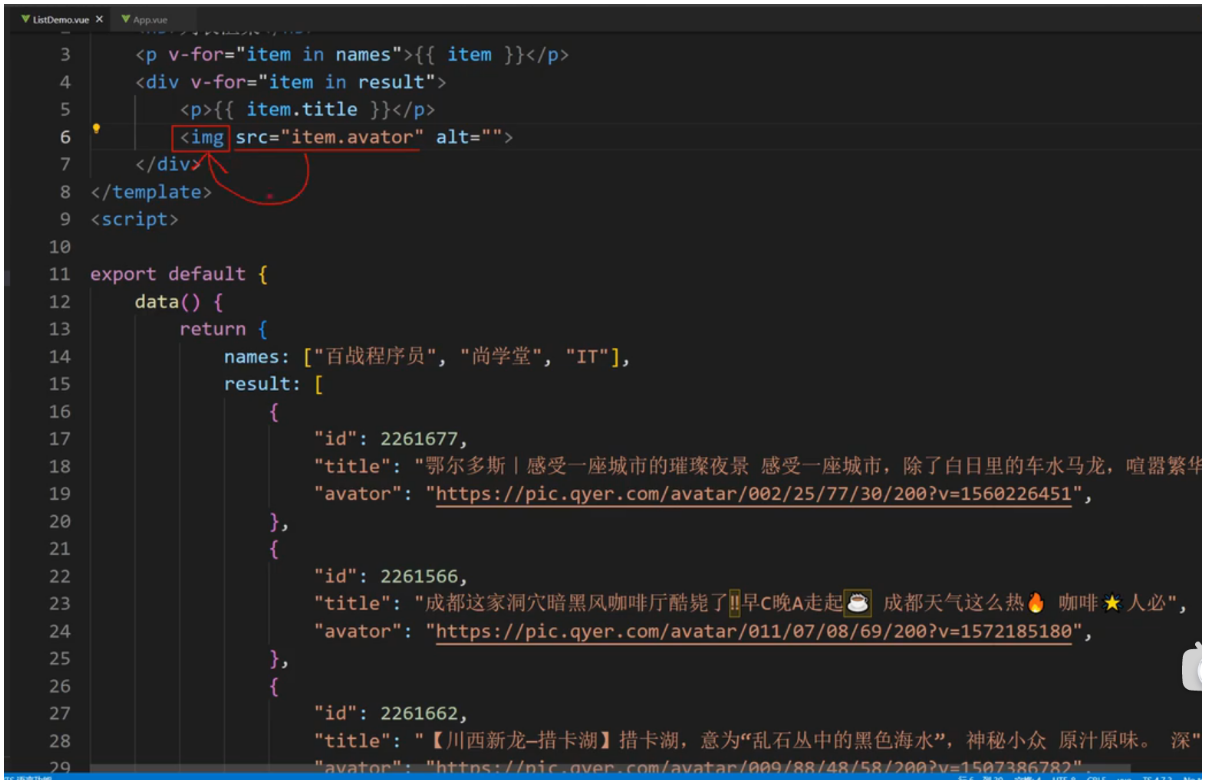
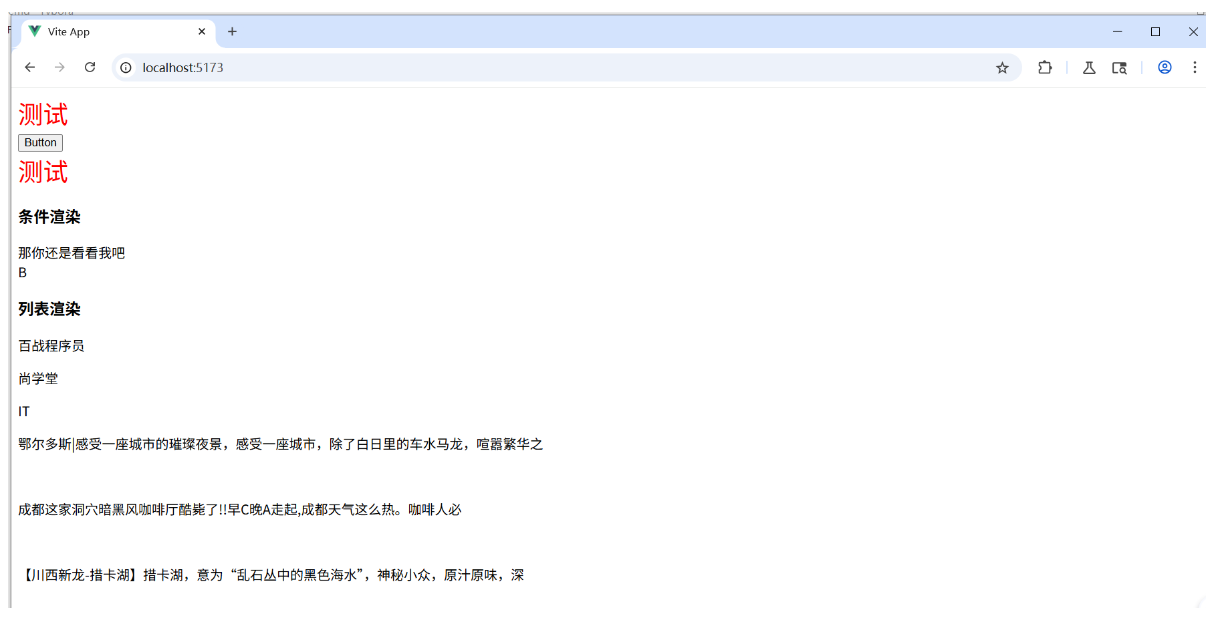
<template><h3>列表渲染</h3><p v-for="item in names">{{ item }}</p><div v-for="item in result"><p>{{ item.title }}</p><img :src="item.avator" alt=""></div>
</template>
<script>
export default {data() {return {names: ["百战程序员","尚学堂","IT"],result: [{"id": 2261677,"title": "鄂尔多斯|感受一座城市的璀璨夜景,感受一座城市,除了白日里的车水马龙,喧嚣繁华之","avator": "https://pic.qyer.com/avator/002/25/77/30/200?v=1560226451",              },{"id": 2261566,"title": "成都这家洞穴暗黑风咖啡厅酷毙了!!早C晚A走起,成都天气这么热。咖啡人必","avator": "https://pic.qyer.com/avator/011/07/08/69/200?v=1572185180",},{"id": 2261662,"title": "【川西新龙-措卡湖】措卡湖,意为“乱石丛中的黑色海水”,神秘小众,原汁原味,深","avator": "https://pic.qyer.com/avator/009/88/48/58/200?v=1507386782",},]}}
}
</script><style>
img{width: 100px;height: 100px;
}
</style>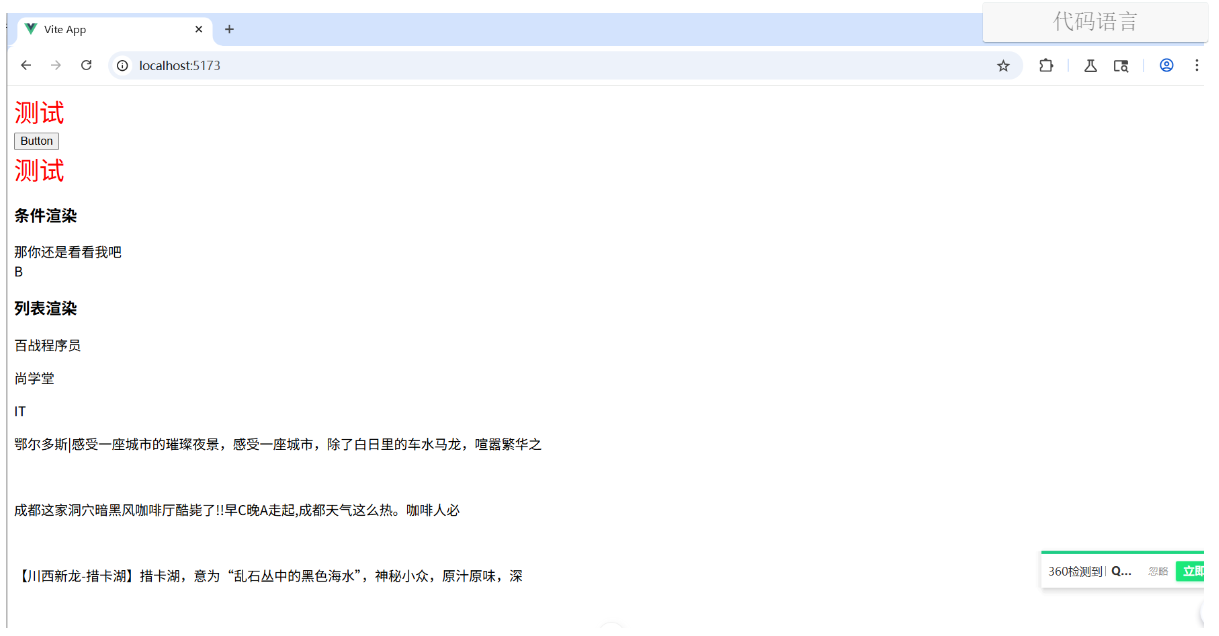
v-for 也支持使用可选的第二个参数表示当前项的位置索引
<template><div><p v-for="(item,index) in names">{{ index }};{{ item }}</p></div>
</template><script>
export default {data() {return {names: ["百战程序员","尚学堂","IT"]}}
}
</script>
你也可以使用 of 作为分隔符来替代in,这更接近 JavaScript的迭代器语法
<div v-for="item of items"></div>实例代码和实例产生的页面如图所示
<template><h3>列表渲染</h3><p v-for="(item,index) of names">{{ item }}-{{ index }}</p><div v-for="item of result"><p>{{ item.title }}</p><img :src="item.avator" alt=""></div>
</template>
<script>
export default {data() {return {names: ["百战程序员","尚学堂","IT"],result: [{"id": 2261677,"title": "鄂尔多斯|感受一座城市的璀璨夜景,感受一座城市,除了白日里的车水马龙,喧嚣繁华之","avator": "https://pic.qyer.com/avator/002/25/77/30/200?v=1560226451",				},{"id": 2261566,"title": "成都这家洞穴暗黑风咖啡厅酷毙了!!早C晚A走起,成都天气这么热。咖啡人必","avator": "https://pic.qyer.com/avator/011/07/08/69/200?v=1572185180",},{"id": 2261662,"title": "【川西新龙-措卡湖】措卡湖,意为“乱石丛中的黑色海水”,神秘小众,原汁原味,深","avator": "https://pic.qyer.com/avator/009/88/48/58/200?v=1507386782",},]}}
}
</script>
<style>
img{width: 100px;height: 100px;
}
</style>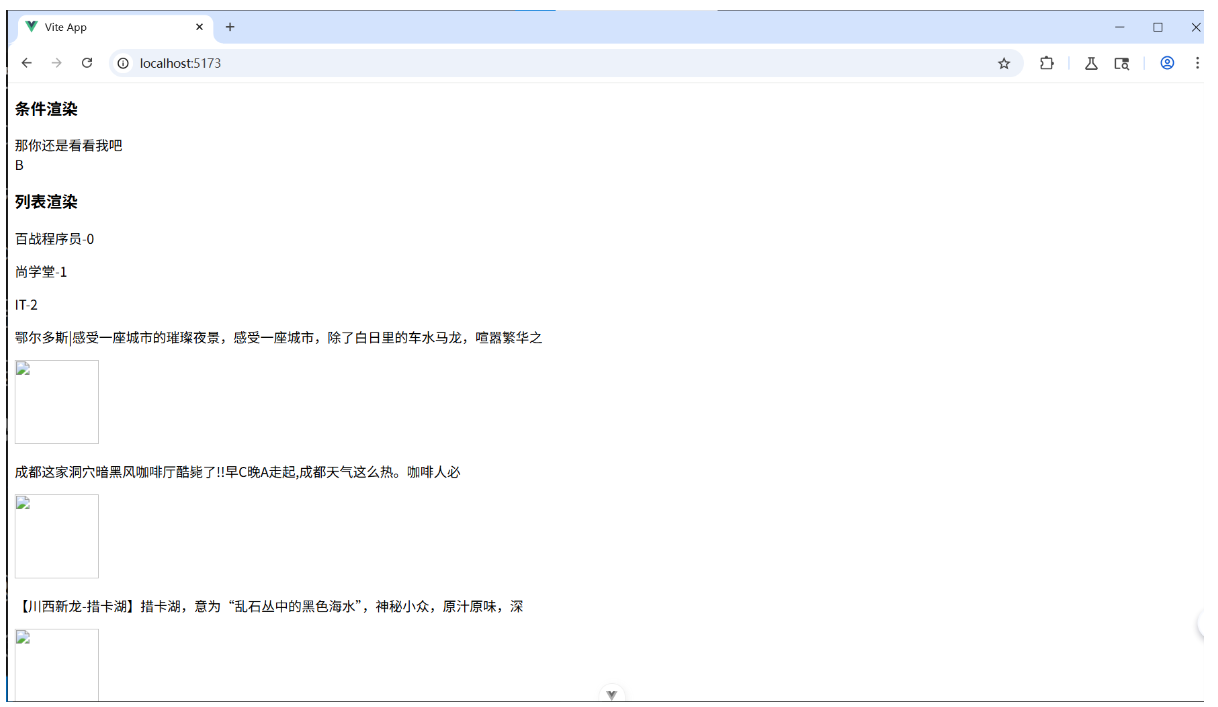
v-for 与对象
你也可以使用 v-for 来遍历对象的所有属性
<template><div><p v-for="(value,key,index) of userInfo">{{ value }}-{{ key }}-{{ index }}</p></div>
</template><script>
export default {data() {return {userInfo:{name: "iwen",age: 20}}}
}
</script>
遍历对象实例代码以及图片:
<template><h3>列表渲染</h3><p v-for="(item,index) of names">{{ item }}-{{ index }}</p><div v-for="item of result"><p>{{ item.title }}</p><img :src="item.avator" alt=""></div><div><p v-for="item of userInfo">{{ item }}</p></div>
</template>
<script>
export default {data() {return {names: ["百战程序员","尚学堂","IT"],result: [{"id": 2261677,"title": "鄂尔多斯|感受一座城市的璀璨夜景,感受一座城市,除了白日里的车水马龙,喧嚣繁华之","avator": "https://pic.qyer.com/avator/002/25/77/30/200?v=1560226451",				},{"id": 2261566,"title": "成都这家洞穴暗黑风咖啡厅酷毙了!!早C晚A走起,成都天气这么热。咖啡人必","avator": "https://pic.qyer.com/avator/011/07/08/69/200?v=1572185180",},{"id": 2261662,"title": "【川西新龙-措卡湖】措卡湖,意为“乱石丛中的黑色海水”,神秘小众,原汁原味,深","avator": "https://pic.qyer.com/avator/009/88/48/58/200?v=1507386782",},],userInfo: {name: "百战程序员",age: 28,sex: "男"}}}
}
</script>
<style>
img{width: 100px;height: 100px;
}
</style>
遍历所有值和index
<template><h3>列表渲染</h3><p v-for="(item,index) of names">{{ item }}-{{ index }}</p><div v-for="item of result"><p>{{ item.title }}</p><img :src="item.avator" alt=""></div><div><p v-for="(value,key,index) of userInfo">{{ value }}-{{ key }}-{{ index }}</p></div>
</template>
<script>
export default {data() {return {names: ["百战程序员","尚学堂","IT"],result: [{"id": 2261677,"title": "鄂尔多斯|感受一座城市的璀璨夜景,感受一座城市,除了白日里的车水马龙,喧嚣繁华之","avator": "https://pic.qyer.com/avator/002/25/77/30/200?v=1560226451",				},{"id": 2261566,"title": "成都这家洞穴暗黑风咖啡厅酷毙了!!早C晚A走起,成都天气这么热。咖啡人必","avator": "https://pic.qyer.com/avator/011/07/08/69/200?v=1572185180",},{"id": 2261662,"title": "【川西新龙-措卡湖】措卡湖,意为“乱石丛中的黑色海水”,神秘小众,原汁原味,深","avator": "https://pic.qyer.com/avator/009/88/48/58/200?v=1507386782",},],userInfo: {name: "百战程序员",age: 28,sex: "男"}}}
}
</script>
<style>
img{width: 100px;height: 100px;
}
</style>
通过 key 管理状态 对列表循环的补充
管理的目的:页面没有变化,他只是为了不让DOM在渲染的时候就地更新,而是按照顺序更换形式让他节省一些内存的消耗,仅此而与

Vue默认按照"就地更新"的策略来更新通过 v-for 渲染的元素列表。当数据项的顺序改变时,Vue不会随之移动 DOM 元素的顺序,而是就地更新每个元素,确保他们在原本指定的索引位置上渲染。
为给Vue一个提示,以便它可以跟踪每个节点的标识,从而重新排序现有的元素,你需要为每个元素对应的块提供一个唯一的 key attribute:
key的属性确保每个元素有唯一的索引,理解为什么要添加key,而每一次的v-for循环都需要添加key值的属性
<template><div><p v-for="(item,index) in names" :key="index">{{ item }}</p></div>
</template><script>
export default {data() {return {names: ["百战程序员","尚学堂","IT"]}}
}
</script>
温磬提示
key 在这里是一个通过 v-bind 绑定的特殊 attribute
推荐在任何可行的时候为 v-for 提供一个 key attribute
key 绑定的值期望是一个基础类型的值,例如字符串或 number 类型
实例代码
<template><h3>Key属性添加到v-for中</h3><p v-for="(item,index) of names" :key="index">{{ item }}</p>
</template><script>
export default {data() {return {names: ["百战程序员","尚学堂","IT"]}}
}
</script>
key的来源
请不要使用 index作为key的值,我们要确保每一条数据的唯一索引不会发生变化
<template><div v-for="(item,index) in result" :key="item.id"><p>{{ item.title }}</p><img :src="item.avator" alt=""></div>
</template><script>
export default {data() {return {result: [{"id": 2261677,"title": "鄂尔多斯|感受一座城市的璀璨夜景,感受一座城市,除了白日里的车水马龙,喧嚣繁华之","avator": "https://pic.qyer.com/avator/002/25/77/30/200?v=1560226451",				},{"id": 2261566,"title": "成都这家洞穴暗黑风咖啡厅酷毙了!!早C晚A走起,成都天气这么热。咖啡人必","avator": "https://pic.qyer.com/avator/011/07/08/69/200?v=1572185180",},{"id": 2261662,"title": "【川西新龙-措卡湖】措卡湖,意为“乱石丛中的黑色海水”,神秘小众,原汁原味,深","avator": "https://pic.qyer.com/avator/009/88/48/58/200?v=1507386782",},],}}
}
</script>
实例代码以及图片 KeyDemo.vue
<template><h3>Key属性添加到v-for中</h3><p v-for="(item,index) of names" :key="index">{{ item }}</p><div v-for="item of result" :key="item.id"><p>{{ item.title }}</p><img :src="item.avator" alt=""></div>
</template><script>
export default {data() {return {names: ["百战程序员","尚学堂","IT"],result: [{"id": 2261677,"title": "鄂尔多斯|感受一座城市的璀璨夜景,感受一座城市,除了白日里的车水马龙,喧嚣繁华之","avator": "https://pic.qyer.com/avator/002/25/77/30/200?v=1560226451",				},{"id": 2261566,"title": "成都这家洞穴暗黑风咖啡厅酷毙了!!早C晚A走起,成都天气这么热。咖啡人必","avator": "https://pic.qyer.com/avator/011/07/08/69/200?v=1572185180",},{"id": 2261662,"title": "【川西新龙-措卡湖】措卡湖,意为“乱石丛中的黑色海水”,神秘小众,原汁原味,深","avator": "https://pic.qyer.com/avator/009/88/48/58/200?v=1507386782",},],}}
}
</script>
事件处理

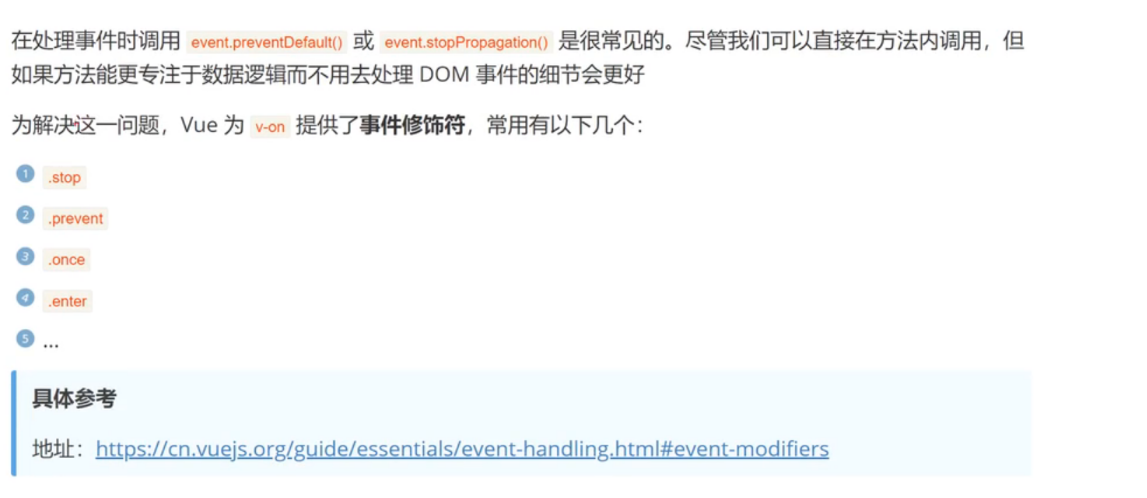
我们可以使用 v-on 指令(简写为 @) 来监听DOM事件,并在事件触发时执行对应的 JavaScript 。用法: v-on:click="methodName" 或 @click="handler"
事件处理器的值可以是
1,内联事件处理器:事件被触发时执行的内联 JavaScript语句(与 onclick 类似)
2,方法事件处理器:一个指向组件上定义的方法的属性名或是路径
内联事件处理器
以下两种方式效果一样
<button v-on:click="count++">Add</button> 单击生效
<button @click="count++">Add</button><button @dblclick="addCount">Add</button>  双击生效
内联事件处理器通常用于简单场景
<template><button @click="count++">Add 1</button><p>Count is:{{ count }}</p>
</template><script>
export default {data() {return {count: 0}}
}
</script>
EventDemo1.vue
<template><h3>内联事件处理器</h3><button @click=count++>Add</button><p>Count is: {{ count }}</p>
</template>
<script>
export default {data() {return {count: 0}}
}
</script>
<style></style>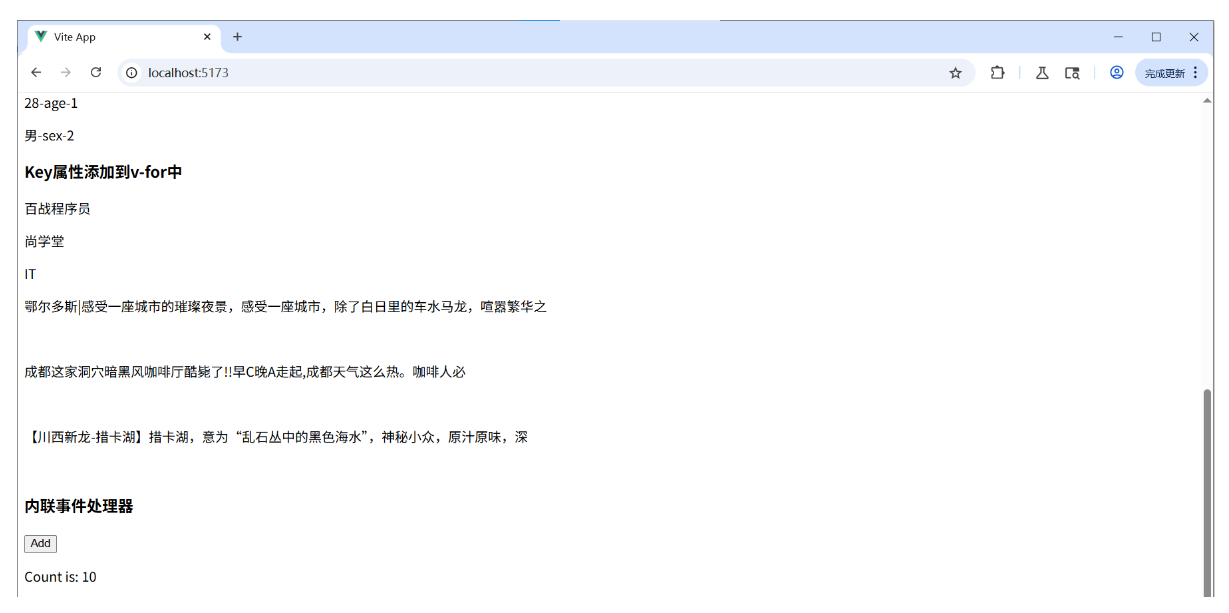
方法事件处理器
<template><button @click="addCount">Add</button><p>Count is: {{ count }}</p>
</template><script>
export default {data() {return {count: 0}},methods: {addCount() {this.count+=1}}
}
</script>
EventDemo2.vue
<template><h3>方法事件处理器</h3><button @click="addCount">Add</button><p>Count is: {{ count }}</p>
</template>
<script>
export default {data() {return {count: 0}},// 所有的方法和函数都应该放在methods对象中。methods: {addCount() {// 读取到data里面的数据的方案 this.count 这里是方法的内容,例如增加计数器值等操作。console.log(this.count)this.count++}},mounted() {console.log('Component mounted.')},beforeDestroy() {console.log('Component will be destroyed.')},destroyed() {console.log('Component destroyed.')},watch: {count(newVal, oldVal) {console.log(`Count changed from ${oldVal} to ${newVal}`)}}
}
</script>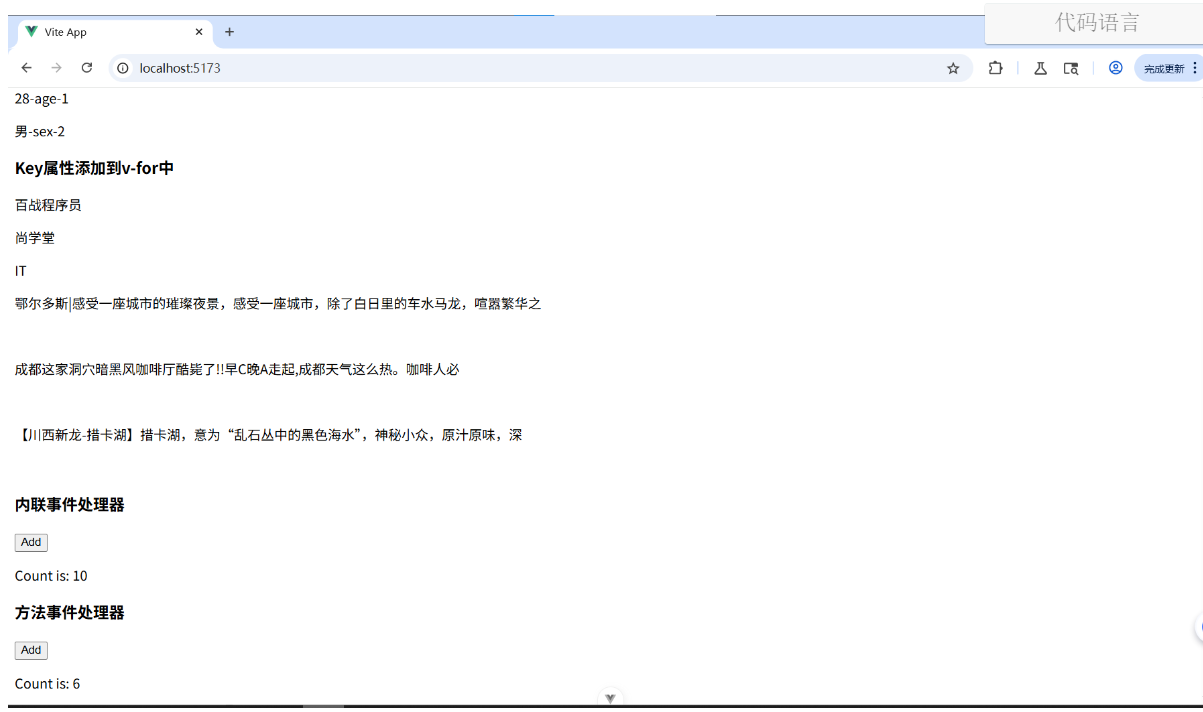
事件参数

事件参数可以获取 event 对象和通过事件传递数据
获取 event 对象
<template><button @click="addCount">Add</button><p>Count is: {{ count }}</p>
</template><script>
export default {data() {return {count: 0}},methods: {addCount(e){console.log(e);this.count+=1}}
}
</script>
EventDemo.vue
<template><h3>事件参数</h3><button @click="addCount">Add</button><p>Count is: {{ count }}</p>
</template>
<script>
export default {data() {return {count: 0}},// 所有的方法和函数都应该放在methods对象中。methods: {// Event对象 事件处理函数,例如点击按钮增加计数器值。addCount(e) {// 读取到data里面的数据的方案 this.count 这里是方法的内容,例如增加计数器值等操作。console.log(e.target.innerHTML="Add"+this.count)console.log(e.target)console.log(e.target.value)console.log(e.target.tagName)this.count++}}
}
</script>
获取event事件对象
<template><h3>事件参数</h3><button @click="addCount">Add</button><p>Count is: {{ count }}</p>
</template>
<script>
export default {data() {return {count: 0}},// 所有的方法和函数都应该放在methods对象中。methods: {// Event对象 事件处理函数,例如点击按钮增加计数器值。addCount(e) {// 读取到data里面的数据的方案 this.count 这里是方法的内容,例如增加计数器值等操作。// Vue中的event对象,就是原生JS的event对象,在事件处理函数中可以直接使用e来访问。e.target.innerHTML="Add"+this.countthis.count++}}
}
</script>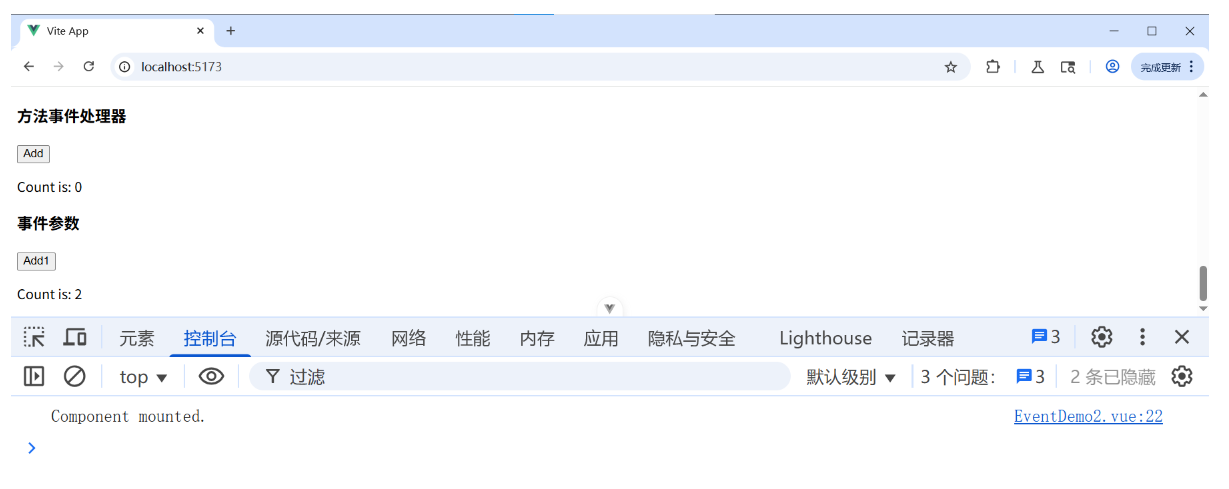
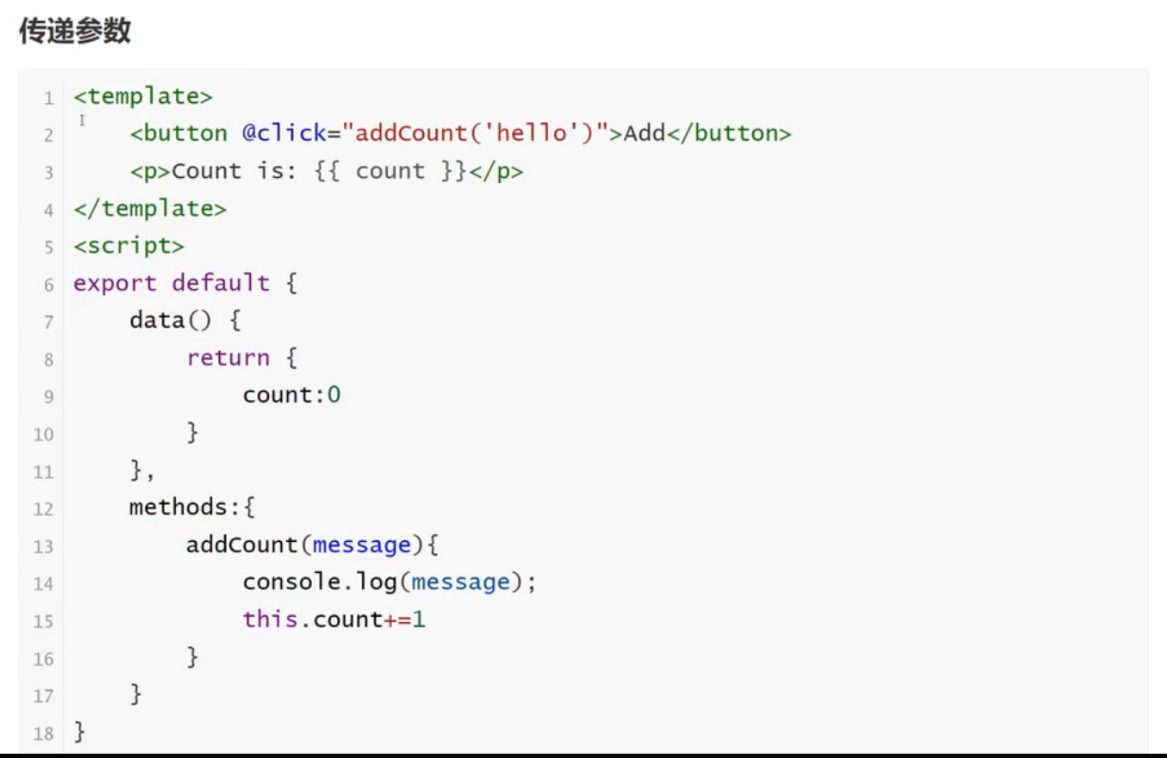
传递参数
<template><h3>传递参数</h3><button @click="addCount('hello')">Add</button><p>Count is: {{ count }}</p>
</template>
<script>
export default {data() {return {count: 0}},// 所有的方法和函数都应该放在methods对象中。methods: {// Event对象 事件处理函数,例如点击按钮增加计数器值。addCount(msg) {// 读取到data里面的数据的方案 this.count 这里是方法的内容,例如增加计数器值等操作。// Vue中的event对象,就是原生JS的event对象,在事件处理函数中可以直接使用e来访问。// e.target.innerHTML="Add"+this.countconsole.log(msg)this.count++}}
}
</script>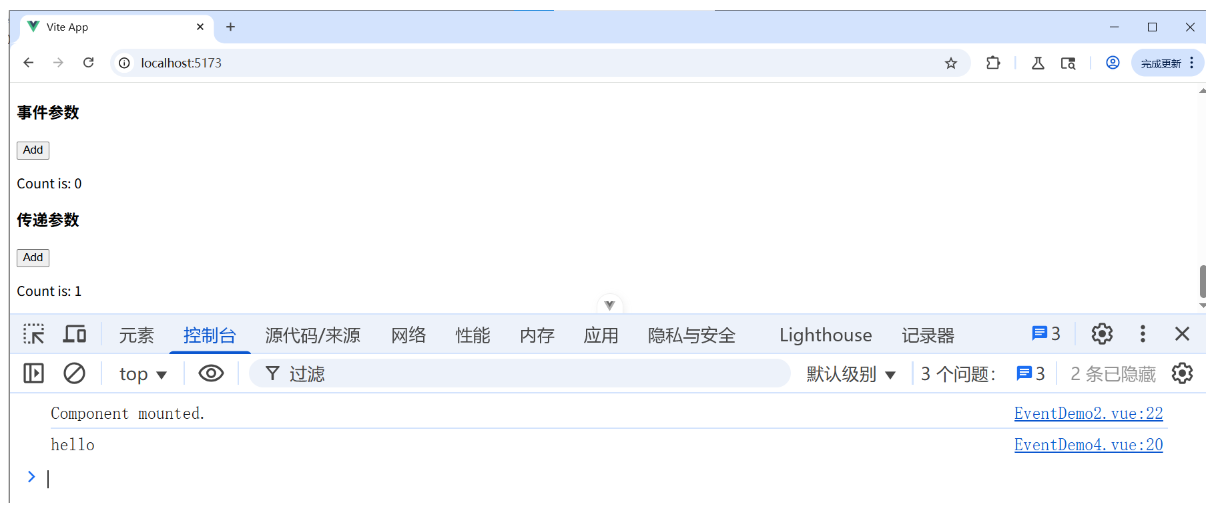
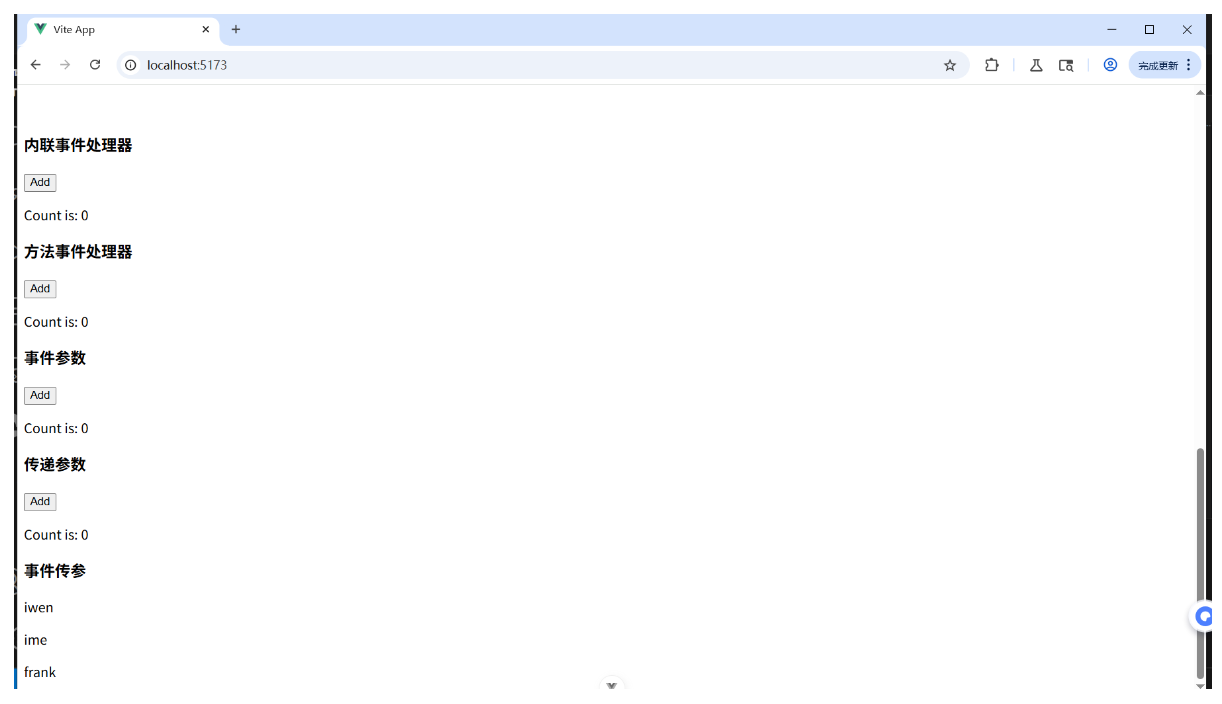
渲染事件传参的列表内容 EventDemo5.vue
<template><h3>事件传参</h3><p v-for="(item,index) of names" :key="index">{{ item }}</p>
</template>
<script>
export default {data() {return {names: ["iwen","ime","frank"]}},// 所有的方法和函数都应该放在methods对象中。methods: {}
}
</script>
执行以上代码页面如下:
渲染事件传参的列表内容并实现点击事件 EventDemo5.vue
这是事件传参最常用的场景,代码和图片如下:
<template><h3>事件传参</h3><p @click="getNameHandler(item)" v-for="(item,index) of names" :key="index">{{ item }}</p>
</template>
<script>
export default {data() {return {names: ["iwen","ime","frank"]}},// 所有的方法和函数都应该放在methods对象中。methods: {// 实现点击事件 事件处理函数,事件传参有两种方式:// 1. 直接在模板中传递参数,如:@click="getNameHandler(item)"// 2. 在方法中定义一个事件对象参数,在模板中使用$event变量代表原生DOM事件。如:@click="getNameHandler($event)"// 注意:如果方法中有多个参数,则第一个参数是事件对象,后面的参数才是传递的自定义参数。例如:@click="getNameHandler(item,$event)"getNameHandler(name) {console.log(name);}}
}
</script>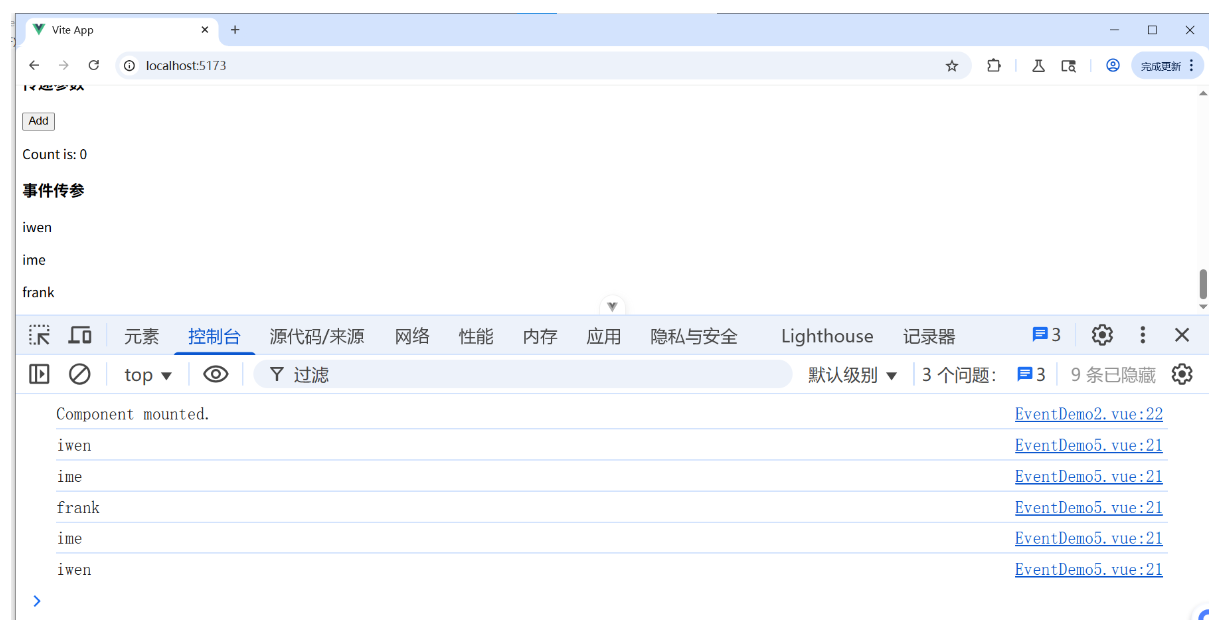
获取列表中的内容
<template><p @click="getNameHandle(item)" v-for="(item,index) in names" :key="index">{{ item }}</p>
</template>
<script>
export default {data() {return {names:["iwen","ime","frank"]}},methods: {getNameHandle(name){console.log(name);}}
}
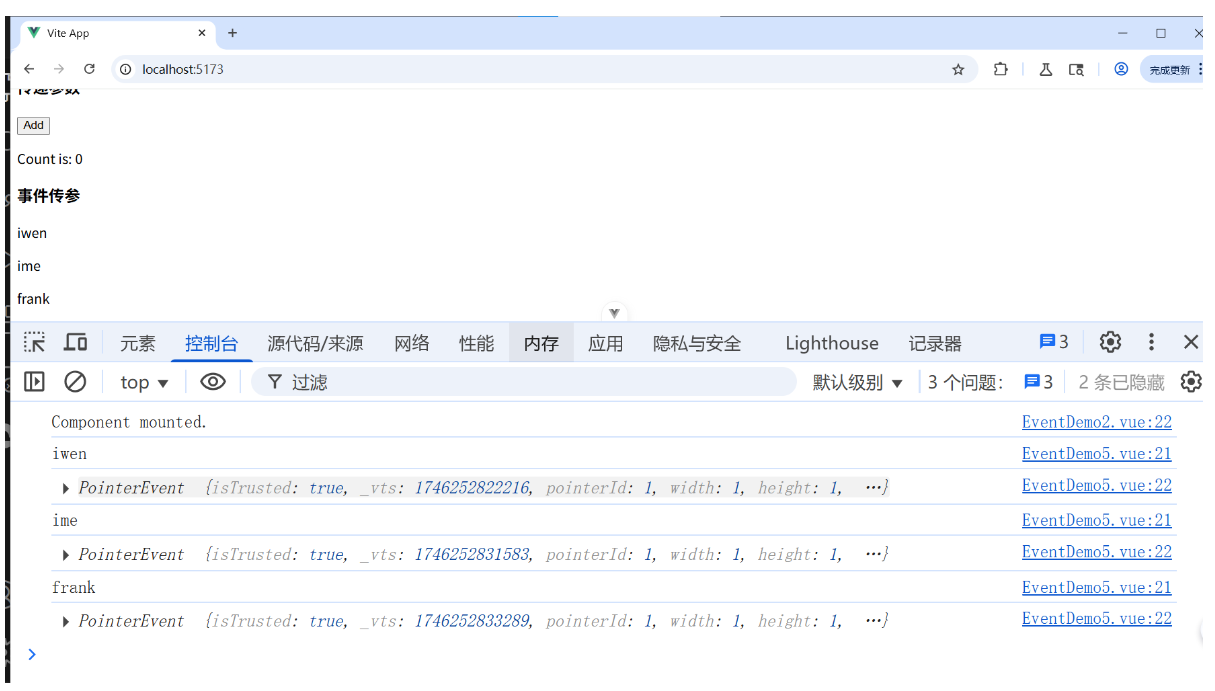
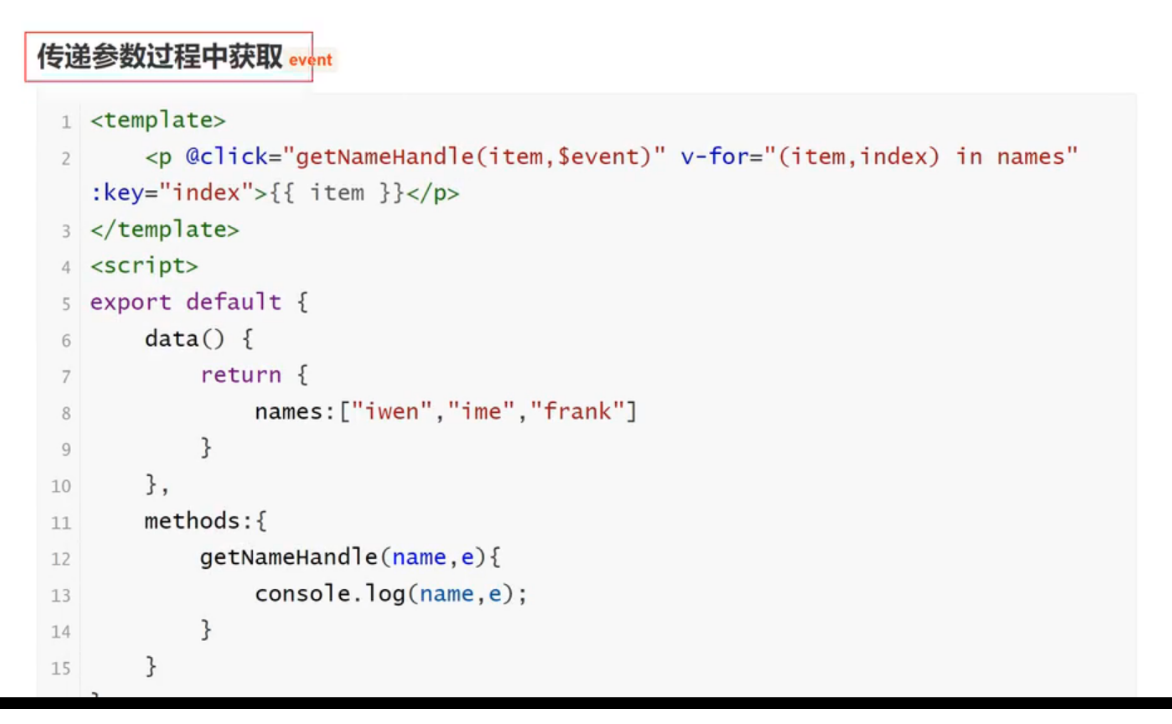
</script>传递参数过程中获取 event EventDemo5.vue
<template><p @click="getNamehandler(item,$event)" v-for="(item,index) in names" :key="index">{{ item }}</p>
</template><script>
export default {data() {return {names:["iwen","ime","frank"]}},methods: {getNameHandler(name,e) {console.log(name,e)}}
}
</script>
EventDemo5.vue
事件修饰符